
Free Shipping on Domestic Orders $75+

How to Repair a Bra Underwire

What you need

  1. How to Repair a Bra Underwire, How to Repair a Bra Underwire: step 1, image 1 of 1
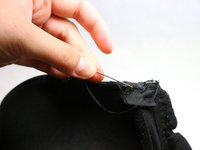
    • Locate the problem: find where the underwire breaks through the fabric of the bra.

    Ask FixBot

    Add Comment

  2. How to Repair a Bra Underwire: step 2, image 1 of 2 How to Repair a Bra Underwire: step 2, image 2 of 2
    • Push the underwire back into the fabric of the side of the cup.

    • When back in place, the wire should not be visible.

    Ask FixBot

    Add Comment

  3. How to Repair a Bra Underwire: step 3, image 1 of 1
    • Take a piece of matching scrap fabric and cut to the appropriate size.

    • Make sure the fabric is a bit bigger than the wire's puncture hole.

    • If the fabric is too thin, you can fold it to create a thicker piece.

    Ask FixBot

    Add Comment

  4. How to Repair a Bra Underwire: step 4, image 1 of 3 How to Repair a Bra Underwire: step 4, image 2 of 3 How to Repair a Bra Underwire: step 4, image 3 of 3
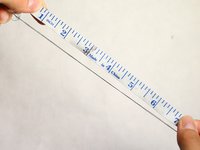
    • Measure the appropriate length of thread and cut it.

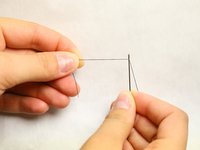
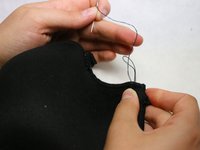
    • Thread the needle and pull both ends evenly to double up the thread.

    • Tie the two loose ends of the thread together with a simple knot.

    Ask FixBot

    Add Comment

  5. How to Repair a Bra Underwire: step 5, image 1 of 2 How to Repair a Bra Underwire: step 5, image 2 of 2
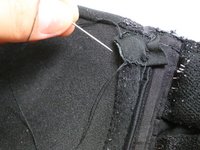
    • Place the fabric over the hole. Sew along the perimeter of the fabric square with a simple overlock stitch.

    • An overlock stitch is a sewing technique where the edges of one or more pieces of fabric are sewn together. Watch a short video to learn how to sew the overlock stitch by hand.

    • Make sure to sew through only the patch fabric and the bra's inner fabric layer. The thread should not show at the front of the bra!

    Ask FixBot

    Add Comment

  6. How to Repair a Bra Underwire: step 6, image 1 of 3 How to Repair a Bra Underwire: step 6, image 2 of 3 How to Repair a Bra Underwire: step 6, image 3 of 3
    • In the last stitch, leave a loop of tread and pull the needle through the loop.

    • Finish by tying a knot in the end of the tread.

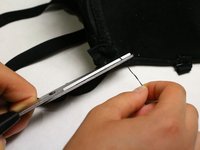
    • Cut the excess thread close to the fabric.

    • Do not cut the thread too close to the knot. This will make the stitches unravel.

    Ask FixBot

    Add Comment

  7. How to Repair a Bra Underwire: step 7, image 1 of 2 How to Repair a Bra Underwire: step 7, image 2 of 2
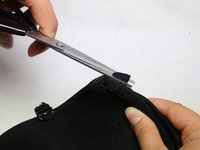
    • Cut the excess fabric off the finished patch.

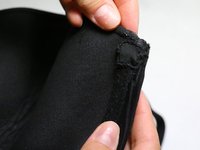
    • Inspect the patch to make sure it is securely sewed on the bra.

    • The final product should be a small patch on the inside of the cup.

    Ask FixBot

    Add Comment

  8. How to Repair a Bra Underwire: step 8, image 1 of 1
    • No damage or evidence of sewing is shown on the outside of the bra.

    • Try on the final product to ensure correct fit and comfort.

    Ask FixBot

    Add Comment

Conclusion

To reassemble your device, follow these instructions in reverse order.

Cancel: I did not complete this guide.

5 other people completed this guide.

Celeste Stoker

Member since: 04/28/17

213 Reputation

1 Guide authored

Team

UC Davis, Team S4-G2, Cole Spring 2017 Member of UC Davis, Team S4-G2, Cole Spring 2017

UCD-COLE-S17S4G2

3 Members

1 Guide authored

2 Guide Comments

You made something that is a total pain in the #$@ not so painful anymore and thanks for adding the video cause that helped a lot

Willow Reignes - Reply Share

I agree with Wllow. Thank you on behalf of my wife and wallet.

Daniel Pollard - Reply Share

Add Comment

View Statistics:

Past 24 Hours: 1

Past 7 Days: 28

Past 30 Days: 103

All Time: 9,972