
Hover-1 Maverick Battery Replacement

Piper Feldman and 7 other contributors
Last updated on Jan 10, 2025
Views: 4.3K
View statistics:
- Past 24 Hours:
- 7
- Past 7 Days:
- 28
- Past 30 Days:
- 92
- All Time:
- 4,252
Comments: 2
2 guide comments.
Go to guide commentsCompleted: 1 2
1 person has marked this guide "completed." Will you be next?
2 people have marked this guide "completed." Including you — great job!
Favorites: 0 1
No one has favorited (and subscribed to) this guide. Will you be the first?
1 person has favorited (and subscribed to) this guide — and that's you!
Introduction
Go to step 1 ↓This guide for the Hover-1 Maverick guides users in replacing the battery in their device. The battery is crucial in powering the hoverboard. Symptoms of having a faulty battery include the device not being able to move, hold a charge, or power on.
Before you begin, make sure your Hover-1 Maverick is off and not charging.
What you need
Parts
Tools

-
-
-
Remove the twenty 15mm Phillips #1 screws from the shell of the hoverboard.
-
Remove the shell.
 Ask FixBot
-
-
-
Remove the four 8mm Phillips #1 screws holding down the black plastic casing.
-
Lift off the black plastic retaining bracket.
-
-
-


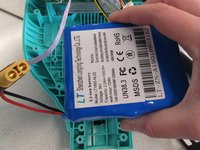
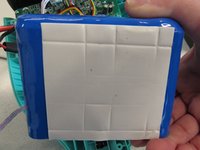
To reassemble your device, follow these instructions in reverse order.
Cancel: I did not complete this guide.
One other person completed this guide.

Team

Cal Poly, Team S2-G2, White Winter 2020 Member of Cal Poly, Team S2-G2, White Winter 2020
CPSU-WHITE-W20S2G2
2 Members
48 Guides authored
