
Free Shipping on Domestic Orders $75+

Hoover Whirlwind Bagless SE71WRO1 Filter Replacement

What you need

  1. Hoover Whirlwind Bagless SE71WRO1 Filter Replacement, Filter: step 1, image 1 of 2 Hoover Whirlwind Bagless SE71WRO1 Filter Replacement, Filter: step 1, image 2 of 2
    • Unplug the vacuum cleaner from the power outlet to ensure safety while performing maintenance.

  2. Hoover Whirlwind Bagless SE71WRO1 Filter Replacement: step 2, image 1 of 2 Hoover Whirlwind Bagless SE71WRO1 Filter Replacement: step 2, image 2 of 2
    • Slide the switch down on the dust bin container handle to release it from the vacuum.

    • Pull the dust bin from the vacuum.

  3. Hoover Whirlwind Bagless SE71WRO1 Filter Replacement: step 3, image 1 of 3 Hoover Whirlwind Bagless SE71WRO1 Filter Replacement: step 3, image 2 of 3 Hoover Whirlwind Bagless SE71WRO1 Filter Replacement: step 3, image 3 of 3
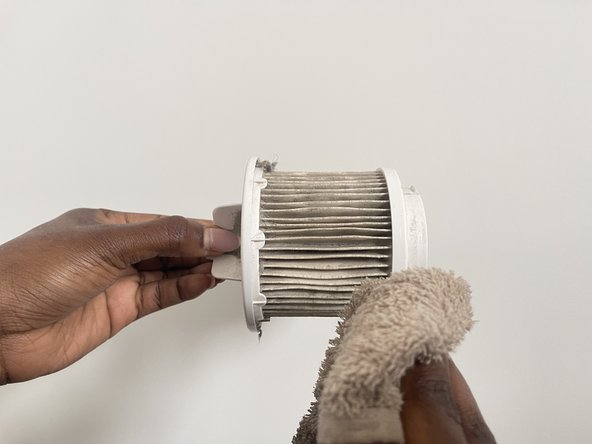
    • Hold the dustbin with one hand and press the button on the side to release the bottom lid and access the filter.

    • Do this over a trash can so the dust released from the bin doesn't get on the floor or wherever you are working.

    • Don't force the lid open. When the switch is pushed down, the lid should come off easily.

  4. Hoover Whirlwind Bagless SE71WRO1 Filter Replacement: step 4, image 1 of 3 Hoover Whirlwind Bagless SE71WRO1 Filter Replacement: step 4, image 2 of 3 Hoover Whirlwind Bagless SE71WRO1 Filter Replacement: step 4, image 3 of 3
    • Slide the old filter out from the bin.

  5. Hoover Whirlwind Bagless SE71WRO1 Filter Replacement: step 5, image 1 of 3 Hoover Whirlwind Bagless SE71WRO1 Filter Replacement: step 5, image 2 of 3 Hoover Whirlwind Bagless SE71WRO1 Filter Replacement: step 5, image 3 of 3
    • Before installing the new filter, clean the area where the filter sits.

    • Use a clean cloth or a small brush to remove any dust or debris.

    • Get in between the spaces of the filter as well.

    • This ensures the optimal performance of the new filter.

  6. Hoover Whirlwind Bagless SE71WRO1 Filter Replacement: step 6, image 1 of 3 Hoover Whirlwind Bagless SE71WRO1 Filter Replacement: step 6, image 2 of 3 Hoover Whirlwind Bagless SE71WRO1 Filter Replacement: step 6, image 3 of 3
    • Insert the clean or new filter into the filter frame and clip it into place.

    • Make sure it is securely fitted and properly aligned.

  7. Hoover Whirlwind Bagless SE71WRO1 Filter Replacement: step 7, image 1 of 3 Hoover Whirlwind Bagless SE71WRO1 Filter Replacement: step 7, image 2 of 3 Hoover Whirlwind Bagless SE71WRO1 Filter Replacement: step 7, image 3 of 3
    • Close the dustbin cover.

    • Reattach it to the vacuum cleaner

  8. Hoover Whirlwind Bagless SE71WRO1 Filter Replacement: step 8, image 1 of 3 Hoover Whirlwind Bagless SE71WRO1 Filter Replacement: step 8, image 2 of 3 Hoover Whirlwind Bagless SE71WRO1 Filter Replacement: step 8, image 3 of 3
    • Plug the vacuum cleaner back into the power outlet.

    • Turn it on to ensure everything is functioning correctly and the vacuum suction has improved.

Conclusion

To reassemble your device, follow these instructions in reverse order.

Jessieao

Member since: 07/02/24

157 Reputation

1 Guide authored

0 Guide Comments

Add Comment

View Statistics:

Past 24 Hours: 3

Past 7 Days: 14

Past 30 Days: 41

All Time: 760