Free Shipping on Domestic Orders $75+

Handspring Visor Edge Speaker Replacement

Views: 1.4K

View statistics:

Past 24 Hours:
3
Past 7 Days:
28
Past 30 Days:
100
All Time:
1,379
Comments: 0

No one has left comments on this guide. Will you be first?

Go to guide comments
Completed: 0

No one has marked this guide "completed." Will you be the first?

Favorites: 0

No one has favorited (and subscribed to) this guide. Will you be the first?

Time Required: 20 - 30 minutes
Difficulty: Moderate
Missing Steps

Oops! This guide is currently missing one or more important steps.

Handspring Visor Edge Speaker Replacement

Introduction

Go to step 1 ↓

If your Handspring Visor Edge is producing distorted audio or no sound at all, use this guide to replace the speaker.

To confirm that the faulty part is coming from the Handspring Visor Edge’s speaker, inspect the speaker port for debris that may be interfering with sound quality. A small buildup of dust can be removed using an ESD-safe brush or small dust blower.

Make sure your device is powered off before you begin.

What you need

Tools

    1. Handspring Visor Edge Speaker Replacement, Flip Cover: step 1, image 1 of 2 Handspring Visor Edge Speaker Replacement, Flip Cover: step 1, image 2 of 2
      • Open the Visor Edge placing the screen and the inner part of the flip cover face down on a flat surface such as a table

      • On the back of the PDA there is a tab connecting the flip cover to the device. Push gently on this tab trying to slide the cover upwards along the surface then lift the pieces apart to fully detach them

      • Do not pull or tug on the flip cover in an attempt to remove it from the PDA this can result in the cover snapping causing damage to the device

      • To reassemble push the downward on the flip cover where there is an indent on the PDA indicating where the pieces connect. Finally, push the cover until it snaps into place.

      Ask FixBot

      Add Comment

    1. Handspring Visor Edge Speaker Replacement, Back Panel: step 2, image 1 of 1
      • Remove the six 4.1 mm Phillips screws from the back plate using the #00 Phillips Scewdriver.

      Ask FixBot

      Add Comment

    2. Handspring Visor Edge Speaker Replacement: step 3, image 1 of 1
      • Remove the gray back plate from the PDA.

      Ask FixBot

      Add Comment

    3. Handspring Visor Edge Speaker Replacement: step 4, image 1 of 2 Handspring Visor Edge Speaker Replacement: step 4, image 2 of 2
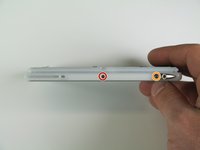
      • Remove the four 2.6 mm Philips screws that are on the sides of the frame.

      • Remove the 3.9 mm Philips screw holding the stylus holster to the frame.

      Ask FixBot

      Add Comment

    4. Handspring Visor Edge Speaker Replacement: step 5, image 1 of 2 Handspring Visor Edge Speaker Replacement: step 5, image 2 of 2
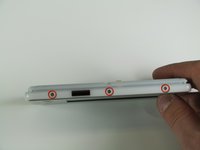
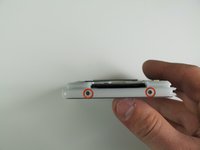
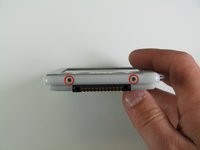
      • Remove the four 2.6 mm Philips screws on the top and bottom of the frame.

      Ask FixBot

      Add Comment

    5. Handspring Visor Edge Speaker Replacement: step 6, image 1 of 1
      • Gently remove the white frame from the back of the PDA.

      Ask FixBot

      Add Comment

    1. Handspring Visor Edge Speaker Replacement, Speaker: step 7, image 1 of 1
      • Gently pull off front cover.

      Ask FixBot

      Add Comment

    2. Handspring Visor Edge Speaker Replacement: step 8, image 1 of 1
      • Gently remove buttons by hand.

      Ask FixBot

      Add Comment

    3. Handspring Visor Edge Speaker Replacement: step 9, image 1 of 1
      • Pull off button board.

      • (The button board is located underneath the buttons).

      Ask FixBot

      Add Comment

    4. Handspring Visor Edge Speaker Replacement: step 10, image 1 of 1
      Tool used on this step:
      Tweezers
      $4.99
      Buy
      • Carefully remove the speaker by pulling on the body of the plug with a pair of tweezers, rocking it from side to side to ease it if necessary.

      • Pull in the same direction as the individual wires are running and make sure to evenly on the full width of the cable so that no individual wires are overly strained.

      Ask FixBot

      Add Comment

Conclusion

To reassemble your device, follow these instructions in reverse order.

Cancel: I did not complete this guide.

Nick Lazarakis

Member since: 01/23/11

334 Reputation

3 Guides authored

Team

Cal Poly, Team 11-28, Maness Winter 2011 Member of Cal Poly, Team 11-28, Maness Winter 2011

CPSU-MANESS-W11S11G28

4 Members

84 Guides authored

0 Guide Comments

Add Comment

View Statistics:

Past 24 Hours: 3

Past 7 Days: 28

Past 30 Days: 100

All Time: 1,379