Free Shipping on Domestic Orders $75+

HP Z2 Mini G3 Power On/Off and HDD Activity LED Replacement

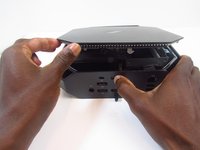
  1. HP Z2 Mini G3 Power On/Off and HDD Activity LED Replacement, Access Panel: step 1, image 1 of 1
    • Turn the device so the back-side of the device is facing you.

    • Be sure that the power is off and the A/C power cord has been disconnected before starting. Removing hardware while the power is on could damage the device or harm yourself.

    • Components of the device are subject to static damage. Work on a hard, grounded surface to prevent damage to the workstation.

    Ask FixBot

    Add Comment

  2. HP Z2 Mini G3 Power On/Off and HDD Activity LED Replacement: step 2, image 1 of 2 HP Z2 Mini G3 Power On/Off and HDD Activity LED Replacement: step 2, image 2 of 2
    • Slide and hold the latch in the direction of the engraved arrow (to the right).

    Ask FixBot

    Add Comment

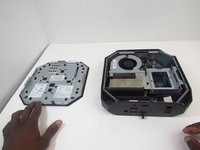
  3. HP Z2 Mini G3 Power On/Off and HDD Activity LED Replacement: step 3, image 1 of 2 HP Z2 Mini G3 Power On/Off and HDD Activity LED Replacement: step 3, image 2 of 2
    • While holding the latch, lift the access panel upwards and towards yourself and set it aside upside-down.

    Ask FixBot

    Add Comment

  4. HP Z2 Mini G3 Power On/Off and HDD Activity LED Replacement, CPU Fan: step 4, image 1 of 1
    • Rotate the device so the front side is facing you (the side with the power button) and locate the CPU fan.

    Ask FixBot

    Add Comment

  5. HP Z2 Mini G3 Power On/Off and HDD Activity LED Replacement: step 5, image 1 of 1
    • Swing the fan upward, to a 90-degree angle.

    Ask FixBot

    Add Comment

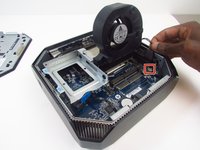
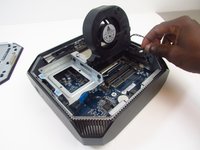
  6. HP Z2 Mini G3 Power On/Off and HDD Activity LED Replacement: step 6, image 1 of 2 HP Z2 Mini G3 Power On/Off and HDD Activity LED Replacement: step 6, image 2 of 2
    • Carefully disconnect the CPU fan by pulling out the wires from the motherboard.

    Ask FixBot

    Add Comment

  7. HP Z2 Mini G3 Power On/Off and HDD Activity LED Replacement: step 7, image 1 of 1
    • Swing the fan back down and carefully unhook the CPU fan notches by pulling each tab away from the heat sink holes.

    Ask FixBot

    Add Comment

  8. HP Z2 Mini G3 Power On/Off and HDD Activity LED Replacement: step 8, image 1 of 1
    • Swing the fan up again and pull it out.

    Ask FixBot

    Add Comment

  9. HP Z2 Mini G3 Power On/Off and HDD Activity LED Replacement, Power on/off Button and HDD Activity LED: step 9, image 1 of 1
    • Remove HDD activity LED from retaining clip.

    Ask FixBot

    Add Comment

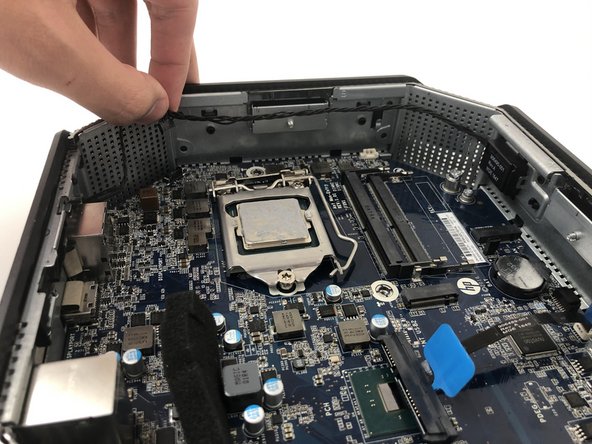
  10. HP Z2 Mini G3 Power On/Off and HDD Activity LED Replacement: step 10, image 1 of 1
    • Grab and lift the cable off of the motherboard and chassis.

    Ask FixBot

    Add Comment

  11. HP Z2 Mini G3 Power On/Off and HDD Activity LED Replacement: step 11, image 1 of 1
    • Pull the HDD activity LED out of the chassis.

    Ask FixBot

    Add Comment

  12. HP Z2 Mini G3 Power On/Off and HDD Activity LED Replacement: step 12, image 1 of 1
    • Pull the cable from the motherboard to finish removing the component.

    Ask FixBot

    Add Comment

Conclusion

To reassemble your device, follow these instructions in reverse order.

Cancel: I did not complete this guide.

0 Guide Comments

Add Comment

View Statistics:

Past 24 Hours: 3

Past 7 Days: 10

Past 30 Days: 55

All Time: 1,692