
HP Stream 7 Battery Replacement

Nelson Thai and 5 other contributors
Last updated on May 7, 2024
Views: 8K
View statistics:
- Past 24 Hours:
- 3
- Past 7 Days:
- 23
- Past 30 Days:
- 117
- All Time:
- 7,957
Comments: 1
1 comment on steps.
Completed: 3 4
3 people have marked this guide "completed." Will you be next?
4 people have marked this guide "completed." Including you — great job!
Favorites: 0 1
No one has favorited (and subscribed to) this guide. Will you be the first?
1 person has favorited (and subscribed to) this guide — and that's you!
Introduction
Go to step 1 ↓Before beginning, be absolutely sure the battery needs replacing. The HP Stream 7's battery is taped to the display panel and it is highly likely the battery will be damaged during removal. Everything else should come off with little force: do not try to muscle components free.
What you need
Tools
-
Spudger4.9
-


-
-
-
Make sure the tablet is powered off before beginning.
-
Gently run the plastic opening tool or your fingernails around the tablet to pry the Back Cover from the tablet.
 Ask FixBot
-
-
-
Remove the eight 5 mm Phillips 000 screws.
-
Gently run the plastic opening tool around the seam to pry the mid back cover from the tablet.
-
-
-
Tool used on this step:Tweezers$4.99
-
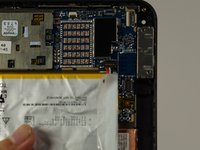
Using tweezers, gently pull the battery connector towards the battery to remove it from the System Board.
-
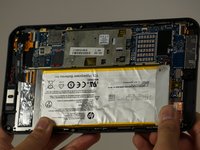
Pull the blue tabs (Not Shown) out from the tablet at an angle to remove the tape underneath the Battery.
-
-


To reassemble your device, follow these instructions in reverse order.
Cancel: I did not complete this guide.
3 other people completed this guide.

Team

Cal Poly, Team 18-5, Forte Fall 2016 Member of Cal Poly, Team 18-5, Forte Fall 2016
CPSU-FORTE-F16S18G5
4 Members
36 Guides authored
