
HP Stream 11-y010nr Battery Replacement

Adam Sitzmann and 4 other contributors
Last updated on Dec 12, 2022
Views: 5.1K
View statistics:
- Past 24 Hours:
- 2
- Past 7 Days:
- 27
- Past 30 Days:
- 94
- All Time:
- 5,090
Comments: 1
1 comment on steps.
Completed: 1 2
1 person has marked this guide "completed." Will you be next?
2 people have marked this guide "completed." Including you — great job!
Favorites: 0 1
No one has favorited (and subscribed to) this guide. Will you be the first?
1 person has favorited (and subscribed to) this guide — and that's you!
Featured Student Guide
This guide has been the hard work of our awesome students and is found to be exceptionally cool by the iFixit staff.
Introduction
Go to step 1 ↓Are you are having problems with your HP Stream 11-y010nr battery? Is the battery life bad enough that it needs to be replaced? The first thing that you should do is see our troubleshooting page and check it before the battery gets replaced. HP Stream 11-y010nr Troubleshooting
This guide will take you through the necessary steps to properly remove and replace the battery. Use caution when taking the battery out as it can catch on fire if the battery pack is punctured. Additionally, a thin wire is attached to the bottom of the battery so use caution when taking it out.
Prior to beginning, ensure the laptop is completely powered off such that it will not interfere with the steps in this guide.
What you need
Parts

Tools


-
-
Tool used on this step:Tweezers$4.99
-
Gently peel back the two rubber strips that cover the screws on backside of the computer with the needle nose tweezers.
 Ask FixBot
-
-
-
Unscrew the seven 0.4mm screws on the backside of the laptop with the Phillips #0 Screwdriver.
-
-
-
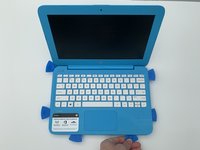
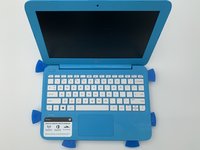
Take the opening picks and push them into the seam between the keyboard and the laptop casing.
-
Go all the way around the laptop.
-
-
-
-
Once the cover is loose enough, lift the keyboard up to expose the wiring beneath.
-
-
-
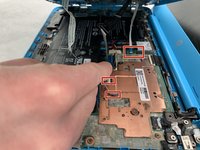
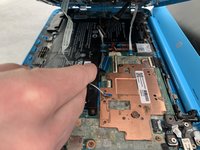
Disconnect the three cables by lifting up on the locking tab of the ZIF connector and pulling the cables out with the needle nose tweezers.
-
Remove the keyboard.
-
-
-
-
-
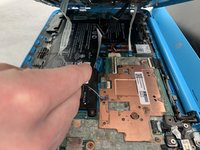
Use your fingers or a spudger to pull the battery cable out from its connector.
-
-
-
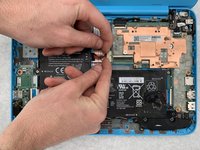
Unscrew the six 0.4mm screws surrounding the battery with a Phillips #1 screwdriver.
-
-
-
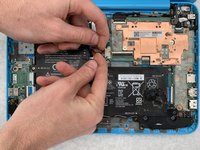
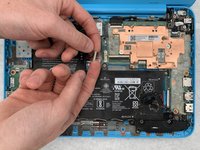
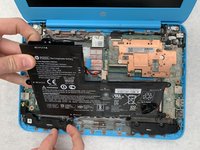
Carefully lift up on the battery.
-
If the black and white wire on the bottom is intertwined with the bracket, gently pull the wire off the battery.
-
-








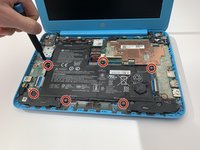
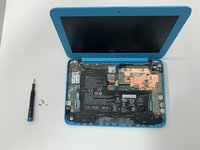


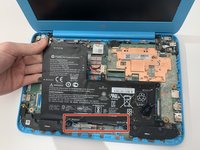
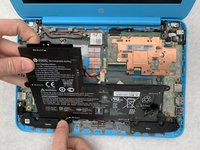
To reassemble your device, follow these instructions in reverse order.
Cancel: I did not complete this guide.
One other person completed this guide.

Team

Embry-Riddle Aeronautical University, Team S5-G6, Watkins Spring 2020 Member of Embry-Riddle Aeronautical University, Team S5-G6, Watkins Spring 2020
ERAU-WATKINS-S20S5G6
4 Members
72 Guides authored
