Introduction
The HP Probook 640 G4 is a business class 14 inch laptop that is designed for durability. This guide will walk you through how to safely replace the motherboard. A failing motherboard can cause no power conditions, dead ports, or random freezes.
Before you start be sure to power the laptop off completely, unplug the AC adapter, and remove all external devices. Work on a clean flat surface. Make sure you have all of the right tools and parts available.
If the laptop shows no signs of life, won't charge despite a battery replacement, or has visible board corrosion then a motherboard replacement is often the fix.
What you need
-
-
-
Loosen the eight 2.5 mm-long Phillips captive screws securing the lower case.
 Ask FixBot
-
-
-
Insert an opening pick into the seam between the lower case and chassis, and twist it to create a gap.
-
Insert an opening tool into the gap.
-
Use the opening tool to pry around the entire perimeter of the device until the lower case fully releases.
-
Remove the lower case.
-
-
-
-
-
Use a Phillips screwdriver to loosen the six 2.5 mm-long captive screws securing the battery.
-
Slide and lift the battery out.
-
-
-
-
-
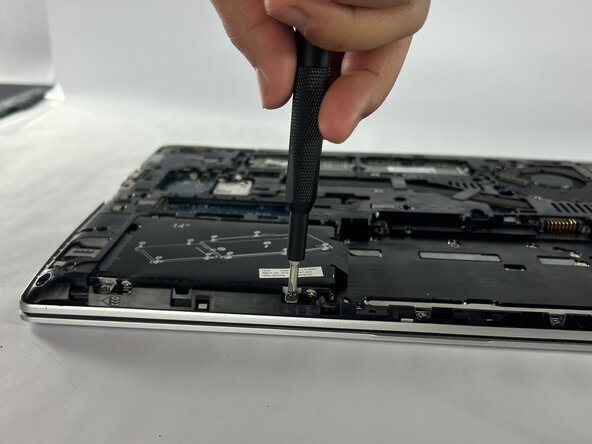
Loosen the four captive 2.5 mm-long Phillips screws securing the SSD.
-
Grip the SSD and slide it out while lifting up.
-
-
-
-
-
-
Two clips secure each RAM module in place, one on each side. Using your fingers, spread the clips away from the RAM module.
-
Repeat for the other RAM module.
-
Remove each of the two RAM modules.
-
-
-
-
-
Remove 5 2.5 mm Phillips head screws.
-
Remove 12 6 mm Torx head screws.
-
Remove 2 2.5 mm Phillips head screws.
-
Loosen 4 2.5 mm Phillips head screws.
-
Loosen 4 2.5 mm Phillips head screws.
-
-
-
-
-
Loosen the four 2.5 mm-long Phillips screws securing the heat sink.
-
Loosen the four 2.5 mm-long Phillips screws securing the fan.
-
-
-
-
-
Remove the 2 mm-long Phillips screw.
-
Remove the 2.5 mm-long Phillips screw.
-
-
-
Disconnect the ZIF connector by gently lifting the hinged locking flap on the connector's top edge until it's vertical, then carefully slide the ZIF connector straight out.
-
Lift the motherboard at an angle making sure to slide the ports out the casing.
-
-




To reassemble your device, follow the above steps in reverse order.
Take your e-waste to an R2 or e-Stewards certified recycler.
Repair didn’t go as planned? Try some basic troubleshooting or ask our Answers community for help.
Cancel: I did not complete this guide.
One other person completed this guide.

Team

UMass Dartmouth, Team 1-5, Botvin Fall 2025 Member of UMass Dartmouth, Team 1-5, Botvin Fall 2025
UMASSD-BOTVIN-F25S1G5
3 Members
84 Guides authored
