Introduction
This guide will show you how to replace the Wi-Fi/Bluetooth card in the HP ProBook 455 G7 (Model: 7JN02AV). The Wi-Fi card enables wireless internet and Bluetooth functionality.
A replacement may be needed if your device experiences frequent disconnects, no Wi-Fi networks appearing, Bluetooth malfunction, or if the “Wireless Connectivity Issues” section of the Troubleshooting Page matches your symptoms.
Before beginning, power off the laptop and disconnect the battery.
The Wi-Fi card has delicate antenna cables—detach them gently to avoid damaging the connectors.
What you need
-
-
-
Flip the laptop over so the lower case is facing up.
-
Use a Phillips #1 screwdriver to remove the seven 8 mm-long screws securing the lower case.
 Ask FixBot
-
-
-
Insert an opening tool into the seam between the lower case and chassis.
-
Pry around the entire perimeter until the lower case fully releases.
-
Lift and remove the lower case.
-
-
-
-
-
-
Use a Phillips #1 screwdriver to remove the three 4 mm-long screws securing the battery.
-
Carefully lift the battery and remove it from the laptop.
-
-
-
-
-
The Wi-Fi card is a small rectangular module secured with one screw.
-
-
-
Use the tip of a spudger to pry up and disconnect the two antenna wires (black and white) attached to the Wi-Fi card.
-
-
-
Unscrew the single Phillips screw holding the card in place.
-
The card will pop up at a slight angle.
-
Gently pull the Wi-Fi card out of its socket.
-
-


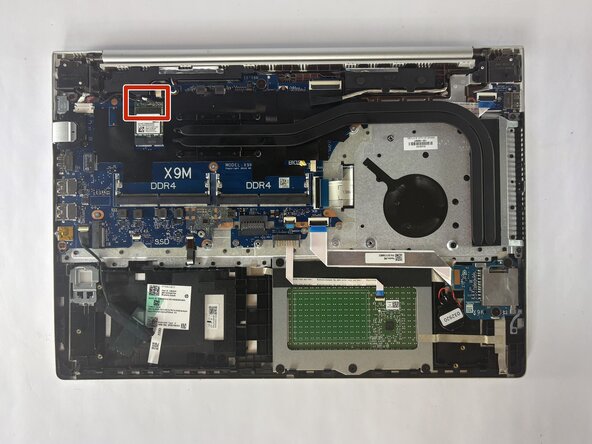

Your Wi-Fi card replacement is complete. After booting, confirm that your wireless networks appear and that your internet connection is functioning normally.

Team

UMass Dartmouth, Team 1-6, Botvin Fall 2025 Member of UMass Dartmouth, Team 1-6, Botvin Fall 2025
UMASSD-BOTVIN-F25S1G6
3 Members
72 Guides authored
