Introduction
HP ProBook 450 G6 CPU frequently overheats prompting replacement of fan; Probook unprompted shuts down due to CPU overheating. Fan is loud/produces unwarranted grinding noise. Unremovable excessive dust build up around fan. Physical damage to fan blades. Probook displays "Fan Error" or "System Fan (90B)" warning on startup.
What you need
-
-
Loosen the five captive Phillips 8.2 mm screws securing the lower case.
-
Remove the two 5 mm Phillips screws securing the lower case.
 Ask FixBot
-
-
-
Insert an opening pick into the seam between the lower case and chassis.
-
Slide the opening pick around the entire perimeter, while prying every couple of centimeters to release the retaining clips.
-
Remove the lower case.
-
-
-
-
Remove the three Phillips M2.0x4.0 screws that are securing the battery.
-
-
-
Disconnect the fan connector from the system board. Remove any tape securing the cable as needed.
-
-
-
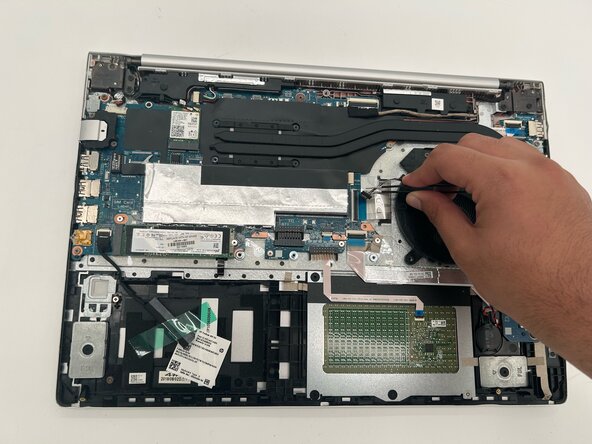
Remove the Phillips M2.0x4.0 screw securing the fan to the Probook.
-
Slide the fan to the left out from under the heat sink and remove the fan from the Probook.
-


To reassemble your device, follow the above steps in reverse order.
Take your e-waste to an R2 or e-Stewards certified recycler.
Repair didn’t go as planned? Try some basic troubleshooting or ask our Answers community for help.

Team

University of North Texas, Team 1-6, Rea Spring 2026 Member of University of North Texas, Team 1-6, Rea Spring 2026
UNT-REA-S26S1G6
4 Members
5 Guides authored