
Free Shipping on Domestic Orders $75+

HP ProBook 440 G9 Daughter Board Replacement

What you need

  1. HP ProBook 440 G9 Daughter Board Replacement, Remove Bottom Cover: step 1, image 1 of 2 HP ProBook 440 G9 Daughter Board Replacement, Remove Bottom Cover: step 1, image 2 of 2
    • Use Phillips #01 screwdriver to unscrew all 6 threaded screws.

    • Do not remove screws from bottom cover as they are intended to stay attached to the bottom cover.

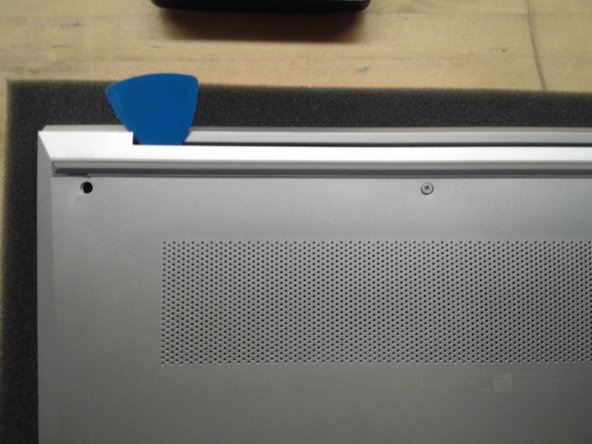
    • Use guitar pick tool to unclip the back cover all around the edges starting from the top.

  2. HP ProBook 440 G9 Daughter Board Replacement, Remove Battery: step 2, image 1 of 3 HP ProBook 440 G9 Daughter Board Replacement, Remove Battery: step 2, image 2 of 3 HP ProBook 440 G9 Daughter Board Replacement, Remove Battery: step 2, image 3 of 3
    • Remove all 4 screws from the battery.

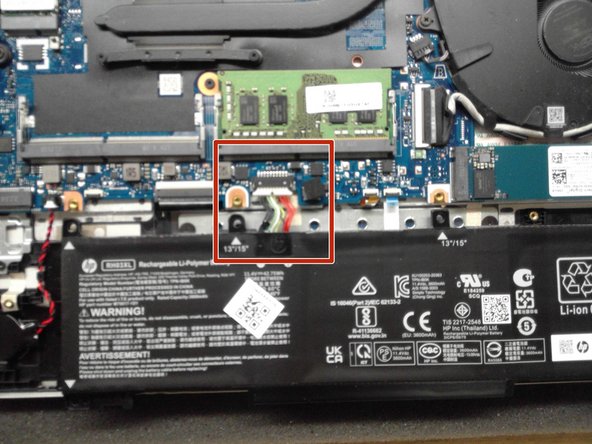
    • Disconnect the Battery Connector from the motherboard using the side tabs on the connector.

    • Possible spark may occur at the Battery Connector port if laptop is not fully powered off when replacing the laptop battery.

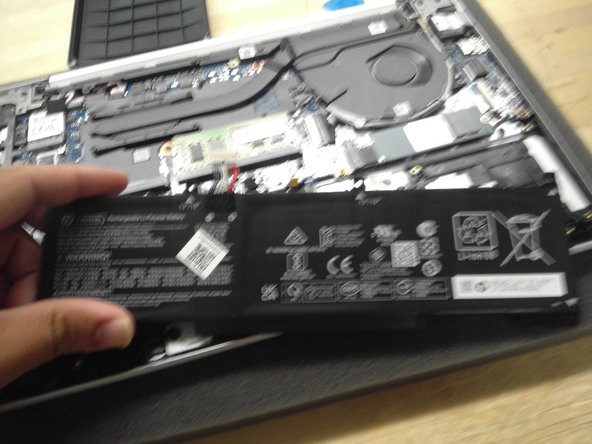
    • Remove the battery from the laptop.

  3. HP ProBook 440 G9 Daughter Board Replacement, Remove Solid State Drive: step 3, image 1 of 3 HP ProBook 440 G9 Daughter Board Replacement, Remove Solid State Drive: step 3, image 2 of 3 HP ProBook 440 G9 Daughter Board Replacement, Remove Solid State Drive: step 3, image 3 of 3
    • Use Phillips #00 to remove screw from SSD.

    • SSD will lift up at a 45 degree angle when screw is removed.

    • Remove SSD from the SSD slot.

    • When reinserting the SSD plug in at a 45 degree angle and then screw down with the new screw.

  4. HP ProBook 440 G9 Daughter Board Replacement, Disconnect Ribbon Cables: step 4, image 1 of 1
    • Remove ribbon cables from daughter board.

    • Use Phillips #01 screwdriver to remove 4 screws from daughter board.

    • Remove the Ethernet port piece and set to the side.

    • Use Phillips #01 screwdriver to remove 3 screws from hinge.

    • One of the hinge screws is under the silver display cable.

    • Lift the display hinge to release the daughter board.

    • Lift the daughter board on the left part of the board to detach from the laptop port cutouts.

Conclusion

To reassemble your device, follow these instructions in reverse order.

Joel

Member since: 04/30/18

470 Reputation

5 Guides authored

0 Guide Comments

Add Comment

View Statistics:

Past 24 Hours: 1

Past 7 Days: 14

Past 30 Days: 49

All Time: 603