
HP ProBook 440 G6 Solid State Drive (SSD) Replacement

Abubaker Murshed and 2 other contributors
Last updated on May 20, 2026
Views: 354
View statistics:
- Past 24 Hours:
- 5
- Past 7 Days:
- 18
- Past 30 Days:
- 91
- All Time:
- 354
Comments: 0
No one has left comments on this guide. Will you be first?
Go to guide commentsCompleted: 0 1
No one has marked this guide "completed." Will you be the first?
1 person has marked this guide "completed." It's you — great job!
Favorites: 0 1
No one has favorited (and subscribed to) this guide. Will you be the first?
1 person has favorited (and subscribed to) this guide — and that's you!
Introduction
Go to step 1 ↓Does your SSD need an inspection or a replacement? In this guide, we'll demonstrate how to safely replace the SSD in your HP ProBook 440 G6 notebook.
The SSD's function is to store any data electronically with 256 GB of storage in the HP ProBook 440 G6. The SSD also offers faster boot time and data transfer.
Common Symptoms that may occur when an SSD is faulty include:
- Slower boot time
- Boot failure
- Frequent random freezing
- File corruption / missing files
- Drive unable to save new information or change already saved files or documents
Our guide will take you every step of the way to safely and smoothly replace your SSD. Before beginning this replacement, be sure to completely power off your laptop, unplug it from the charger, and put it in Battery safe Mode.
What you need
Tools


-
-
-
Using a Phillips #0 Screwdriver, remove the two 5 mm screws on the front-facing side of the lower case.
-
Using a Phillips #0 Screwdriver, remove the remaining five 5 mm Phillips screws securing the lower case.
 Ask FixBot
-
-
-
Starting under the display, carefully use a plastic prying tool (iFixit opening tool) to disengage the retaining clips.
-
Once a corner or edge starts to lift, slowly slide the tool along the edge to loosen more of the bottom panel.
-
Keep working around the edges until all the clips are loose.
-
-
-
Gently lift the rear of the cover to disengage it from the computer.
-
Carefully remove the bottom cover from the computer.
-
-
-
-
-
-
Using a Phillips #0 Screwdriver, remove the two 4mm Phillips screws that secure the battery to the computer.
-
-
-
-
-
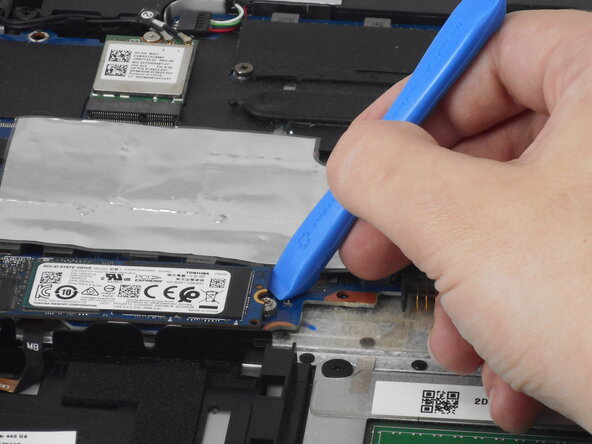
Use a Phillips #0 screwdriver, remove the single 2.5 mm Phillips screw that secures the SSD to the computer.
-
-
-
Carefully remove the solid-state drive by pulling the module away from the slot at an angle.
-
-


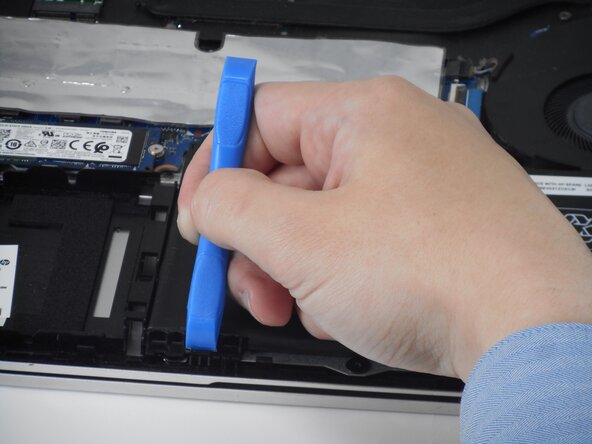




To reassemble your device, follow the above steps in reverse order.
Take your e-waste to an R2 or e-Stewards certified recycler.
Repair didn’t go as planned? Try some basic troubleshooting or ask our Answers community for help.

Team

University of Memphis, Team 1-4, Sneed Spring 2026 Member of University of Memphis, Team 1-4, Sneed Spring 2026
UM-SNEED-S26S1G4
3 Members
72 Guides authored
