
HP Pavilion dv9000 Hard Drive Replacement

Robby Cabri and 6 other contributors
Last updated on Feb 19, 2016
Views: 10K
View statistics:
- Past 24 Hours:
- 3
- Past 7 Days:
- 25
- Past 30 Days:
- 113
- All Time:
- 10,027
Comments: 4
4 guide comments.
Go to guide commentsCompleted: 9 10
9 people have marked this guide "completed." Will you be next?
10 people have marked this guide "completed." Including you — great job!
Favorites: 4 5
4 people have favorited (and subscribed to) this guide. Will you be next?
5 people have favorited (and subscribed to) this guide — including you!
Introduction
Go to step 1 ↓In an age where files expand to huge sizes, it becomes necessary to have a large storage medium. Replacing a hard drive could be a challenging task, but this guide clarifies all potential issues.
What you need
Tools

-
-
-
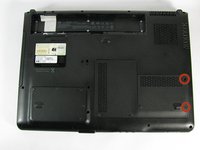
Turn the laptop over to expose the bottom side.
-
Locate the battery removal switch next to the battery compartment
 Ask FixBot
-
-
-
Slide the switch all the way to the left to release the battery. The battery should pop up.
-
Lift the battery out.
-
-
-
-
-
There are two hard drive bays.
-
Hard drive bay 1 is in the lower right corner.
-
Hard drive bay 2 is in the lower left corner.
-
-
-
To remove hard drive 1 from bay 1
-
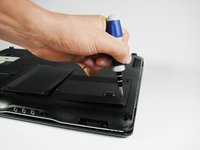
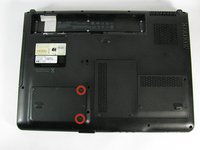
Using a Phillips #1 screwdriver, remove the two 5 mm screws that hold the bay 1 cover in place.
-
-
-
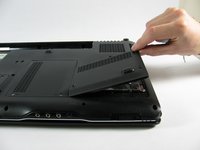
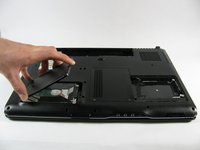
After removing the two cover screws, lift and slide the cover out of position to access the hard drive.
-
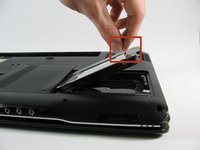
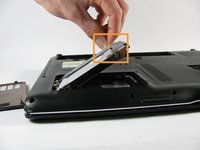
Grab the clear plastic pull tab on top of the hard drive to lift the hard drive from the laptop.
-
-
-
-
To remove hard drive 2 from bay 2.
-
Using a Phillips #1 screwdriver remove the two 5 mm screws that hold the bay 2 cover in place.
-
After removing the two cover screws, lift and slide the cover out of position to access the hard drive.
-
Grab the clear plastic pull tab on top of the hard drive, and lift the hard drive from the laptop.
-
-
-
After the hard drive has been removed from the laptop, it must then be removed from its bracket.
-
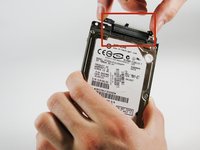
Start by gently pulling the HP hard drive adapter from the end of the hard drive.
-
Using a Phillips #1 screwdriver, remove the four 3 mm bracketing screws on both sides of the hard drive bracket (2 per side) .
-
Lift the hard drive from its metal bracket.
-
-








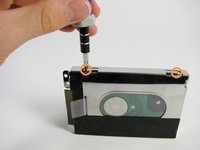
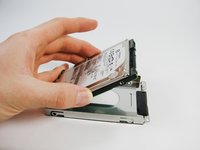
To reassemble your device, follow these instructions in reverse order.
Cancel: I did not complete this guide.
9 other people completed this guide.

Team

Cal Poly, Team 10-32, Maness Winter 2014 Member of Cal Poly, Team 10-32, Maness Winter 2014
CPSU-MANESS-W14S10G32
4 Members
72 Guides authored
4 Guide Comments
Hello. In step 7 of the above, what is the name/part number/ size etc of the adapter/connector please ? I need one urgently.
Thanks.
yes that would be very helpfull because the new SSdrive I have will not fit even though is is the same size. I think I need some sort of an adaptor as you say.
thanks for the help
