Free Shipping on Domestic Orders $75+

HP Pavilion G60-120US Midframe Replacement

Views: 517

View statistics:

Past 24 Hours:
2
Past 7 Days:
10
Past 30 Days:
59
All Time:
517
Comments: 4

4 comments on steps.

Completed: 1

1 person has marked this guide "completed." Will you be next?

Favorites: 0

No one has favorited (and subscribed to) this guide. Will you be the first?

Time Required: 45 minutes
Difficulty: Moderate
HP Pavilion G60-120US Midframe Replacement

Introduction

Go to step 1 ↓

If you are looking to repair a part on your HP Pavilion G60-120US laptops midframe, this detailed guide will take you through the steps necessary to troubleshoot some common hardware issues, such as replacing a malfunctioning keyboard, removing and reinstalling the display assembly, or accessing internal components for maintenance. Each section gives instructions in detail on how to accomplish the process safely and correctly.

Safety plays an important role while doing any sort of hardware repairs, including the repairs talked about in this guide. To avoid electrical shock, first power off your device and unplug any external ports. Removing the battery is an important step to eliminate any electrical current before opening your device. If you take the proper safety precautions and make sure to be safe while performing the steps in this guide, you can ensure both the safety of yourself and your device.

This guide is laid out to provide clear, step-by-step instructions and is targeted to be understandable by readers with limited experience in hardware repairs of an HP Pavilion G60-120US laptop. At the conclusion of these steps, hopefully the reader will have a restored, operational, functioning laptop, extending its lifespan along with saving money on repair costs.

What you need

Tools

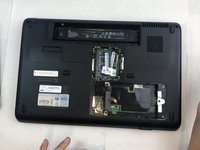
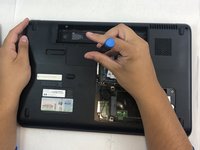
    1. HP Pavilion G60-120US Midframe Replacement, Battery: step 1, image 1 of 1
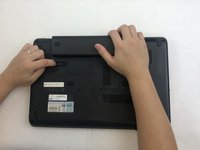
      • Make sure the laptop is turned off.

      • Turn the laptop over to reveal the battery.

      Ask FixBot
      Add Comment

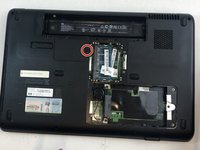
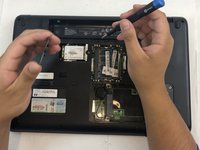
    2. HP Pavilion G60-120US Midframe Replacement: step 2, image 1 of 2 HP Pavilion G60-120US Midframe Replacement: step 2, image 2 of 2
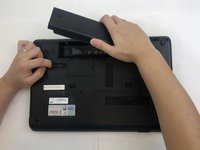
      • Slide and hold the battery release switch to the left to release the battery from the device.

      Ask FixBot
      Add Comment

    3. HP Pavilion G60-120US Midframe Replacement: step 3, image 1 of 2 HP Pavilion G60-120US Midframe Replacement: step 3, image 2 of 2
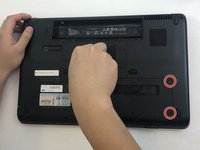
      • While holding the battery release switch, grab the battery and pull it upward gently.

      Ask FixBot

      Add Comment

    1. HP Pavilion G60-120US Midframe Replacement, Keyboard: step 4, image 1 of 1
      • Using the Phillips #0 screwdriver, remove the seven 4.0mm screws on the battery compartment of the laptop.

      Ask FixBot

      Add Comment

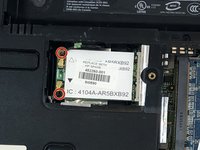
    2. HP Pavilion G60-120US Midframe Replacement: step 5, image 1 of 2 HP Pavilion G60-120US Midframe Replacement: step 5, image 2 of 2
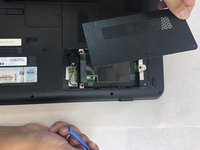
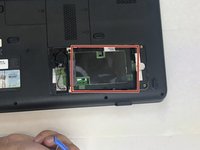
      • Using the Phillips #0 screwdriver, remove two 4.0mm screws from the hard disk cover.

      • Remove the hard disk cover.

      Ask FixBot
      Add Comment

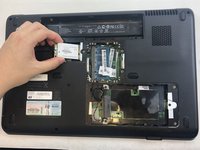
    3. HP Pavilion G60-120US Midframe Replacement: step 6, image 1 of 2 HP Pavilion G60-120US Midframe Replacement: step 6, image 2 of 2
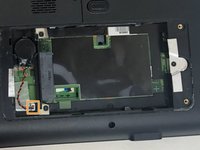
      • Remove the hard drive by pulling gently and disconnecting the hard drive from the laptop.

      • Gently pull on the black and red wiring on the bottom left to separate the wire from the component.

      Ask FixBot
      Add Comment

    4. HP Pavilion G60-120US Midframe Replacement: step 7, image 1 of 1
      • Remove the two 4.0 mm Phillips #0 screws from the hard disk compartment.

      Ask FixBot

      Add Comment

    5. HP Pavilion G60-120US Midframe Replacement: step 8, image 1 of 3 HP Pavilion G60-120US Midframe Replacement: step 8, image 2 of 3 HP Pavilion G60-120US Midframe Replacement: step 8, image 3 of 3
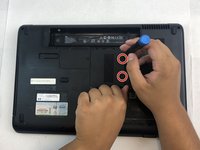
      • Using the Phillips #0 screwdriver, remove the two 4.0 mm screws from the memory card cover.

      • Remove the memory disk cover.

      Ask FixBot

      Add Comment

    6. HP Pavilion G60-120US Midframe Replacement: step 9, image 1 of 3 HP Pavilion G60-120US Midframe Replacement: step 9, image 2 of 3 HP Pavilion G60-120US Midframe Replacement: step 9, image 3 of 3
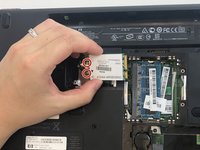
      • Using the Phillips #0 screwdriver, remove the 4.0 mm screw from the Wi-Fi chip cover.

      • Remove the Wi-Fi chip cover.

      Ask FixBot
      Add Comment

    7. HP Pavilion G60-120US Midframe Replacement: step 10, image 1 of 2 HP Pavilion G60-120US Midframe Replacement: step 10, image 2 of 2
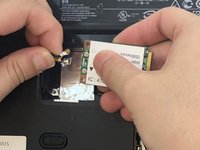
      • Using the Phillips #0 screwdriver, remove the two 3.0 mm screws securing the Wi-Fi chip in place.

      • Grab the Wi-Fi chip and pull up gently to the left to disconnect it from the laptop.

      Ask FixBot
      Add Comment

    8. HP Pavilion G60-120US Midframe Replacement: step 11, image 1 of 2 HP Pavilion G60-120US Midframe Replacement: step 11, image 2 of 2
      • Disconnect the two wires connecting the chip's base.

      • Remove the Wi-Fi chip.

      Ask FixBot

      Add Comment

    9. HP Pavilion G60-120US Midframe Replacement: step 12, image 1 of 1
      • Using the Phillips #0 screwdriver, remove the seven 4.0 mm screws on the bottom of the laptop.

      Ask FixBot

      Add Comment

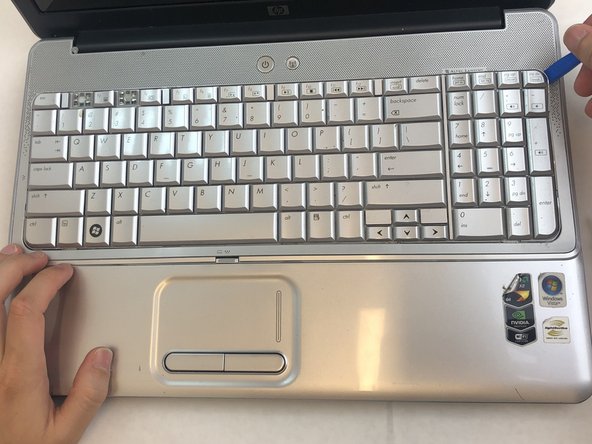
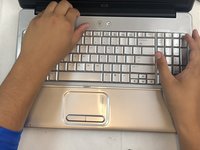
    10. HP Pavilion G60-120US Midframe Replacement: step 13, image 1 of 3 HP Pavilion G60-120US Midframe Replacement: step 13, image 2 of 3 HP Pavilion G60-120US Midframe Replacement: step 13, image 3 of 3
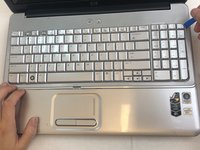
      • Turn the laptop back to its upright state.

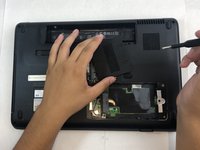
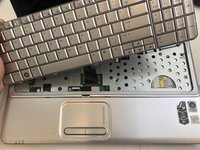
      • Insert an opening tool into the upper right corner of the keyboard and gently lift it to separate it from the laptop.

      • Be sure not to apply excessive pressure to prevent the bending and breaking of the keyboard.

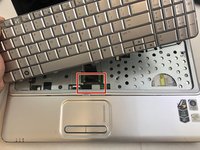
      • Do not pull the keyboard all the way out because there is a wiring connection under the keyboard.

      Ask FixBot

      Add Comment

    11. HP Pavilion G60-120US Midframe Replacement: step 14, image 1 of 3 HP Pavilion G60-120US Midframe Replacement: step 14, image 2 of 3 HP Pavilion G60-120US Midframe Replacement: step 14, image 3 of 3
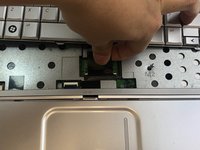
      • Grab the wiring and gently pull it out to disconnect it from the laptop.

      • Don't use excessive force.

      • Remove the keyboard.

      Ask FixBot

      Add Comment

    1. HP Pavilion G60-120US Midframe Replacement, Display Assembly: step 15, image 1 of 2 HP Pavilion G60-120US Midframe Replacement, Display Assembly: step 15, image 2 of 2
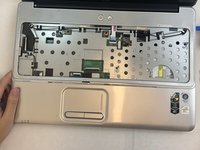
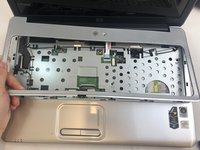
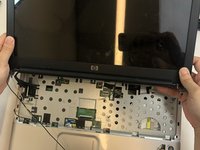
      • Insert an opening tool into the top right side of the corner, and gently lift the rest of the cover to separate if from the laptop.

      • Avoid using excessive force which may break the cover.

      • Do not completely pull out the cover; there is a wire still attached to the laptop.

      Ask FixBot

      Add Comment

    2. HP Pavilion G60-120US Midframe Replacement: step 16, image 1 of 2 HP Pavilion G60-120US Midframe Replacement: step 16, image 2 of 2
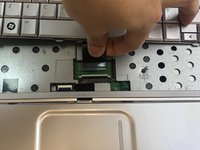
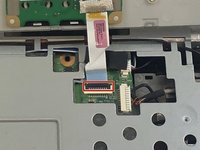
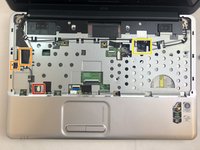
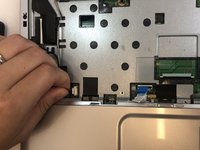
      • Using your fingertips, detach the ribbon cable by gently lifting up the black tab located on the bottom end of the cable.

      • Separate the cable and remove the cover.

      Ask FixBot

      Add Comment

    3. HP Pavilion G60-120US Midframe Replacement: step 17, image 1 of 3 HP Pavilion G60-120US Midframe Replacement: step 17, image 2 of 3 HP Pavilion G60-120US Midframe Replacement: step 17, image 3 of 3
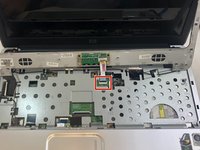
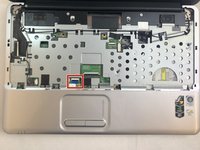
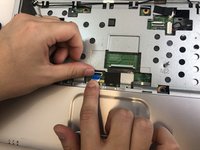
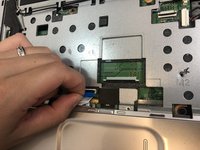
      • Remove the mouse and touchpad cable by lifting the black tab and gently pulling the cable out.

      Ask FixBot

      Add Comment

    4. HP Pavilion G60-120US Midframe Replacement: step 18, image 1 of 3 HP Pavilion G60-120US Midframe Replacement: step 18, image 2 of 3 HP Pavilion G60-120US Midframe Replacement: step 18, image 3 of 3
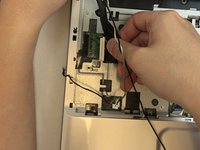
      • Detach the white screen wiring on the bottom left side by gently pulling out.

      • Detach two black screen cables on the middle left side by gently pulling out the cables.

      • Pull out the black cable on the upper right side of the laptop.

      • Use gentle pressure while removing the wires.

      Ask FixBot

      Add Comment

    5. HP Pavilion G60-120US Midframe Replacement: step 19, image 1 of 3 HP Pavilion G60-120US Midframe Replacement: step 19, image 2 of 3 HP Pavilion G60-120US Midframe Replacement: step 19, image 3 of 3
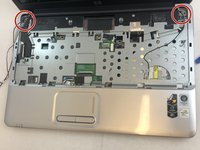
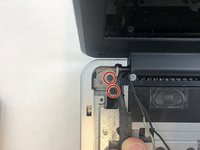
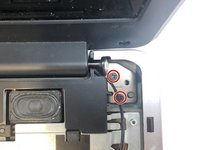
      • Using the Phillips #0 screwdriver, remove the four 4.0 mm screws on both hinges of the laptop's screen.

      Ask FixBot

      Add Comment

    6. HP Pavilion G60-120US Midframe Replacement: step 20, image 1 of 2 HP Pavilion G60-120US Midframe Replacement: step 20, image 2 of 2
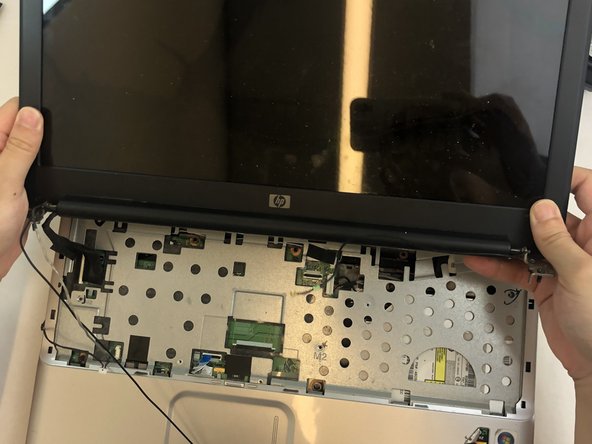
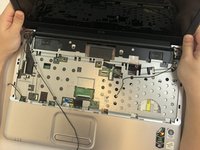
      • Gently lift and detach the display assembly from the laptop’s base.

      Ask FixBot

      Add Comment

    1. HP Pavilion G60-120US Midframe Replacement, Midframe: step 21, image 1 of 1
      • Using the Phillips #0 screwdriver, remove the four 4mm screws from the midframe.

      Ask FixBot

      Add Comment

    2. HP Pavilion G60-120US Midframe Replacement: step 22, image 1 of 3 HP Pavilion G60-120US Midframe Replacement: step 22, image 2 of 3 HP Pavilion G60-120US Midframe Replacement: step 22, image 3 of 3
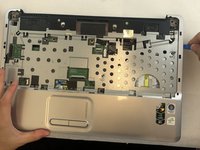
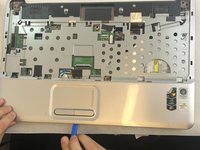
      • Using an opening tool, gently lift each corner of the midframe.

      • Use caution when applying pressure with the opening tool as it may break while attempting to lift the midframe.

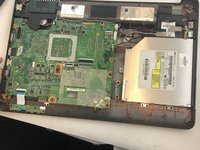
      • Detach and remove the midframe from the main body of the laptop.

      Ask FixBot

      Add Comment

Conclusion

To reassemble your device, follow these instructions in reverse order.

Cancel: I did not complete this guide.

One other person completed this guide.

0 Guide Comments

Add Comment

View Statistics:

Past 24 Hours: 2

Past 7 Days: 10

Past 30 Days: 59

All Time: 517