Free Shipping on Domestic Orders $75+

HP Pavilion DV2160BR Webcam Replacement

What you need

    1. HP Pavilion DV2160BR Webcam Replacement, Battery: step 1, image 1 of 1
      • Start with the bottom of the laptop facing up.

      Ask FixBot

      Add Comment

    2. HP Pavilion DV2160BR Webcam Replacement: step 2, image 1 of 2 HP Pavilion DV2160BR Webcam Replacement: step 2, image 2 of 2
      • Locate the battery compartment at the rear of the device.

      • There is a slider button located under the left side of the battery compartment. It is indicated by a battery symbol. Move the slider to the left and lift the battery out.

      Ask FixBot

      Add Comment

    1. HP Pavilion DV2160BR Webcam Replacement, Webcam: step 3, image 1 of 1
      • Flip over the laptop and open it.

      Ask FixBot

      Add Comment

    2. HP Pavilion DV2160BR Webcam Replacement: step 4, image 1 of 2 HP Pavilion DV2160BR Webcam Replacement: step 4, image 2 of 2
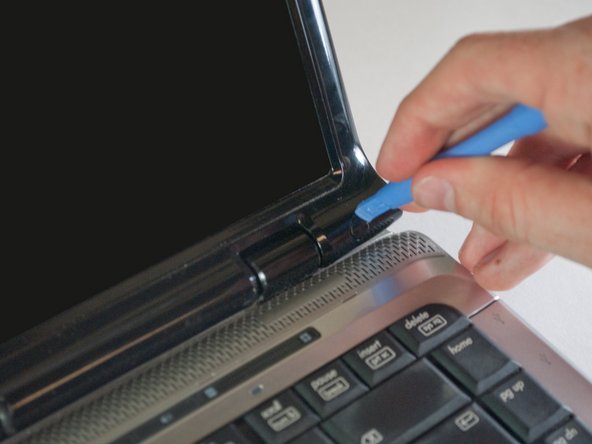
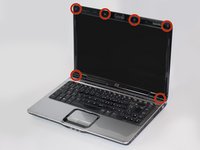
      • Remove the 6 rubber screw covers from the screen panel using the plastic opener tools by applying firm pressure to the edges.

      • The 4 screw covers on top are attached by an adhesive backing.

      • The 2 screw covers on the bottom are rubber plugs.

      Ask FixBot

      Add Comment

    3. HP Pavilion DV2160BR Webcam Replacement: step 5, image 1 of 1
      • Remove the 4 M2.5x4-Lg #0 Phillips screws from the top of the screen panel.

      • Remove the 2 M2.5x8-Lg #1 Phillips screws from the bottom of the screen panel.

      Ask FixBot

      Add Comment

    4. HP Pavilion DV2160BR Webcam Replacement: step 6, image 1 of 2 HP Pavilion DV2160BR Webcam Replacement: step 6, image 2 of 2
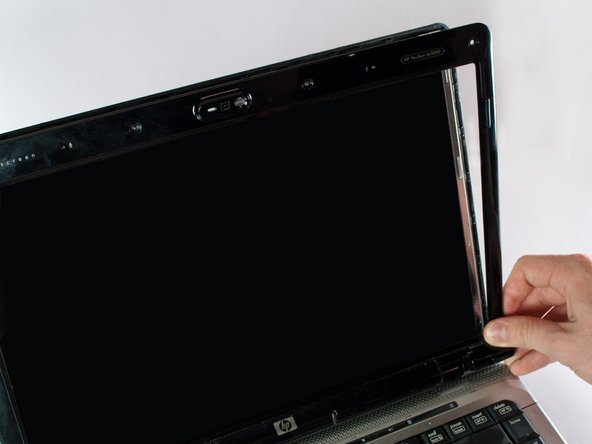
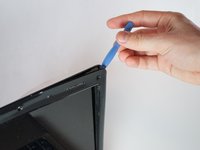
      • Slide a plastic opener tool along the outside edges of the front screen panel to start to separate it from the back screen panel.

      • You may need to apply some firm pressure to get it started.

      • Once it has started to separate, gently pull off the screen panel by working along the edge, and set it aside.

      Ask FixBot

      Add Comment

    5. HP Pavilion DV2160BR Webcam Replacement: step 7, image 1 of 1
      • Locate the screw on the left side of the cameras mounting bracket.

      • Remove the M2.5x4-Lg #0 Phillips screw

      Ask FixBot

      Add Comment

    6. HP Pavilion DV2160BR Webcam Replacement: step 8, image 1 of 1
      • Pull the camera from the back screen panel and rotate it so you are looking at the back.

      • Remove the 2 M2x3-Lg #00 Phillips screws and place the mounting bracket aside.

      Ask FixBot

      Add Comment

    7. HP Pavilion DV2160BR Webcam Replacement: step 9, image 1 of 1
      • Disconnect the cable on the right side of the camera board by pulling firmly on the connector.

      Ask FixBot

      Add Comment

Conclusion

To reassemble your device, follow these instructions in reverse order.

Cancel: I did not complete this guide.

One other person completed this guide.

Brandon MacDonald

Member since: 03/12/14

239 Reputation

2 Guides authored

Team

0 Guide Comments

Add Comment

View Statistics:

Past 24 Hours: 0

Past 7 Days: 0

Past 30 Days: 20

All Time: 1,074