
HP Pavilion 15-cs3079nr Display Assembly Replacement

Nicolas Soto and one other contributor
Last updated on Jun 22, 2026
Views: 187
View statistics:
- Past 24 Hours:
- 1
- Past 7 Days:
- 11
- Past 30 Days:
- 77
- All Time:
- 187
Comments: 0
No one has left comments on this guide. Will you be first?
Go to guide commentsCompleted: 0 1
No one has marked this guide "completed." Will you be the first?
1 person has marked this guide "completed." It's you — great job!
Favorites: 0 1
No one has favorited (and subscribed to) this guide. Will you be the first?
1 person has favorited (and subscribed to) this guide — and that's you!
Introduction
Go to step 1 ↓Common display issues for the HP Pavilion-cs3079nr include:
- Blank/empty screen
- Cracked or otherwise damaged screen
- Colored lines through display image
You may review HP Pavilion 15-cs3079nr Display Not Turning On before continuing to confirm common symptoms and causes of these issues. The following guide will help you replace the Display Panel component of the HP Pavilion-cs3079nr.
What you need
Tools
-
Spudger4.9
-
-


-
-
-
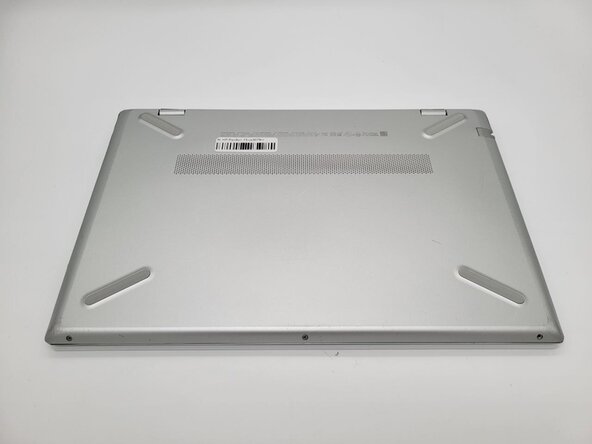
Use a Phillips #0 screwdriver to remove the three 7 mm screws from the recesses.
-
-
-
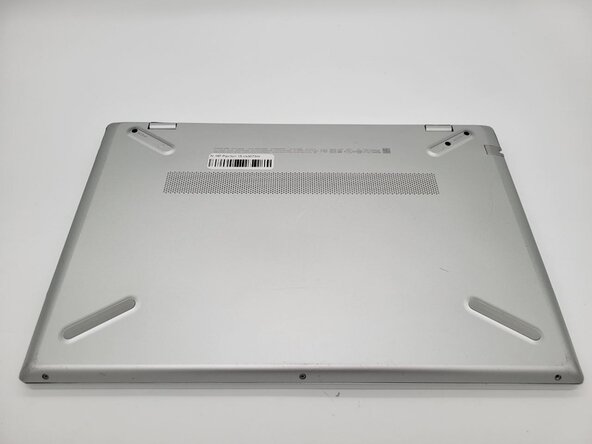
Use a Phillips #0 screwdriver to remove the three silver 5 mm case screws from the front of the device.
-
-
-
-
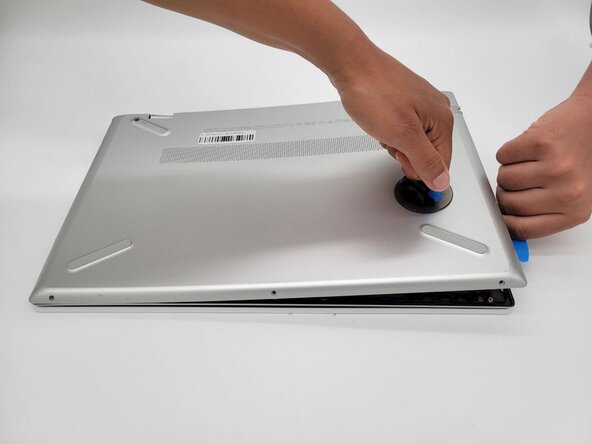
Place the suction handle on the case.
-
Insert an opening pick between the case sections and work around the perimeter of the device to separate the lower case from the chassis.
-
-
-
-
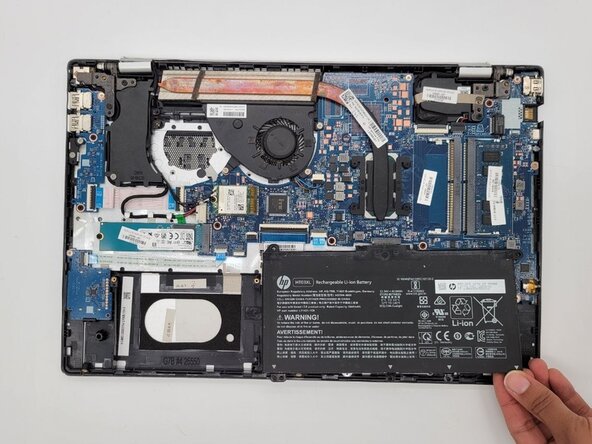
Use a Phillips #0 screwdriver to remove the three 4.5 mm screws securing the battery.
-
Carefully lift and remove the battery.
-
-
-
-
-
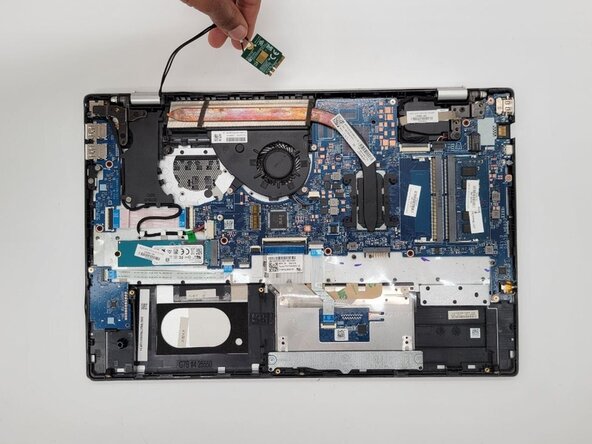
Remove the single Phillips screw securing the Wi-Fi card.
-
Disconnect the card from the board and set aside.
-
-
-
Use a spudger to flip up the display cable connector locking flap.
-
Unseat and disconnect the cable.
-
-
-
Use a Phillips #0 screwdriver to remove the two 6 mm screws securing the right hinge.
-
Lift the hinge to its furthest point.
-
-
-
Use a Phillips #0 screwdriver to remove the two 6 mm screws securing the left hinge.
-
Lift the hinge to its furthest point.
-
-
-
Lift and remove the motherboard case section from the display panel component.
-
-




 Ask FixBot









To reassemble your device, follow the above steps in reverse order.
Take your e-waste to an R2 or e-Stewards certified recycler.
Repair didn’t go as planned? Try some basic troubleshooting or ask our Answers community for help.

Team

University of North Texas, Team 1-1, Rea Spring 2026 Member of University of North Texas, Team 1-1, Rea Spring 2026
UNT-REA-S26S1G1
5 Members
72 Guides authored
