Free Shipping on Domestic Orders $75+

HP Pavilion 15-cc561st Bottom Cover Replacement

What you need

    1. HP Pavilion 15-cc561st Bottom Cover Replacement, Bottom Cover: step 1, image 1 of 3 HP Pavilion 15-cc561st Bottom Cover Replacement, Bottom Cover: step 1, image 2 of 3 HP Pavilion 15-cc561st Bottom Cover Replacement, Bottom Cover: step 1, image 3 of 3
      Tool used on this step:
      Magnetic Project Mat
      $19.95
      Buy
      • Before you begin to remove the bottom cover, shut down the computer. Disconnect all external devices and unplug the AC adapter. Flip the laptop upside down.

      • Use a Phillips #0 screwdriver to remove five screws from the bottom cover:

      • Two 5.6 mm screws

      • Each of these screws are beneath the two rubber feet on the rear side of the laptop (near the display hinges). You do not have to completely remove the rubber feet to remove the screws; simply peel the top of the feet to reveal the screws.

      • Three 5.8 mm screws

      • Throughout this repair, keep track of each screw size and location to avoid damaging your device.

      Ask FixBot

      Add Comment

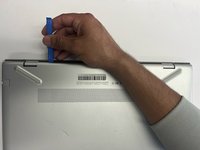
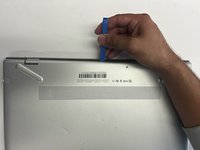
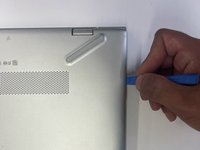
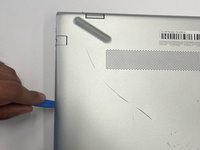
    2. HP Pavilion 15-cc561st Bottom Cover Replacement: step 2, image 1 of 2 HP Pavilion 15-cc561st Bottom Cover Replacement: step 2, image 2 of 2
      • Insert an opening tool into the space between the display hinges and the bottom cover.

      • Firmly push the opening tool upwards to separate the bottom cover from these areas.

      Ask FixBot

      Add Comment

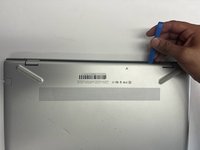
    3. HP Pavilion 15-cc561st Bottom Cover Replacement: step 3, image 1 of 3 HP Pavilion 15-cc561st Bottom Cover Replacement: step 3, image 2 of 3 HP Pavilion 15-cc561st Bottom Cover Replacement: step 3, image 3 of 3
      • Insert your opening tool and firmly push the tool upwards along the rear edge.

      Ask FixBot

      Add Comment

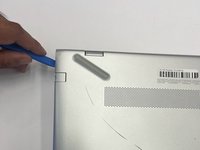
    4. HP Pavilion 15-cc561st Bottom Cover Replacement: step 4, image 1 of 3 HP Pavilion 15-cc561st Bottom Cover Replacement: step 4, image 2 of 3 HP Pavilion 15-cc561st Bottom Cover Replacement: step 4, image 3 of 3
      • Use the opening tool again on the left and right sides.

      • Start prying at the areas closer to the rear of the laptop (near the display hinges) before moving towards areas that are closer to the front of the laptop (away from the display hinges).

      • Pry a little bit on the left side, then pry a little bit on the right side before prying more on the left side again. Working on both sides in this incremental fashion is easier than completely prying one side before starting the other side.

      Ask FixBot

      Add Comment

    5. HP Pavilion 15-cc561st Bottom Cover Replacement: step 5, image 1 of 1
      • Lift the bottom cover upwards to remove it.

      Ask FixBot

      Add Comment

Conclusion

To reassemble your device, follow these instructions in reverse order.

Cancel: I did not complete this guide.

Nathan Luu

Member since: 09/26/22

569 Reputation

5 Guides authored

Team

CSU Los Angeles, Team 6-4, Adachi Fall 2022 Member of CSU Los Angeles, Team 6-4, Adachi Fall 2022

CSULA-ADACHI-F22S6G4

4 Members

84 Guides authored

0 Guide Comments

Add Comment

View Statistics:

Past 24 Hours: 0

Past 7 Days: 4

Past 30 Days: 47

All Time: 1,844