Free Shipping on Domestic Orders $75+

HP Pavilion 15-ay041wm Keyboard Replacement

What you need

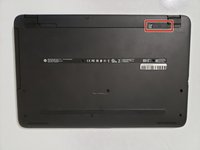
    1. HP Pavilion 15-ay041wm Keyboard Replacement, Battery: step 1, image 1 of 2 HP Pavilion 15-ay041wm Keyboard Replacement, Battery: step 1, image 2 of 2
      • Place the laptop upside down.

      Ask FixBot

      Add Comment

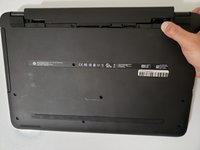
    2. HP Pavilion 15-ay041wm Keyboard Replacement: step 2, image 1 of 2 HP Pavilion 15-ay041wm Keyboard Replacement: step 2, image 2 of 2
      • Find the battery lock latch on the top left corner.

      • Slide the latch to the right position.

      Ask FixBot

      Add Comment

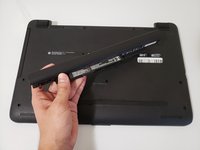
    3. HP Pavilion 15-ay041wm Keyboard Replacement: step 3, image 1 of 3 HP Pavilion 15-ay041wm Keyboard Replacement: step 3, image 2 of 3 HP Pavilion 15-ay041wm Keyboard Replacement: step 3, image 3 of 3
      • Find the battery release latch on the top right corner.

      • Slide and hold the latch towards the left to cover the battery icon.

      • Carefully slide the battery outwards.

      Ask FixBot

      Add Comment

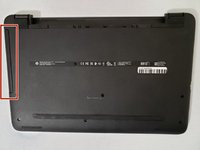
    1. HP Pavilion 15-ay041wm Keyboard Replacement, Disc Drive: step 4, image 1 of 1
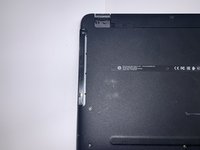
      • Turn the laptop upside down with the base of the laptop facing you.

      • Remove the grippers positioned at the top right and top left of the laptop to access the two additional screws.

      • Use a 1.5mm Hex screwdriver to remove twelve 10mm screws.

      Ask FixBot

      Add Comment

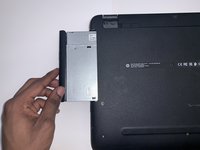
    2. HP Pavilion 15-ay041wm Keyboard Replacement: step 5, image 1 of 3 HP Pavilion 15-ay041wm Keyboard Replacement: step 5, image 2 of 3 HP Pavilion 15-ay041wm Keyboard Replacement: step 5, image 3 of 3
      • Press the eject button.

      • Hold and carefully slide the disc drive out of the laptop.

      Ask FixBot

      Add Comment

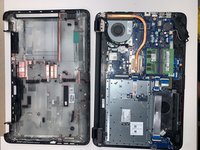
    1. HP Pavilion 15-ay041wm Keyboard Replacement, Keyboard: step 6, image 1 of 3 HP Pavilion 15-ay041wm Keyboard Replacement, Keyboard: step 6, image 2 of 3 HP Pavilion 15-ay041wm Keyboard Replacement, Keyboard: step 6, image 3 of 3
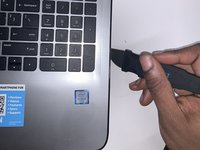
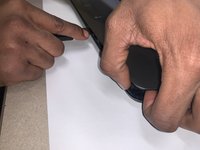
      • Using the Jimmy, create a separation between the keyboard and bottom panel.

      • Slide around the body of the panel until the separation is big enough for you to use your fingers.

      • Separate the keyboard and bottom panel.

      Ask FixBot

      Add Comment

Conclusion

To reassemble your device, follow these instructions in reverse order.

Cancel: I did not complete this guide.

Kristen Gismondi

Member since: 11/12/14

108,508 Reputation

271 Guides authored

Team

iFixit Member of iFixit

Staff

123 Members

84,755 Guides authored

0 Guide Comments

Add Comment

View Statistics:

Past 24 Hours: 1

Past 7 Days: 9

Past 30 Days: 33

All Time: 1,206