
HP Pavilion 14-cf0014dx Display Assembly Replacement

Angel S and 2 other contributors
Last updated on Jun 26, 2024
Views: 546
View statistics:
- Past 24 Hours:
- 3
- Past 7 Days:
- 17
- Past 30 Days:
- 83
- All Time:
- 546
Comments: 0
No one has left comments on this guide. Will you be first?
Go to guide commentsCompleted: 0 1
No one has marked this guide "completed." Will you be the first?
1 person has marked this guide "completed." It's you — great job!
Favorites: 0 1
No one has favorited (and subscribed to) this guide. Will you be the first?
1 person has favorited (and subscribed to) this guide — and that's you!
Action Shots
Be an action hero! This guide needs images that better demonstrate how to perform specific actions.
Needs Better Images
Better photos will improve this guide. Help out by taking, editing, or uploading new ones!
Markup Mishap
This guide needs better markups. Help out by correcting or making some markup annotations.
Needs More Images
A few more images would make this guide's procedures crystal clear.
Introduction
Go to step 1 ↓This repair guide will take you through the steps to replace the display assembly on the HP Pavilion 14-cf0014dx. This guide will be useful for those who have issues with their display. This could be if the screen is cracked, physically damaged, or if it is not turning on at all. It is important to note that this guide will replace the entire assembly and not only the LCD screen.
Before you begin the repair, make sure your laptop is powered off and unplug it from the charger.
What you need
Tools
-
Spudger4.9


-
-
-
Flip the device over so that the backside is facing you.
-
Remove the rubber feet to expose six screws.
-
Using the Phillips #1 screwdriver, remove six screws securing the back panel to the device.
 Ask FixBot
-
-
-
Insert a plastic opening tool and run it along the edges of the laptop.
-
Remove the back panel from the device.
-
-
-
-
-
Using the Phillips #0 screwdriver, remove the four screws securing the battery in place.
-
-
-
-
-
Use a Phillips #0 screwdriver to remove the 6.8 mm screws securing the hinges.
-
-
-
-
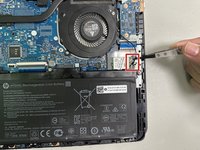
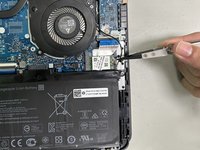
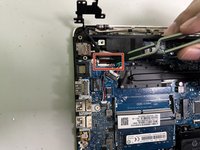
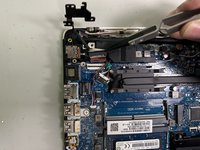
First, gently push the tip of a spudger under the metal buckle of the display cable connector to unclip it, then swing it over the socket.
-
Next, hold the buckle and cable together and gently pull the connector straight out of its socket.
-
Grip the cable and buckle together and insert the connector fully into its socket.
-
Flip the buckle over the socket and use a spudger to press the buckle down until it clicks into place.
-
-





To reassemble your device, follow these instructions in reverse order. Take your e-waste to an R2 or e-Stewards certified recycler.

Team

University of North Texas, Team 1-1, Coppersmith Spring 2024 Member of University of North Texas, Team 1-1, Coppersmith Spring 2024
UNT-COPPERSMITH-S24S1G1
4 Members
48 Guides authored
