Introduction
This guide provides details to restore life to your HP Pavilion 13-p110nr by replacing the faulty screen. Before you begin, make sure you have adequately troubleshooted how to change the screen using this Troubleshooting Page. In addition, make sure you have read through all the steps required and understand what you will be doing. While replacing the screen, watch out for smalls pieces of broken glass during the process. If you don't understand or feel comfortable completing any of the steps, find someone with more experience to assist you with this guide.
What you need
-
-
-
Detach the wires from the green circuit boards located at the bottom.
-
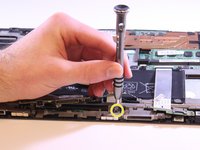
Remove three 3.0 mm #00 Philips screws from the circuit board on the left.
-
Remove two 4.0 mm #00 Philips screws from the small circuit board on the right.
-
-
-
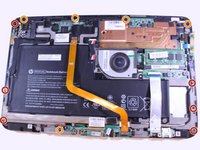
Remove six 4.0 mm Philips #00 screws from the outside of the frame.
-
Remove five 3.0 mm Philips #00 screws from the outside of the frame.
-
Remove the one 3.0 mm Philips #00 screw hidden under the circuit board.
-
-
-
-
Remove the band that is attached to the circuit board, located on the right side.
-
-
-
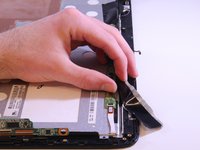
Lift the frame and attached hardware from two corners of the frame.
-
Remove the frame from the device.
-
-
-
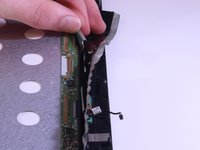
Remove the tape located at the top of the frame.
-
Remove the bands from underneath the tape.
-
-
-
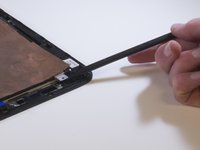
Use the spudger to lift the case, which is attached at four spots by pegs.
-
Remove the metal cover and layers of film.
-
-
-
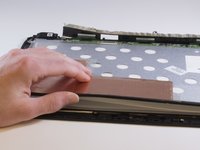
After you get some space at the top of the screen, proceed by using a thin board to gently remove the screen from the frame.
-

 Ask FixBot








To reassemble your device, follow these instructions in reverse order.
Cancel: I did not complete this guide.
2 other people completed this guide.

Team

Eastern Washington University, Team S2-G5, Munoz Winter 2018 Member of Eastern Washington University, Team S2-G5, Munoz Winter 2018
EWU-MUNOZ-W18S2G5
4 Members
60 Guides authored
