Introduction
What is this guide for?
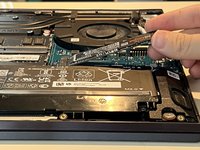
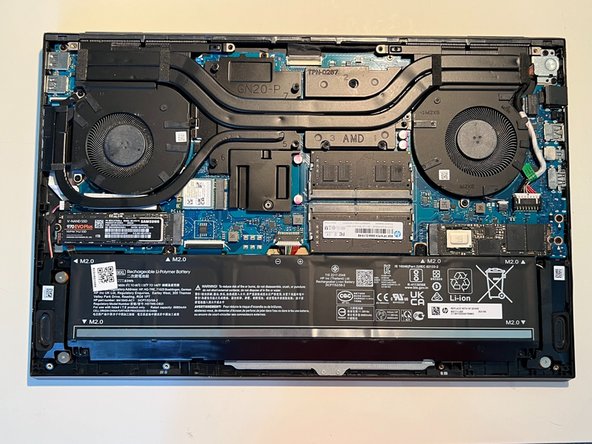
This guide is for replacing and/or upgrading the M.2 NVMe SSD Hard Drive on the HP Omen 16 Series Laptops.
Do I need this repair?
If you have malfunctions and issues with your hard drive or if you are looking to upgrade storage on your laptop, this is the perfect guide for you!
What tools do I need?
The tools that are required to perform this repair are:
- Philips Head Screwdriver
- A Plastic Card (Can be any plastic card).
- One spare M.2 NVMe SSD Hard Drive
*A tool that I may recommend is a compressed gas canister to dust off any particles or dust on your laptop. However, this is not required.
How difficult is this repair?
Replacing and/or upgrading the hard drive on the HP Omen 16 Series Laptops is not very difficult. The estimated completion time of this repair should be around 5 minutes and should take no longer than 10 minutes.
What you need
-
Tool used on this step:Plastic Cards$2.99
-
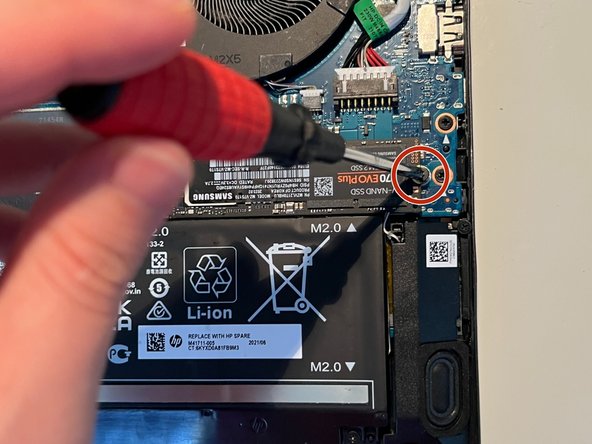
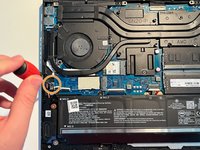
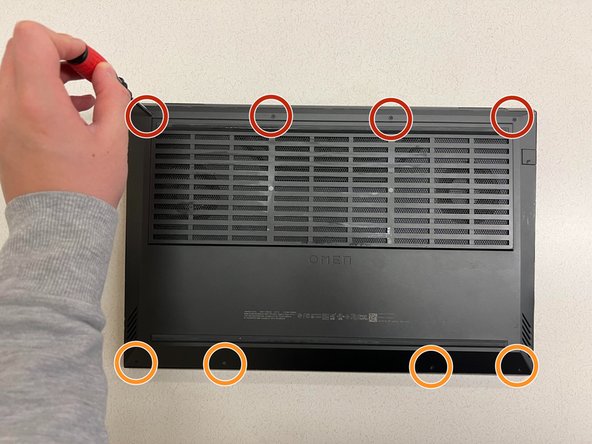
Remove the four 8 mm screws from the back panel of the laptop using a Phillips #1 screwdriver.
-
Remove the four 5 mm screws from the back panel of the laptop using a Phillips #1 screwdriver.
-
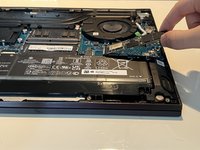
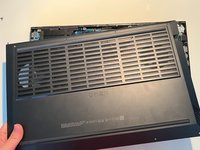
Slide a small plastic card between the crevice of the back panel of the laptop and the laptop itself.
-
Turn the card clockwise until you have a wide gap between the back panel and the laptop. Repeat this step all around the laptop to remove the back panel.
-
-


Cancel: I did not complete this guide.
9 other people completed this guide.

Team

CSU Los Angeles, Team 4-11, Kershman Fall 2023 Member of CSU Los Angeles, Team 4-11, Kershman Fall 2023
CSULA-KERSHMAN-F23S4G11
1 Member
2 Guides authored
2 Guide Comments
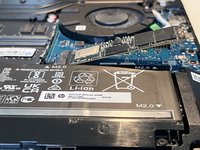
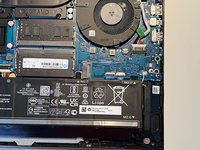
Take note that different modelnumbers in the 16 series might not have a secondary M.2 slot.
The pictures in the guide seem to be from the 16-k series (2022) while the 16-wd (2023) only has 1 slot according to other sources.
Mine has 2 slots. The piece of plastic like acushion or pillow that sits there should not be removed I think....