Introduction
This guide is designed to replace the touchpad on a HP Mini 110-3131dx laptop. This guide is important because by simply replacing the touchpad, you'd save the need of buying an external mouse. The problems this guide would likely solve are random clicking, the cursor not moving, or some parts of the touchpad's input not being registered. This guide will walk you through safely removing and replacing your faulty touchpad, allowing for you to get back to having smooth and reliable navigation.
The touchpad is the main input device used to control the cursor on the laptop. When it becomes faulty, it can significantly impact usability by preventing accurate movement or click functions. Before beginning this repair, make sure that the issue isn't in the settings or an accidental disabling of the touchpad itself. You may also test it with an external mouse to confirm that the problem is just the touchpad. This guide will require partial disassembly of the laptop, including removing the keyboard and accessing internal components. You will be working with small screws and delicate ribbon cables, so extra care should be taken when handling and disconnecting these parts to avoid damage.
Before beginning, make sure the laptop is completely powered off, unplugged, and the battery is removed. This is recommended to prevent damage to internal components.
What you need
-
-
Power off the laptop before trying to remove the battery.
-
Turn the laptop upside down, and locate the sliding tabs on the battery.
-
Slide both tabs in an inward direction, then slide the battery away from the laptop.
 Ask FixBot
-
-
-
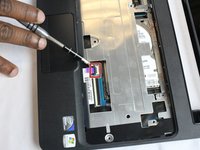
Remove the three black screws marked by the keyboard symbol using a Phillips #1 screwdriver.
-
-
-
Turn the laptop upright and open it.
-
Disconnect the clips located around the perimeter of the keyboard.
-
Slide the iFixit opening tool between the top edge of the keyboard and the plastic bezel.
-
Pull the keyboard with your fingers until it comes out on both sides.
-
-
-
Tilt the keyboard toward you to reveal the ribbon cable.
-
Lift up the black tab on top of the keyboard ribbon cable to release the ribbon cable.
-
Pull the ribbon cable out of its container.
-
-
-
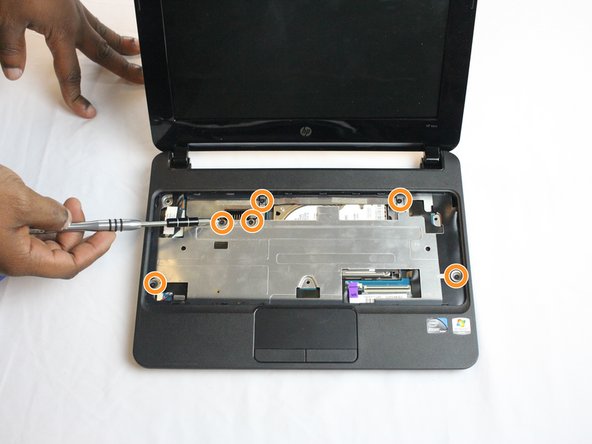
Remove the six black screws around the perimeter of the laptop using a Phillips #1 screwdriver.
-
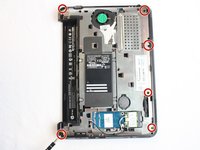
Flip the laptop over and remove the six black screws.
-
-
-
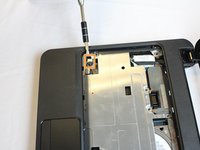
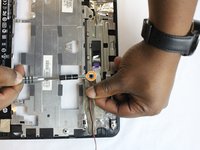
Using your fingernail or the iFixit opening tool, flip the black tab up to release the ribbon cable that connects the touchpad and motherboard.
-
Disconnect the red and black wires from the motherboard on the left-hand side of the bezel using your fingernail or iFixit opening tool.
-
-
-
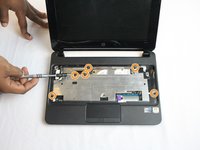
Lift the keyboard bezel from the back end and slide the iFixit opening tool around the perimeter of the bezel until it is fully released.
-
-
-
Turn the keyboard so that the touchpad is close to you.
-
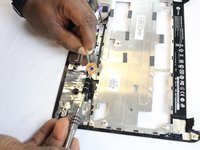
Detach the ribbon cable from the connector on the touchpad circuit board using your fingernail or an opening tool.
-
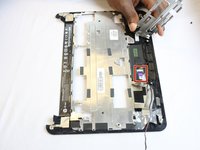
Remove the four 2.9 mm screws from the bracket using a Phillips #0 screwdriver.
-
Remove the touchpad from the top of the keyboard bezel on the touch-sensitive side.
-


To reassemble your device, follow these instructions in reverse order. Take your e-waste to an R2 or e-Stewards certified recycler.
Cancel: I did not complete this guide.
2 other people completed this guide.
Team

USF Tampa, Team 2-4, Cagle Fall 2016 Member of USF Tampa, Team 2-4, Cagle Fall 2016
USFT-CAGLE-F16S2G4
5 Members
10 Guides authored