
HP G71t-400 Hard Drive Replacement

Nicholas Castro and 5 other contributors
Last updated on Feb 24, 2020
Views: 537
View statistics:
- Past 24 Hours:
- 1
- Past 7 Days:
- 17
- Past 30 Days:
- 65
- All Time:
- 537
Comments: 0
No one has left comments on this guide. Will you be first?
Go to guide commentsCompleted: 0 1
No one has marked this guide "completed." Will you be the first?
1 person has marked this guide "completed." It's you — great job!
Favorites: 1 2
1 person has favorited (and subscribed to) this guide. Will you be next?
2 people have favorited (and subscribed to) this guide — including you!
Introduction
Go to step 1 ↓The hard drive is responsible for data storage in the laptop. If this drive becomes corrupted by physical damage or from a software issue, it could prevent your computer from booting properly, and would need to be replaced. You might also find that your computer functions, but has become full on storage. In this case, a hard drive upgrade will allow your computer to keep more data accessible for regular use, and can convert the old hard drive to an external storage device.
This guide will go through the process of removing the hard drive in the HP G71t-400, which is an important task to get right to guarantee your data is not lost. Back up your data on an alternate hard drive before attempting to replace the drive if possible, as this can prevent data being lost in case of damage to the disk. Following the procedure completely is crucial to successful replacement.
What you need
Tools


-
-
-
Make sure to completely power off your notebook before continuing. Lay the laptop down so the bottom is facing up.
-
Push the slide button, located below the battery, leftwards to release the battery.
-
Lift and tilt the battery up and away from the notebook to ensure it releases nicely.
-
After the battery is removed hold the power button down for 10-15 seconds to discharge all capacitors
-
This ensures there is no power in the system that could potentially short out any components.
 Ask FixBot
-
-
-
Unscrew the 4 circled screws using the PH1 screwdriver to release the cover plate. Remove the screws and set aside.
-
Lift and remove the cover plate to expose the disk drive. Set aside by the screws.
-
-
-
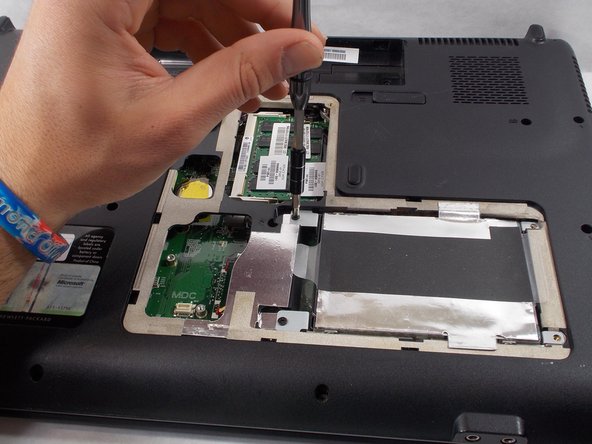
Unscrew and remove the 2 circled screws. Set these screws aside, but keep them separate from the cover plate screws.
-
Before touching the disk drive make sure to follow the precautions for handling electrostatic sensitive devices. This will help ensure you do not damage the disk drive and lose your data.
-
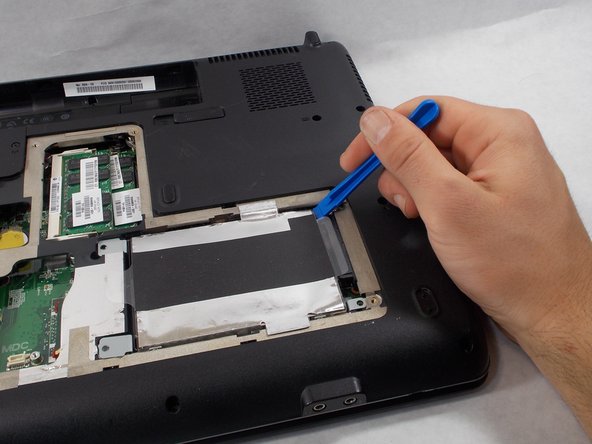
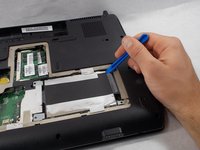
After following the precautions, slide the disk drive over so that it disconnects from the disk drive port. An opening tool can be used to help with this but the tool cannot be made of metal or conductive materials
-
-
-



To install replacement and reassemble your device, carefully follow these instructions in reverse order. When doing so, make sure to observe precautions for handling electrostatic sensitive devices.

Team

UMass Dartmouth, Team S1-G5, Simcock Spring 2019 Member of UMass Dartmouth, Team S1-G5, Simcock Spring 2019
UMASSD-SIMCOCK-S19S1G5
2 Members
72 Guides authored
