Free Shipping on Domestic Orders $75+

HP G62 347NR Motherboard Replacement

What you need

    1. HP G62 347NR Motherboard Replacement, Keyboard: step 1, image 1 of 1
      • Make sure the device is turned off before removing the battery to avoid loss or corruption of files.

      • Turn the device over so the bottom is facing up.

      • Slide the battery release to the left until you hear a click.

      • Once you hear a click, the battery will have been released from the battery compartment.

      Ask FixBot

      Add Comment

    2. HP G62 347NR Motherboard Replacement: step 2, image 1 of 1
      • Remove the battery, carefully, from the compartment.

      Ask FixBot

      Add Comment

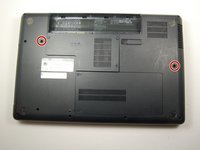
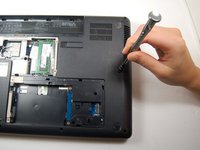
    3. HP G62 347NR Motherboard Replacement: step 3, image 1 of 2 HP G62 347NR Motherboard Replacement: step 3, image 2 of 2
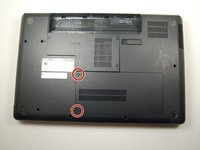
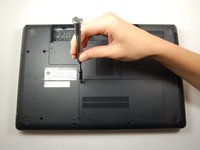
      • Find the hard drive compartment with two Phillips head screws.

      • Use the PH1 screwdriver to loosen and remove both screws.

      • Gently remove the hard drive compartment.

      Ask FixBot

      Add Comment

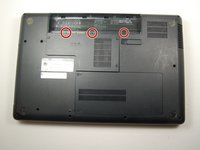
    4. HP G62 347NR Motherboard Replacement: step 4, image 1 of 2 HP G62 347NR Motherboard Replacement: step 4, image 2 of 2
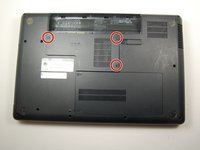
      • Locate the three Phillips head screws on the compartment with the wifi and keyboard logos.

      • Using the Phillips #1 screwdriver, remove the three screws.

      Ask FixBot

      Add Comment

    5. HP G62 347NR Motherboard Replacement: step 5, image 1 of 2 HP G62 347NR Motherboard Replacement: step 5, image 2 of 2
      • Locate the two keyboard logos on back of the computer.

      • Find the Phillips head screws in the hole next to the logo.

      • Remove the two screws using a Phillips #1 screwdriver.

      Ask FixBot

      Add Comment

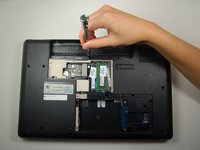
    6. HP G62 347NR Motherboard Replacement: step 6, image 1 of 2 HP G62 347NR Motherboard Replacement: step 6, image 2 of 2
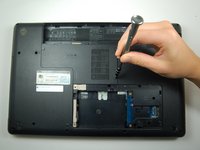
      • In the battery compartment, locate the three keyboard logos.

      • Find the Phillips head screws next to each logo.

      • Remove the three screws using the Phillips #1 screwdriver.

      Ask FixBot

      Add Comment

    7. HP G62 347NR Motherboard Replacement: step 7, image 1 of 2 HP G62 347NR Motherboard Replacement: step 7, image 2 of 2
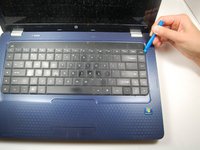
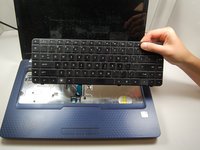
      • Place the plastic opening tool between the keyboard and the motherboard.

      • Gently pry the entire keyboard up and away from the laptop's motherboard.

      • Once you have part of the keyboard separated, run your fingers around the edge of the keyboard to separate the entire thing.

      Ask FixBot

      Add Comment

    1. HP G62 347NR Motherboard Replacement, Remove palmrest: step 8, image 1 of 3 HP G62 347NR Motherboard Replacement, Remove palmrest: step 8, image 2 of 3 HP G62 347NR Motherboard Replacement, Remove palmrest: step 8, image 3 of 3
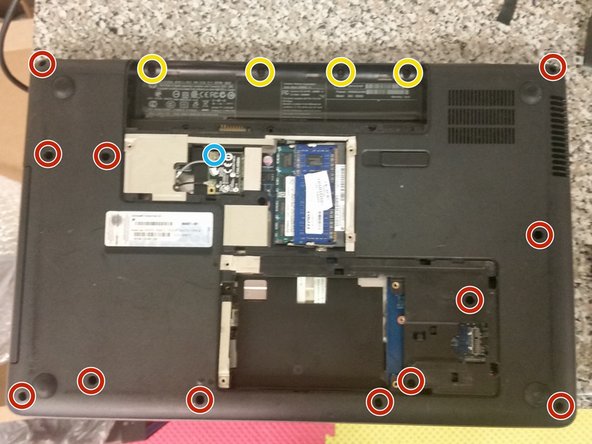
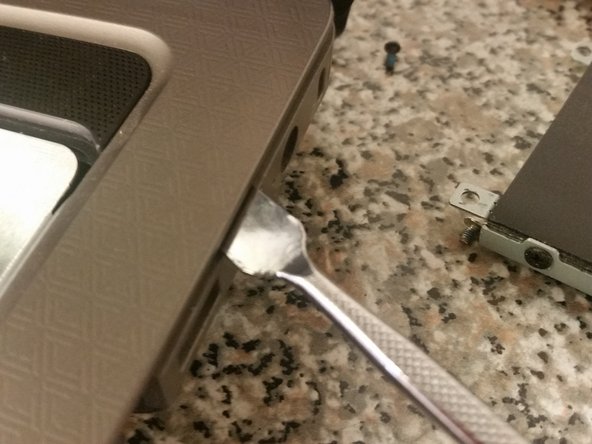
      • Remove the single M2.5x5 blue-painted screw securing the palmrest, from under where the keyboard was.

      • Remove the connectors from the motherboard.

      • Close the laptop's screen, and flip the laptop over.

      • Remove the twelve M2.5x6.5 red-painted screws.

      • Remove the four M2.5x3 screws securing the palmrest to the base.

      • Remove the screw for the wireless card, as well as the wireless antennas, and take the wireless card out.

      Ask FixBot

      Add Comment

    2. HP G62 347NR Motherboard Replacement, Remove motherboard: step 9, image 1 of 1
      • Remove the two blue-painted M2.5x4 screws securing the motherboard to the base.

      • Remove all connectors from the motherboard.

      • Transfer your heatsink, processor, and memory to the replacement board. You're done!

      Ask FixBot

      Add Comment

Conclusion

To reassemble your device, follow these instructions in reverse order.

Cancel: I did not complete this guide.

Joseph Sctbunio

Member since: 09/23/17

7,914 Reputation

42 Guides authored

0 Guide Comments

Add Comment

View Statistics:

Past 24 Hours: 0

Past 7 Days: 14

Past 30 Days: 43

All Time: 1,918