Introduction
RAM can wear over time leading to blue screen of death, corrupt files, and other issues. In addition, faulty RAM may lead to slower computer loading times and can affect the overall performance of a computer. If you’re looking to replace or upgrade the RAM in your device, use the steps in this guide to replace the RAM in your laptop.
What you need
-
-
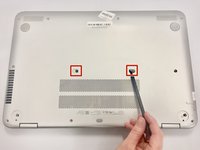
Pry off the 2 rear rubber pads (closest to the laptop hinge) using the plastic opening tool to reveal two screws.
-
Remove the 2 anti-tamper proof covers using the spudger to reveal two screws.
 Ask FixBot
-
-
-
Remove the fourteen 7mm screws using the Phillips #0 screwdriver from the bottom of the laptop.
-
-
-
Turn the device right side up and open the lid.
-
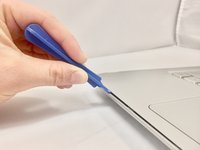
Insert the plastic opening tool in between the keyboard plate and the base of laptop.
-
Run the tool along seem, prying up as you go.
-
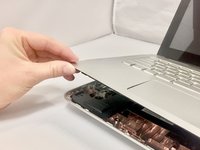
Separate the keyboard plate from the base, lifting from the front.
-
-
-
There are 3 ribbon cables (black, white, and copper color) connecting the computer to the keyboard plate. Disconnect the 3 ribbon cables using the plastic opening tool by prying up the latches holding each cable in place.
-
Remove the keyboard plate from the device.
-
-
-
Remove the thick white ribbon cable covering the battery using the plastic opening tool by prying up the latches attaching each end.
-
-
-
-
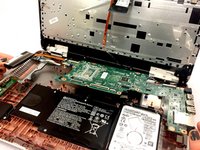
Disconnect the battery from the motherboard.
-
There may be tamper-proof tape holding the battery in place. Remove the tape if present.
-
Remove the battery from the device.
-
-
-
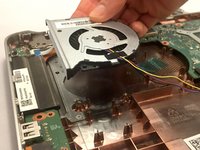
Remove the three 4mm screws using the Phillips #0 screwdriver from the device fan.
-
-
-
Disconnect the fan from the motherboard using the spudger.
-
Remove the fan from the device.
-
-
-
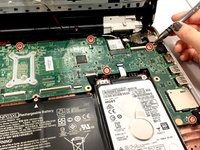
Remove the five 4mm screws with the Phillips #0 screwdriver.
-
Remove one 3mm screw with the Phillips #00 screwdriver.
-
-
-
Disconnect the 2 white ribbon cables using the plastic opening tool.
-
Disconnect the two black cable bundles using the plastic opening tool.
-
-
-
Disconnect the charging port wire bundle from the motherboard using the plastic opening tool.
-
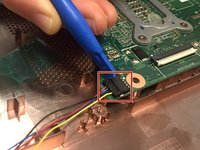
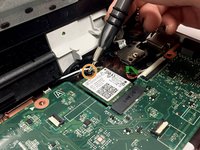
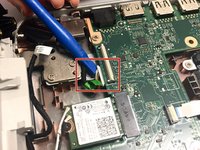
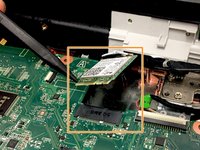
Disconnect the wireless card by pulling away from the black transistor using the spudger.
-
Remove the motherboard.
-
-
-
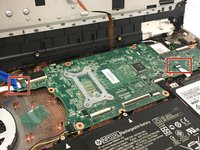
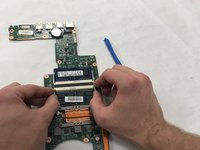
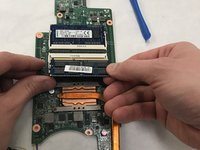
Use both fingers to push the tabs to the side and release the RAM.
-
Remove the RAM chip by pulling away from the connector.
-


To reassemble your device, follow these instructions in reverse order.
Cancel: I did not complete this guide.
2 other people completed this guide.

Team

IUPUI, Team S3-G3, Harley Fall 2019 Member of IUPUI, Team S3-G3, Harley Fall 2019
IUPUI-HARLEY-F19S3G3
3 Members
2 Guides authored