Free Shipping on Domestic Orders $75+

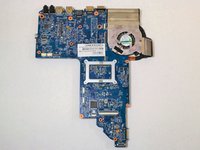
HP Envy dv7t-7200 Fan Replacement

What you need

    1. HP Envy dv7t-7200 Fan Replacement, Battery: step 1, image 1 of 1
      • Turn the power off and disconnect all cables and cords from the laptop.

      • Place the computer on its top on a flat surface with the hinges facing away from you.

      Ask FixBot

      Add Comment

    2. HP Envy dv7t-7200 Fan Replacement: step 2, image 1 of 3 HP Envy dv7t-7200 Fan Replacement: step 2, image 2 of 3 HP Envy dv7t-7200 Fan Replacement: step 2, image 3 of 3
      • Slide the battery release latch to the left which is located on the right-hand side of the battery.

      Ask FixBot

      Add Comment

    3. HP Envy dv7t-7200 Fan Replacement: step 3, image 1 of 1
      • Tilt the battery away from you and lift out.

      Ask FixBot

      Add Comment

    1. HP Envy dv7t-7200 Fan Replacement, Service Cover: step 4, image 1 of 1
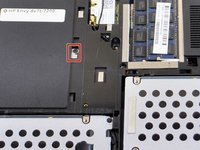
      • Using a Phillips #01 screwdriver, remove the Phillips PM2.5×5.5 screw on the service cover.

      • This screw does not come out of the service cover completely once loosened.

      Ask FixBot

      Add Comment

    2. HP Envy dv7t-7200 Fan Replacement: step 5, image 1 of 2 HP Envy dv7t-7200 Fan Replacement: step 5, image 2 of 2
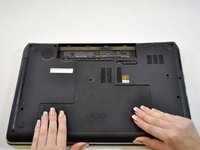
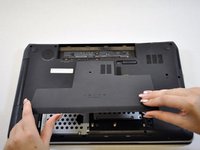
      • Slide the service cover toward the front of the laptop.

      • Lift the service cover to remove it from the laptop.

      Ask FixBot

      Add Comment

    1. HP Envy dv7t-7200 Fan Replacement, Hard Drive: step 6, image 1 of 1
      • Remove the 2 Phillips PM2.5×5.5 top screws from brackets on both hard drives.

      Ask FixBot

      Add Comment

    2. HP Envy dv7t-7200 Fan Replacement: step 7, image 1 of 1
      • Remove the primary drive first located on the right hand side.

      • Use the black tab to lift the drive up and out.

      Ask FixBot

      Add Comment

    3. HP Envy dv7t-7200 Fan Replacement: step 8, image 1 of 1
      • Remove the 2 Phillips PM2.5×5.5 screws on each side of the drive bracket.

      Ask FixBot

      Add Comment

    4. HP Envy dv7t-7200 Fan Replacement: step 9, image 1 of 1
      • Remove the hard drive connector cable.

      • This cable can be difficult to remove. Try to pull this cable firmly and carefully.

      Ask FixBot

      Add Comment

    5. HP Envy dv7t-7200 Fan Replacement: step 10, image 1 of 1
      • Repeat steps 6-9 for the secondary hard drive.

      Ask FixBot

      Add Comment

    1. HP Envy dv7t-7200 Fan Replacement, Optical Disc Drive: step 11, image 1 of 1
      • Remove the Phillips PM2.5×4.0 screw that attaches the optical drive to the laptop.

      Ask FixBot

      Add Comment

    2. HP Envy dv7t-7200 Fan Replacement: step 12, image 1 of 2 HP Envy dv7t-7200 Fan Replacement: step 12, image 2 of 2
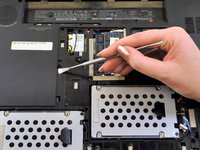
      • Press the tab with a metal spudger that is located next to the screw to release the optical drive.

      Ask FixBot

      Add Comment

    3. HP Envy dv7t-7200 Fan Replacement: step 13, image 1 of 2 HP Envy dv7t-7200 Fan Replacement: step 13, image 2 of 2
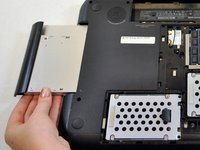
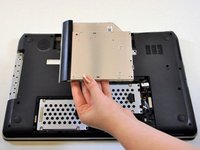
      • Slide the disk drive out of the laptop.

      Ask FixBot

      Add Comment

    1. HP Envy dv7t-7200 Fan Replacement, Keyboard Assembly: step 14, image 1 of 1
      • Place the laptop on it’s top

      • Remove the two screws that secure the keyboard to the laptop.

      Ask FixBot

      Add Comment

    2. HP Envy dv7t-7200 Fan Replacement: step 15, image 1 of 1
      • Stand the laptop on it’s left side with it’s top open.

      • Locate the circular opening in the optical drive slot.

      • Using a plastic opener, press on the keyboard through this opening until it lifts the keyboard away.

      Ask FixBot

      Add Comment

    3. HP Envy dv7t-7200 Fan Replacement: step 16, image 1 of 1
      • Place the laptop on it’s back with the front facing you.

      • Using a plastic opener, lift the back of the keyboard towards you releasing it from the lip that holds it.

      • You will hear slight popping noises as the keyboard separates.

      Ask FixBot

      Add Comment

    4. HP Envy dv7t-7200 Fan Replacement: step 17, image 1 of 1
      • The keyboard is still attached by two ribbon cables. Lift the keyboard slowly during this step.

      • Lift keyboard up and place upside down on laptop.

      Ask FixBot

      Add Comment

    5. HP Envy dv7t-7200 Fan Replacement: step 18, image 1 of 1
      • Release the connectors that attach the keyboard to the laptop.

      Ask FixBot

      Add Comment

    6. HP Envy dv7t-7200 Fan Replacement: step 19, image 1 of 1
      • Remove the keyboard.

      Ask FixBot

      Add Comment

    1. HP Envy dv7t-7200 Fan Replacement, Motherboard: step 20, image 1 of 1
      • Disconnect the four tabs shown from the laptop.

      Ask FixBot

      Add Comment

    2. HP Envy dv7t-7200 Fan Replacement: step 21, image 1 of 1
      • Remove the screw located to the upper left of the disc drive.

      Ask FixBot

      Add Comment

    3. HP Envy dv7t-7200 Fan Replacement: step 22, image 1 of 1
      • Pry open the top panel of the laptop with a metal spudger.

      Ask FixBot

      Add Comment

    4. HP Envy dv7t-7200 Fan Replacement: step 23, image 1 of 1
      • Remove the screws that hold the motherboard to the frame

      Ask FixBot

      Add Comment

    5. HP Envy dv7t-7200 Fan Replacement: step 24, image 1 of 2 HP Envy dv7t-7200 Fan Replacement: step 24, image 2 of 2
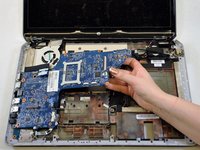
      • Lift the right side of the motherboard

      • Slide the motherboard at this angle toward the right

      Ask FixBot

      Add Comment

    6. HP Envy dv7t-7200 Fan Replacement: step 25, image 1 of 2 HP Envy dv7t-7200 Fan Replacement: step 25, image 2 of 2
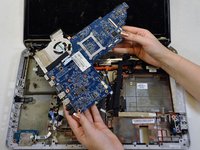
      • Turn the motherboard over

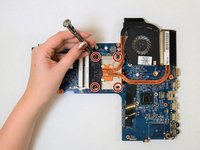
      • Remove the screws that hold the motherboard and the fan together.

      Ask FixBot

      Add Comment

Conclusion

To reassemble your device, follow these instructions in reverse order.

Cancel: I did not complete this guide.

One other person completed this guide.

Krystal

Member since: 10/16/17

885 Reputation

8 Guides authored

Team

UW Tacoma, Team S3-G3, Liner Fall 2017 Member of UW Tacoma, Team S3-G3, Liner Fall 2017

UWT-LINER-F17S3G3

5 Members

96 Guides authored

0 Guide Comments

Add Comment

View Statistics:

Past 24 Hours: 0

Past 7 Days: 3

Past 30 Days: 24

All Time: 1,215