Free Shipping on Domestic Orders $75+

HP Envy 4-1105dx Hard Drive Replacement

What you need

    1. HP Envy 4-1105dx  Hard Drive Replacement, Battery: step 1, image 1 of 1
      • Power off the device before beginning disassembly. Disconnect all external devices.

      • Flip the device on its back.

      Ask FixBot

      Add Comment

    2. HP Envy 4-1105dx  Hard Drive Replacement: step 2, image 1 of 1
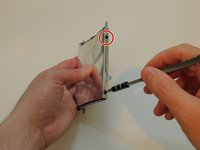
      • Unscrew and remove the one 7.5 mm Phillips-head screw using Phillips #1 screwdriver.

      Ask FixBot

      Add Comment

    3. HP Envy 4-1105dx  Hard Drive Replacement: step 3, image 1 of 1
      • Unscrew twelve 6.0 mm Phillips-head screws using Phillips #1 screwdriver.

      Ask FixBot

      Add Comment

    4. HP Envy 4-1105dx  Hard Drive Replacement: step 4, image 1 of 1
      • Use the plastic opening tool (which is short and has a thin end for prying open device parts) to pry open the back case of the device.

      Ask FixBot

      Add Comment

    5. HP Envy 4-1105dx  Hard Drive Replacement: step 5, image 1 of 1
      • Once the device is open, move the ribbon cable to the side.

      Ask FixBot

      Add Comment

    6. HP Envy 4-1105dx  Hard Drive Replacement: step 6, image 1 of 1
      • Use the flat end of a plastic spudger to disconnect the battery cable from its socket in the motherboard.

      Ask FixBot

      Add Comment

    7. HP Envy 4-1105dx  Hard Drive Replacement: step 7, image 1 of 1
      • Unscrew and remove the three 4.0 mm Phillips-head screws that hold the battery in place, using a Phillips #1 screwdriver.

      Ask FixBot

      Add Comment

    8. HP Envy 4-1105dx  Hard Drive Replacement: step 8, image 1 of 1
      • Lift the battery up and remove.

      • Removing the battery can dislodge the touchpad bracket. Place the battery carefully over the alignment pins.

      Ask FixBot

      Add Comment

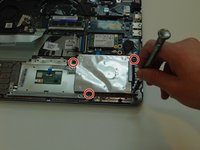
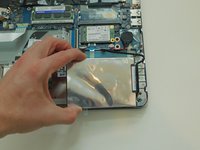
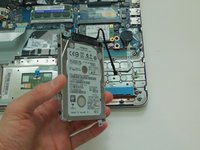
    1. HP Envy 4-1105dx  Hard Drive Replacement, Hard Drive: step 9, image 1 of 2 HP Envy 4-1105dx  Hard Drive Replacement, Hard Drive: step 9, image 2 of 2
      • Remove the four 4.0 mm screws that hold down the hard drive case using a Philips #1 Screwdriver.

      • Move the hard drive case and hard drive so that you can easily reach the hard drive cable.

      Ask FixBot

      Add Comment

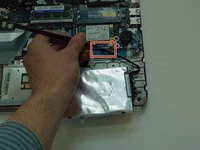
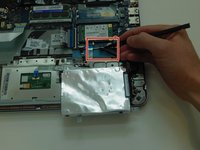
    2. HP Envy 4-1105dx  Hard Drive Replacement: step 10, image 1 of 3 HP Envy 4-1105dx  Hard Drive Replacement: step 10, image 2 of 3 HP Envy 4-1105dx  Hard Drive Replacement: step 10, image 3 of 3
      • Use the plastic spudger tool to loosen the hard drive SATA cable connection by pushing it away from the motherboard.

      • Once it is loose, pull the hard drive out of the socket.

      • Remove the hard drive from the device.

      Ask FixBot

      Add Comment

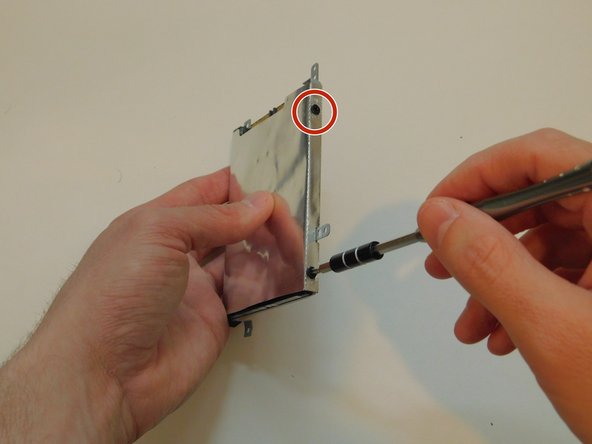
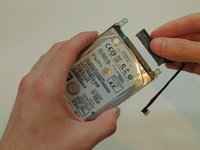
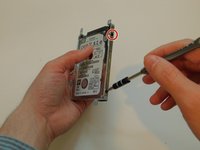
    3. HP Envy 4-1105dx  Hard Drive Replacement: step 11, image 1 of 3 HP Envy 4-1105dx  Hard Drive Replacement: step 11, image 2 of 3 HP Envy 4-1105dx  Hard Drive Replacement: step 11, image 3 of 3
      • Pull out the hard drive cable from the hard drive, and set it aside.

      • Remove the four 3.0 mm screws that attach the hard drive case to the hard drive using a Philips #1 Screwdriver. If the screwdriver is too big, try #0 sized screwdriver.

      Ask FixBot

      Add Comment

    4. HP Envy 4-1105dx  Hard Drive Replacement: step 12, image 1 of 1
      • Remove the hard drive from the hard drive case.

      Ask FixBot

      Add Comment

Conclusion

To reassemble your device, follow these instructions in reverse order.

Cancel: I did not complete this guide.

3 other people completed this guide.

KC Armstrong

Member since: 10/03/17

204 Reputation

2 Guides authored

0 Guide Comments

Add Comment

View Statistics:

Past 24 Hours: 2

Past 7 Days: 19

Past 30 Days: 97

All Time: 1,303