Free Shipping on Domestic Orders $75+

HP Envy 15-u001dx Chassis Replacement

What you need

    1. HP Envy 15-u001dx Chassis Replacement, Motherboard: step 1, image 1 of 3 HP Envy 15-u001dx Chassis Replacement, Motherboard: step 1, image 2 of 3 HP Envy 15-u001dx Chassis Replacement, Motherboard: step 1, image 3 of 3
      • Flip the device over so the bottom is is facing up.

      • Peel up the two rubber feet closest to the hinge using the metal spudger to reveal two 6.6 mm Phillips #0 screws.

      Ask FixBot

      Add Comment

    2. HP Envy 15-u001dx Chassis Replacement: step 2, image 1 of 2 HP Envy 15-u001dx Chassis Replacement: step 2, image 2 of 2
      • Peel up the small plastic coverings in the middle of the device with the spudger to reveal two more 6.6 mm Phillips #0 screws.

      Ask FixBot

      Add Comment

    3. HP Envy 15-u001dx Chassis Replacement: step 3, image 1 of 2 HP Envy 15-u001dx Chassis Replacement: step 3, image 2 of 2
      • Remove each of the fourteen 6.6 mm Phillips #0 screws with the Philips #0 screwdriver.

      Ask FixBot

      Add Comment

    4. HP Envy 15-u001dx Chassis Replacement: step 4, image 1 of 1
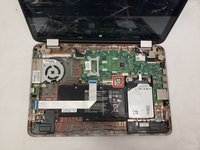
      • Flip the device over and open it to reveal the keyboard.

      • Use the metal spudger to pry the chassis apart and reveal the inside of the device.

      Ask FixBot

      Add Comment

    5. HP Envy 15-u001dx Chassis Replacement: step 5, image 1 of 3 HP Envy 15-u001dx Chassis Replacement: step 5, image 2 of 3 HP Envy 15-u001dx Chassis Replacement: step 5, image 3 of 3
      • Disconnect the T/P cable by flipping up the black plastic piece on the connector and pulling the cable out of the connector.

      Ask FixBot

      Add Comment

    6. HP Envy 15-u001dx Chassis Replacement: step 6, image 1 of 3 HP Envy 15-u001dx Chassis Replacement: step 6, image 2 of 3 HP Envy 15-u001dx Chassis Replacement: step 6, image 3 of 3
      • Disconnect the keyboard cable by flipping up the black plastic piece on the connector and pulling the cable out of the connector.

      Ask FixBot

      Add Comment

    7. HP Envy 15-u001dx Chassis Replacement: step 7, image 1 of 3 HP Envy 15-u001dx Chassis Replacement: step 7, image 2 of 3 HP Envy 15-u001dx Chassis Replacement: step 7, image 3 of 3
      • Disconnect the battery cable by flipping up the black plastic piece on the connector and pulling the cable out of the connector.

      Ask FixBot

      Add Comment

    8. HP Envy 15-u001dx Chassis Replacement: step 8, image 1 of 3 HP Envy 15-u001dx Chassis Replacement: step 8, image 2 of 3 HP Envy 15-u001dx Chassis Replacement: step 8, image 3 of 3
      • Disconnect the AUX/USB cable by flipping up the black plastic piece on the connector and pulling the cable out of the connector.

      Ask FixBot

      Add Comment

    9. HP Envy 15-u001dx Chassis Replacement: step 9, image 1 of 3 HP Envy 15-u001dx Chassis Replacement: step 9, image 2 of 3 HP Envy 15-u001dx Chassis Replacement: step 9, image 3 of 3
      • Disconnect the cable by flipping up the black plastic piece on the connector and pulling the cable out of the connector.

      Ask FixBot

      Add Comment

    10. HP Envy 15-u001dx Chassis Replacement: step 10, image 1 of 3 HP Envy 15-u001dx Chassis Replacement: step 10, image 2 of 3 HP Envy 15-u001dx Chassis Replacement: step 10, image 3 of 3
      • Disconnect the cable by flipping up the black plastic piece on the connector and pulling the cable out of the connector.

      Ask FixBot

      Add Comment

    11. HP Envy 15-u001dx Chassis Replacement: step 11, image 1 of 3 HP Envy 15-u001dx Chassis Replacement: step 11, image 2 of 3 HP Envy 15-u001dx Chassis Replacement: step 11, image 3 of 3
      • Disconnect the cable by flipping up the black plastic piece on the connector and pulling the cable out of the connector.

      Ask FixBot

      Add Comment

    12. HP Envy 15-u001dx Chassis Replacement: step 12, image 1 of 3 HP Envy 15-u001dx Chassis Replacement: step 12, image 2 of 3 HP Envy 15-u001dx Chassis Replacement: step 12, image 3 of 3
      • Disconnect the cable by gently pulling it out. The spudger may be used to help loosen it.

      Ask FixBot

      Add Comment

    13. HP Envy 15-u001dx Chassis Replacement: step 13, image 1 of 3 HP Envy 15-u001dx Chassis Replacement: step 13, image 2 of 3 HP Envy 15-u001dx Chassis Replacement: step 13, image 3 of 3
      • Remove the three 4.0 mm Phillips #0 screws with the Phillips #0 screwdriver on the fan.

      • Disconnect the cable by gently pulling it out.

      • Remove the fan by pulling it out of the chassis.

      • The connector tends to get stuck and forceful pulling will break it. Use the spudger to loosen the connector on each side.

      Ask FixBot

      Add Comment

    14. HP Envy 15-u001dx Chassis Replacement: step 14, image 1 of 3 HP Envy 15-u001dx Chassis Replacement: step 14, image 2 of 3 HP Envy 15-u001dx Chassis Replacement: step 14, image 3 of 3
      • Disconnect the cable by gently pulling it out. The spudger may be used to help loosen it.

      • This connector may be hard to see because it is connected on the underside of the motherboard.

      Ask FixBot

      Add Comment

    15. HP Envy 15-u001dx Chassis Replacement: step 15, image 1 of 1
      • Remove each of the six 4.0 mm screws with the Philips #0 screwdriver.

      Ask FixBot

      Add Comment

    16. HP Envy 15-u001dx Chassis Replacement: step 16, image 1 of 1
      • Remove each of the three 4.0 mm screws around the fan with the Philips #0 screwdriver.

      • The fan will now be loose, and easy to lift out.

      Ask FixBot

      Add Comment

    17. HP Envy 15-u001dx Chassis Replacement: step 17, image 1 of 2 HP Envy 15-u001dx Chassis Replacement: step 17, image 2 of 2
      • Gently pry the heat sink loose to release the motherboard.

      Ask FixBot

      Add Comment

    18. HP Envy 15-u001dx Chassis Replacement: step 18, image 1 of 2 HP Envy 15-u001dx Chassis Replacement: step 18, image 2 of 2
      • Disconnect the wifi card from the motherboard and remove the motherboard from the rest of the device.

      Ask FixBot

      Add Comment

    19. HP Envy 15-u001dx Chassis Replacement: step 19, image 1 of 1
      • The disconnected motherboard should look like the indicated photo.

      Ask FixBot

      Add Comment

    1. HP Envy 15-u001dx Chassis Replacement, Chassis: step 20, image 1 of 3 HP Envy 15-u001dx Chassis Replacement, Chassis: step 20, image 2 of 3 HP Envy 15-u001dx Chassis Replacement, Chassis: step 20, image 3 of 3
      • Remove the three 4mm Phillips #0 screws that attach the battery to the chassis.

      • Once all three 4mm Phillips #0 screws are out, lift the battery out of the chassis.

      Ask FixBot

      Add Comment

    2. HP Envy 15-u001dx Chassis Replacement: step 21, image 1 of 2 HP Envy 15-u001dx Chassis Replacement: step 21, image 2 of 2
      • Carefully, use the spudger, to loosen the I/O port board connector.

      • Once the connector is loose, simply pull it away.

      Ask FixBot

      Add Comment

    3. HP Envy 15-u001dx Chassis Replacement: step 22, image 1 of 3 HP Envy 15-u001dx Chassis Replacement: step 22, image 2 of 3 HP Envy 15-u001dx Chassis Replacement: step 22, image 3 of 3
      • Remove the 4mm Phillips #0 screw that attaches the left speaker to the chassis.

      • Lift the left side speaker out of the chassis.

      • Remove the 4mm Phillips #0 screw that attaches the right speaker to the chassis.

      Ask FixBot

      Add Comment

    4. HP Envy 15-u001dx Chassis Replacement: step 23, image 1 of 3 HP Envy 15-u001dx Chassis Replacement: step 23, image 2 of 3 HP Envy 15-u001dx Chassis Replacement: step 23, image 3 of 3
      • Remove the 4mm Phillips #0 screw attaching the volume circuitry board to the chassis.

      • Once screw has been removed, then simply pull the circuitry board out.

      Ask FixBot

      Add Comment

    5. HP Envy 15-u001dx Chassis Replacement: step 24, image 1 of 2 HP Envy 15-u001dx Chassis Replacement: step 24, image 2 of 2
      • Remove the 4 mm Phillips #0 screws attaching the power button circuitry board to the chassis.

      • Once all the screws are removed, then simply pull the circuitry board out.

      Ask FixBot

      Add Comment

    6. HP Envy 15-u001dx Chassis Replacement: step 25, image 1 of 2 HP Envy 15-u001dx Chassis Replacement: step 25, image 2 of 2
      • Remove the two 4mm Phillips #0 screws that attach the storage device to the chassis.

      • Then pull up on the storage device to get it pop it out of the chassis.

      Ask FixBot

      Add Comment

    7. HP Envy 15-u001dx Chassis Replacement: step 26, image 1 of 1
      • Remove the 6.6mm Phillips #0 screws that attach the screen to the right side of the chassis.

      Ask FixBot

      Add Comment

    8. HP Envy 15-u001dx Chassis Replacement: step 27, image 1 of 2 HP Envy 15-u001dx Chassis Replacement: step 27, image 2 of 2
      • Remove the two 6.6mm Phillips #0 screws that attach the hinge to the chassis on the left side.

      Ask FixBot

      Add Comment

    9. HP Envy 15-u001dx Chassis Replacement: step 28, image 1 of 2 HP Envy 15-u001dx Chassis Replacement: step 28, image 2 of 2
      • After you remove the screen, all that is left is the chassis!

      Ask FixBot

      Add Comment

Conclusion

To reassemble your device, follow these instructions in reverse order.

Cancel: I did not complete this guide.

Samuel Olubakinde

Member since: 11/04/19

169 Reputation

1 Guide authored

Team

IUPUI, Team S1-G1, Henning Fall 2019 Member of IUPUI, Team S1-G1, Henning Fall 2019

IUPUI-HENNING-F19S1G1

3 Members

36 Guides authored

0 Guide Comments

Add Comment

View Statistics:

Past 24 Hours: 4

Past 7 Days: 9

Past 30 Days: 40

All Time: 1,716