
HP Elitebook 8570w Optical Drive Replacement

MJ Routh and 2 other contributors
Last updated on Dec 21, 2017
Views: 2.5K
View statistics:
- Past 24 Hours:
- 1
- Past 7 Days:
- 18
- Past 30 Days:
- 94
- All Time:
- 2,494
Comments: 0
No one has left comments on this guide. Will you be first?
Go to guide commentsCompleted: 0 1
No one has marked this guide "completed." Will you be the first?
1 person has marked this guide "completed." It's you — great job!
Favorites: 0 1
No one has favorited (and subscribed to) this guide. Will you be the first?
1 person has favorited (and subscribed to) this guide — and that's you!
Introduction
Go to step 1 ↓This replacement guide will show you how to disconnect the optical drive from your HP EliteBook 8570w. It consists of 4 relatively easy steps that should guide you successfully.
What you need
Tools

-
-
-
Begin by removing the computers back covering.
-
Use the right slider to unlock the backing.
-
Slide the backing towards you while holding the slider to remove it.
 Ask FixBot
-
-
-
Once the backing is removed, locate the panel to the left where the optical drive is stored.
-
Locate the single screw in the photo.
-
Unscrew the 0.8mm Phillips screw and place to the side.
-
-
-
-
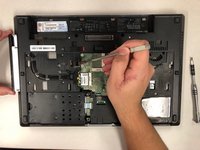
Locate the small metal piece in the photo.
-
Using a tool, push the piece in the given direction.
-
-
-
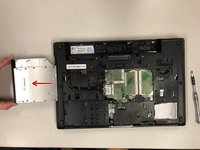
Once pushing the piece outwards, the optical drive will pop out of the side of the computer.
-
Grab the optical drive and carefully remove it from the back of the computer.
-
-


To reassemble your device, follow these instructions in reverse order.

Team

Baylor, Team S8-G5, Johnson Fall 2017 Member of Baylor, Team S8-G5, Johnson Fall 2017
BU-JOHNSON-F17S8G5
3 Members
48 Guides authored
