Introduction
If your HP Elite x2 G4 has a cracked or non-functional rear camera, this guide will walk you through replacing the rear camera module.
The rear facing camera is critical for taking high quality photos with the device. Damage to the camera can render this function completely useless, and replacing can restore full functionality.
Before beginning this guide, please identify if the camera has any damage. If not, attempt to update the drivers of the camera, as a dysfunctional camera may be due to software rather than hardware.
Before starting, power off your device completely and disconnect it from any external power source.
What you need
-
-
Open the kickstand.
-
Use a T5 Torx screwdriver to remove the four 3.0 mm screws along the bottom edge of the back of the display assembly.
 Ask FixBot
-
-
-
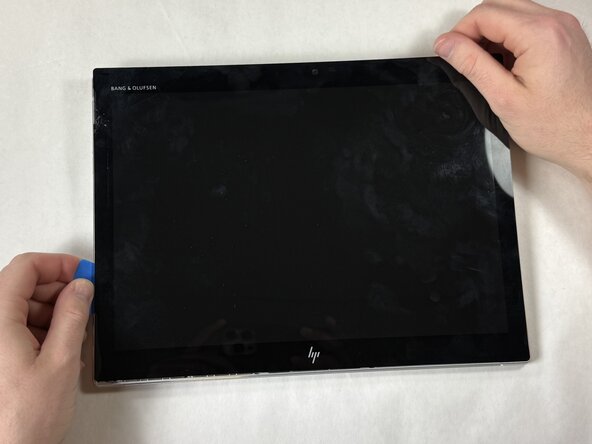
Use a suction cup and opening pick to carefully detach the screen from the display assembly in the following order: top-right, top-left, bottom-right, and bottom-left corners.
-
Slide an opening pick around the seam between the screen and back case to release the retaining clips.
-
Use the suction cup to separate the screen.
-
-
-
Slowly lift the display panel until you have access to the battery connector on the motherboard.
-
Use a spudger or a clean fingernail to flip up the black locking flap on the ZIF connector to release the display cable from the motherboard.
-
Use tweezers to gently pull the display cable out of its socket.
-
Flip the locking flap up on the touchscreen cable connector and remove the ribbon cable from the board.
-
Remove the screen from the device.
-
-
-
-
Use the point of a spudger to push on alternating sides of the battery connector to "walk" it out of its socket on the motherboard.
-
-
-
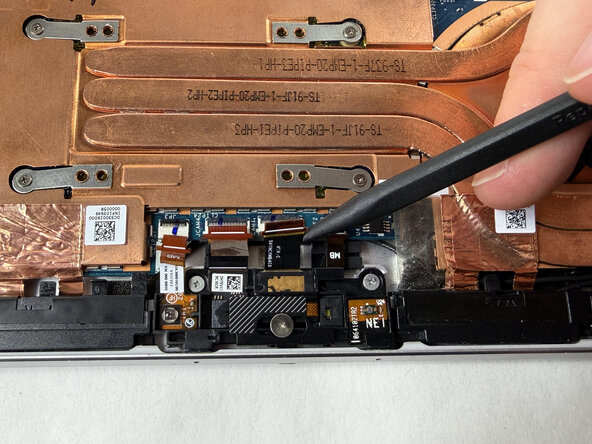
Use a spudger or a clean fingernail to flip up the locking flaps on the four ZIF connectors.
-
Use tweezers or your fingers to gently remove the four ribbon cables from their sockets to disconnect the camera.
-






To reassemble your device, follow these instructions in reverse order. Take your e-waste to an R2 or e-Stewards certified recycler.

Team

UMass Dartmouth, Team 5-6, Rioux Spring 2026 Member of UMass Dartmouth, Team 5-6, Rioux Spring 2026
UMASSD-RIOUX-S26S5G6
4 Members
4 Guides authored
