Introduction
If your HP Elite x2 G4 is overheating, producing unusually loud noise, or shutting down unexpectedly, this guide will walk you through replacing the internal cooling fan.
The cooling fan is responsible for regulating the device’s temperature by dissipating heat generated by the processor and other internal components. A faulty or failing fan may result in poor thermal performance, excessive heat buildup, or inconsistent fan operation.
Before beginning this guide, check for simple causes such as dust buildup in the vents or temporary software-related issues. Cleaning the vents with compressed air and ensuring your system is up to date can sometimes resolve minor cooling problems. If the issue persists, replacing the fan may be necessary.
Before starting, power off your device completely and disconnect it from any external power sources.
What you need
-
-
-
Open the kickstand.
-
Use a T5 Torx screwdriver to remove the four 3.0 mm screws along the bottom edge of the back of the display assembly.
 Ask FixBot
-
-
-
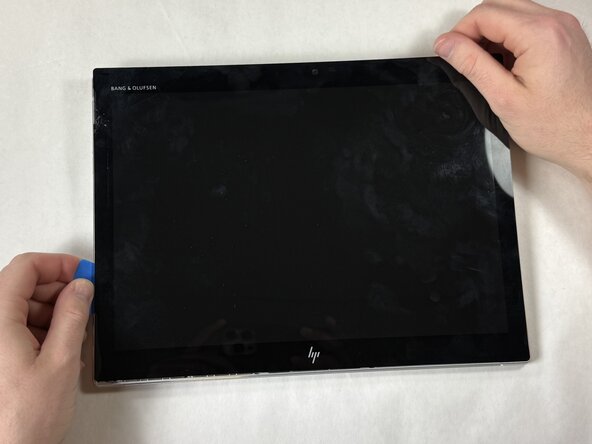
Use a suction cup and opening pick to carefully detach the screen from the display assembly in the following order: top-right, top-left, bottom-right, and bottom-left corners.
-
Slide an opening pick around the seam between the screen and back case to release the retaining clips.
-
Use the suction cup to separate the screen.
-
-
-
Slowly lift the display panel until you have access to the battery connector on the motherboard.
-
Use a spudger or a clean fingernail to flip up the black locking flap on the ZIF connector to release the display cable from the motherboard.
-
Use tweezers to gently pull the display cable out of its socket.
-
Flip the locking flap up on the touchscreen cable connector and remove the ribbon cable from the board.
-
Remove the screen from the device.
-
-
-
-
-
Use the point of a spudger to push on alternating sides of the battery connector to "walk" it out of its socket on the motherboard.
-
-
-
Remove the six 3.5 mm Phillips #1 screws that secure the battery to the display enclosure.
-
-
-
Carefully lift the top edge of the battery off of the alignment pins.
-
Slide the bottom edge out from retention tabs on the display enclosure and remove the battery.
-
-
-
-
-
-
Use a JIS #000 screwdriver to remove the three screws securing the webcam.
-
Use a spudger or a clean fingernail to flip up the locking flaps on the four ZIF connectors.
-
Use tweezers or your fingers to gently remove the four ribbon cables from their sockets to disconnect the camera.
-
-
-
Use a JIS #000 screwdriver to remove the single screw holding the SSD in place.
-
Slide the SSD from its socket on the motherboard.
-
-
-
Use a spudger to flip up the locking flap on the speaker cable connector.
-
Use tweezers or your fingers to gently pull the cable out of its socket.
-
-
-
Disconnect the keyboard ribbon cable connector from the keyboard to the motherboard.
-
Remove the ribbon cable connection from the port bank to the motherboard.
-
-
-
Slide a thin, ESD-safe pry tool or angled tweezers under the metal neck of the coaxial cable connectors (as close to the head as possible) and lift straight up from the board.
-
-
-
Use a JIS #000 screwdriver to remove the six screws holding the motherboard to the chassis.
-
-
-
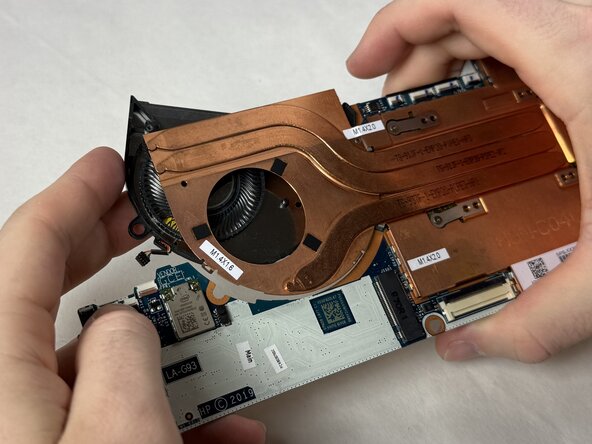
Gently pry the circuit board from the heatsink to allow enough space to access the fan.
-
Slide the fan out from between the board and heat sink.
-
-






To reassemble your device, follow these instructions in reverse order. Take your e-waste to an R2 or e-Stewards certified recycler.

Team

UMass Dartmouth, Team 5-6, Rioux Spring 2026 Member of UMass Dartmouth, Team 5-6, Rioux Spring 2026
UMASSD-RIOUX-S26S5G6
4 Members
48 Guides authored
