Free Shipping on Domestic Orders $75+

HP Compaq 6710b Screen Replacement

What you need

  1. HP Compaq 6710b Screen Replacement, Battery: step 1, image 1 of 1
    • Turn off your computer! Taking out the battery while it's still on is dangerous!

    • Flip the laptop over to the back.

    • Using two hands, push on the tabs while gently taking out the battery.

    Ask FixBot

    Add Comment

  2. HP Compaq 6710b Screen Replacement, Keyboard: step 2, image 1 of 3 HP Compaq 6710b Screen Replacement, Keyboard: step 2, image 2 of 3 HP Compaq 6710b Screen Replacement, Keyboard: step 2, image 3 of 3
    • Turn off computer before starting.

    • Flip to the backside of the laptop.

    • Using a Phillips #1 screwdriver, unscrew the 5mm screw and take off the shown cover.

    • Using the same screwdriver, unscrew the 8mm screws.

    • The screws may not completely fall out of the laptop, just ensure they are unscrewed as far as they will go.

    Ask FixBot

    Add Comment

  3. HP Compaq 6710b Screen Replacement: step 3, image 1 of 1
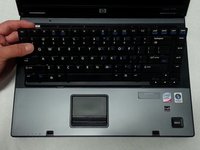
    • Flip over the laptop to the top side, and open the laptop.

    • Slide the locking tabs down using a blue plastic opening tool or your fingernail.

    Ask FixBot

    Add Comment

  4. HP Compaq 6710b Screen Replacement: step 4, image 1 of 2 HP Compaq 6710b Screen Replacement: step 4, image 2 of 2
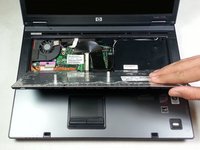
    • Using the plastic prying tool, lift the keyboard gently towards you.

    • Don't take the keyboard completely off because it is still attached with a ribbon cable to the computer.

    Ask FixBot

    Add Comment

  5. HP Compaq 6710b Screen Replacement: step 5, image 1 of 1
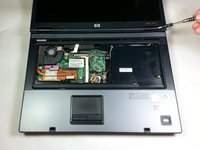
    • Pull up on both sides of the black locking tab of the connector.

    • The keyboard should now be free of the computer.

    Ask FixBot

    Add Comment

  6. HP Compaq 6710b Screen Replacement, Power Button Panel: step 6, image 1 of 1
    • Put a finger under each side of the plastic lock on the ribbon cable and pull up.

    Ask FixBot

    Add Comment

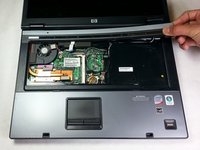
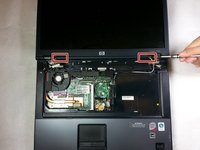
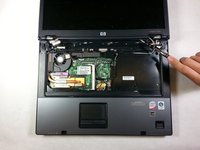
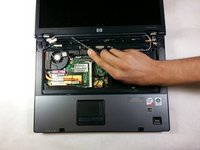
  7. HP Compaq 6710b Screen Replacement: step 7, image 1 of 3 HP Compaq 6710b Screen Replacement: step 7, image 2 of 3 HP Compaq 6710b Screen Replacement: step 7, image 3 of 3
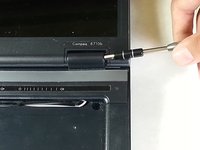
    • Using a flathead screwdriver, get under each plastic hinge cover until they pop.

    • Lift the right edge of plastic strip covering the power button and gently pull it up until the whole strip comes free.

    Ask FixBot

    Add Comment

  8. HP Compaq 6710b Screen Replacement, Screen: step 8, image 1 of 1
    • Using a flathead screwdriver, work both sides of the connector next to the fan and take it out.

    Ask FixBot

    Add Comment

  9. HP Compaq 6710b Screen Replacement: step 9, image 1 of 1
    • Using the T9 Torx screwdriver, remove one 7mm screw on the left hinge.

    • We recommend replacing this screw shortly after removing the cable as it helps hold the hinge to the lower half of the laptop.

    Ask FixBot

    Add Comment

  10. HP Compaq 6710b Screen Replacement: step 10, image 1 of 1
    • Using the blue plastic opening tool, pull the rubber covers off the screen screws.

    Ask FixBot

    Add Comment

  11. HP Compaq 6710b Screen Replacement: step 11, image 1 of 1
    • Using a T9 Torx screwdriver, remove the top four 5 mm screws.

    • Remove the bottom two 6 mm screws with the same screwdriver.

    Ask FixBot

    Add Comment

  12. HP Compaq 6710b Screen Replacement: step 12, image 1 of 3 HP Compaq 6710b Screen Replacement: step 12, image 2 of 3 HP Compaq 6710b Screen Replacement: step 12, image 3 of 3
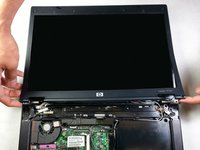
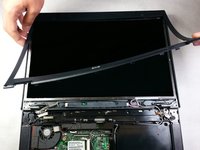
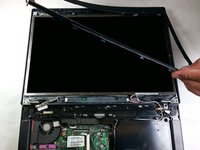
    • Using a flat head screwdriver, pry the plastic panel over the screen up starting at one of the hinges.

    • Using the flathead, continue running the it under the the plastic screen edge and gently pry it off.

    • If you press the screwdriver tip down (by lifting the handle), the screen panel pops off easier.

    Ask FixBot

    Add Comment

  13. HP Compaq 6710b Screen Replacement: step 13, image 1 of 3 HP Compaq 6710b Screen Replacement: step 13, image 2 of 3 HP Compaq 6710b Screen Replacement: step 13, image 3 of 3
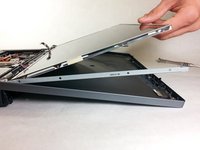
    • Slowly pry back the of the screen.

    • It is easiest to work both sides free at the same time.

    Ask FixBot

    Add Comment

  14. HP Compaq 6710b Screen Replacement: step 14, image 1 of 1
    • Using your fingers, take out the two connections near the hinges.

    Ask FixBot

    Add Comment

  15. HP Compaq 6710b Screen Replacement: step 15, image 1 of 1
    • Using the T9 Torx screwdriver, unscrew the four 4mm screws.

    Ask FixBot

    Add Comment

  16. HP Compaq 6710b Screen Replacement: step 16, image 1 of 2 HP Compaq 6710b Screen Replacement: step 16, image 2 of 2
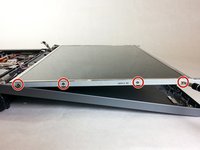
    • Tilt the screen up from the top to gain access to the screws on the side.

    • Go just far enough to get to the bottom screws to avoid damaging the bracket.

    • Using the PH00 screwdriver, unscrew the 2.5mm screws on the side of the screen. There should be 4 on each side.

    • You can now take out the screen.

    Ask FixBot

    Add Comment

Conclusion

To reassemble your device, follow these instructions in reverse order.

Cancel: I did not complete this guide.

8 other people completed this guide.

Khulan Orgil

Member since: 04/14/15

1,186 Reputation

6 Guides authored

Team

Cal Poly, Team 4-2, Maness Spring 2015 Member of Cal Poly, Team 4-2, Maness Spring 2015

CPSU-MANESS-S15S4G2

4 Members

6 Guides authored

1 Guide Comment

thank you I found it very interesting

Hassan - Reply Share

Add Comment

View Statistics:

Past 24 Hours: 1

Past 7 Days: 8

Past 30 Days: 44

All Time: 6,201