
HP Compaq 6510b CPU Replacement

tmg86 and one other contributor
Last updated on Nov 10, 2024
Views: 961
View statistics:
- Past 24 Hours:
- 2
- Past 7 Days:
- 20
- Past 30 Days:
- 79
- All Time:
- 961
Comments: 0
No one has left comments on this guide. Will you be first?
Go to guide commentsCompleted: 2 3
2 people have marked this guide "completed." Will you be next?
3 people have marked this guide "completed." Including you — great job!
Favorites: 0 1
No one has favorited (and subscribed to) this guide. Will you be the first?
1 person has favorited (and subscribed to) this guide — and that's you!
Bullets!
Better coordination with markups and the color/type of bullets will help make this guide more clear!
Community-Contributed Guide
An awesome member of our community made this guide. It was not created by iFixit staff.
Better Introduction
Improve this guide by completing or revising its introduction.
What you need
Parts
Tools


-
-
-
Unscrew the three screws shown.
-
Open the RAM door to expose the next screw.
-
Unscrew the final keyboard screw.
-
-
-
Use a flathead or spudger to slide the clips toward the trackpad.
-
-
-
Put the screen in a 180 degree position.
-
Gently pull the keyboard up at the display side.
-
Slide the keyboard to the display.
-
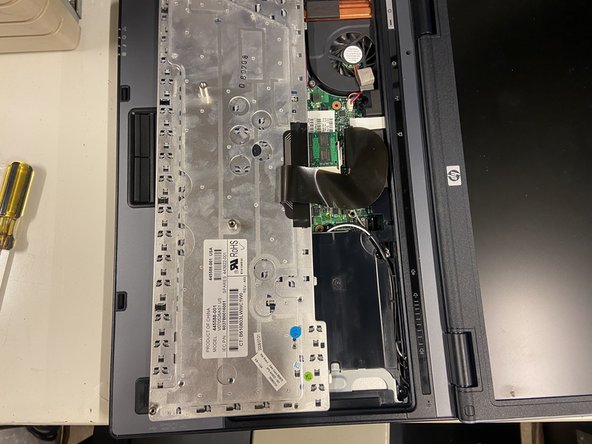
Flip the keyboard so the keys are touching the trackpad.
-
-
-
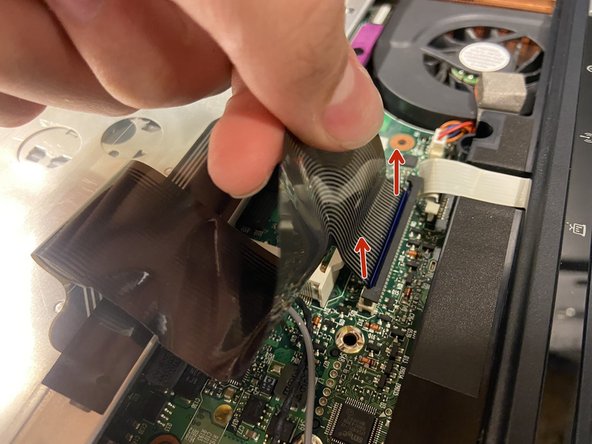
Fold the ribbon cable back so you can access the connection.
-
Pull the black part of the connector up to unlock the cable.
-
Pull the ribbon cable up to disconnect it.
-
-
-
Disconnect the ribbon cable that connects to the top panel and remove the second RAM stick.
-
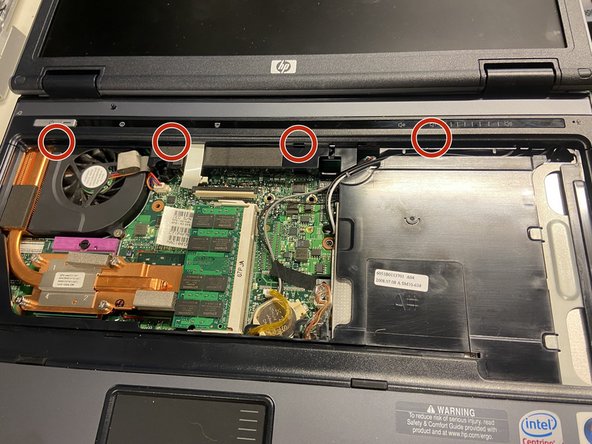
Insert a flat head screwdriver into the holes circled and rotate 90 degrees to pop the plastic clips.
-
-
-
Disconnect the fan cable and unscrew the fan screws.
-
Lift the fan at the CPU side and slide it toward the CPU to free it.
-
-
-
-
Unscrew the cooler screws in the reverse order - 4 3 2 1.
-
Pry with a flathead to unstick the thermal pad on the chipset. (It can hold on pretty tight)
-
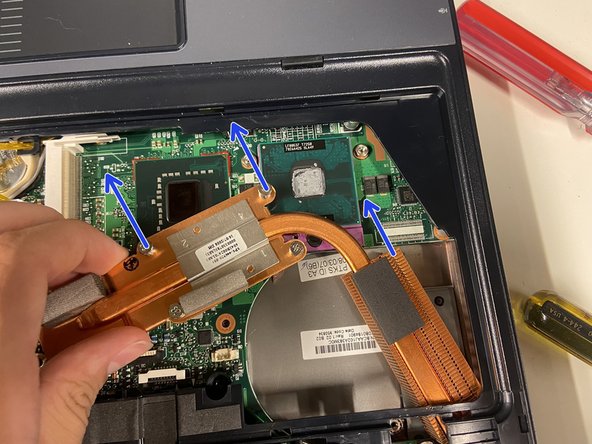
Pull the cooler up a bit on the CPU side, then rotate it as demonstrated in the second photo.
-
When the chipset pad has roughly reached the keyboard connector, pull it out in the direction of the coin cell battery.
-
-
-
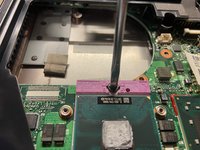
Use the flathead screwdriver to rotate the lock to the unlocked position.
-
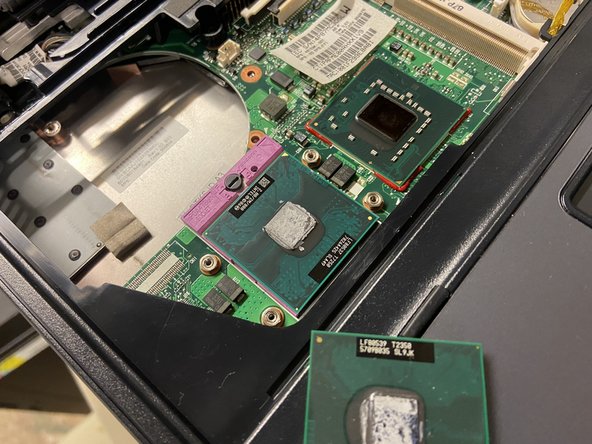
Grab the CPU as shown. This way the pins are not likely to get bent.
-
Place the new CPU in the socket.
-

 Ask FixBot












To reassemble your device, follow these instructions in reverse order. When you get to screwing on the CPU cooler, tighten them in numerical order. (1 2 3 4)
Cancel: I did not complete this guide.
2 other people completed this guide.

