Free Shipping on Domestic Orders $75+

HP Chromebook 14-x013dx Camera Replacement

What you need

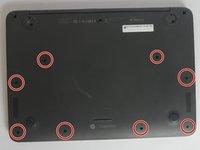
  1. HP Chromebook 14-x013dx Camera Replacement, Keyboard, Touchpad: step 1, image 1 of 2 HP Chromebook 14-x013dx Camera Replacement, Keyboard, Touchpad: step 1, image 2 of 2
    • Using the plastic spudger, gently lift the 5 rubber pads away from their seating.

    Ask FixBot

    Add Comment

  2. HP Chromebook 14-x013dx Camera Replacement: step 2, image 1 of 1
    • Remove the five 6mm screws located under the removed pads using Phillips #00 screwdriver.

    Ask FixBot

    Add Comment

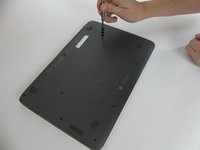
  3. HP Chromebook 14-x013dx Camera Replacement: step 3, image 1 of 2 HP Chromebook 14-x013dx Camera Replacement: step 3, image 2 of 2
    • With the Phillips #00 screwdriver, remove the remaining eight 6mm screws. You will now have thirteen 6mm screws removed from the case.

    Ask FixBot

    Add Comment

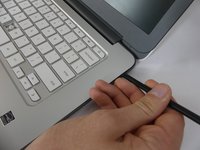
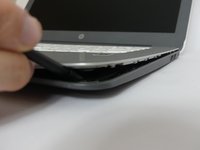
  4. HP Chromebook 14-x013dx Camera Replacement: step 4, image 1 of 2 HP Chromebook 14-x013dx Camera Replacement: step 4, image 2 of 2
    • To continue removing the back cover, turn the laptop over as displayed.

    • Use the plastic spudger to gently pry around the base of the laptop from the back cover. Continue prying around the entire base of the laptop.

    Ask FixBot

    Add Comment

  5. HP Chromebook 14-x013dx Camera Replacement: step 5, image 1 of 3 HP Chromebook 14-x013dx Camera Replacement: step 5, image 2 of 3 HP Chromebook 14-x013dx Camera Replacement: step 5, image 3 of 3
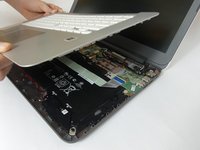
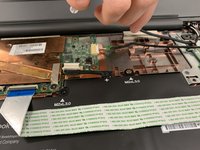
    • Gently lift the silver base of the laptop from the bottom, but do not remove it.

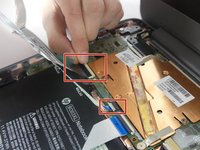
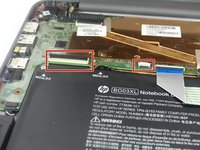
    • To remove the ribbon cables, lift the latch holding the ribbon cables in place and then pull them free.

    • Remove the keyboard panel from the laptop.

    Ask FixBot

    Add Comment

  6. HP Chromebook 14-x013dx Camera Replacement, Camera: step 6, image 1 of 2 HP Chromebook 14-x013dx Camera Replacement, Camera: step 6, image 2 of 2
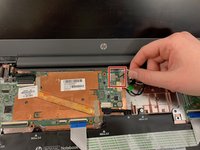
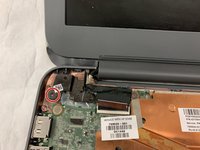
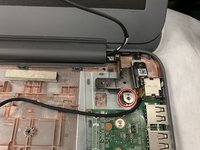
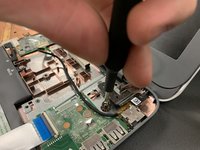
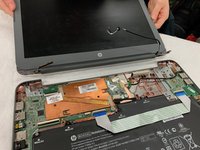
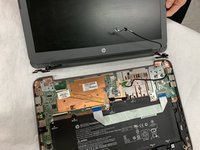
    • Disconnect the black and white wires connected to the Wi-Fi module.

    • Remove the wire from the casing.

    Ask FixBot

    Add Comment

  7. HP Chromebook 14-x013dx Camera Replacement: step 7, image 1 of 1
    • Pull the ribbon cable out of socket.

    Ask FixBot

    Add Comment

  8. HP Chromebook 14-x013dx Camera Replacement: step 8, image 1 of 3 HP Chromebook 14-x013dx Camera Replacement: step 8, image 2 of 3 HP Chromebook 14-x013dx Camera Replacement: step 8, image 3 of 3
    • Use a Phillips #00 screwdriver to remove the two 6mm screws located at the upper left and right corners.

    Ask FixBot

    Add Comment

  9. HP Chromebook 14-x013dx Camera Replacement: step 9, image 1 of 2 HP Chromebook 14-x013dx Camera Replacement: step 9, image 2 of 2
    • Remove the lid out of the laptop.

    • It is helpful to rotate the lid to a 90-degree angle.

    Ask FixBot

    Add Comment

  10. HP Chromebook 14-x013dx Camera Replacement: step 10, image 1 of 1
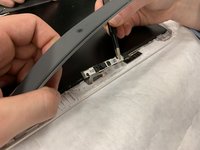
    • Using the plastic opening tool, pry the left and right side of the top of the lid.

    • It is not necessary to remove the entire frame, only pry the top to expose the camera.

    Ask FixBot

    Add Comment

  11. HP Chromebook 14-x013dx Camera Replacement: step 11, image 1 of 1
    Tool used on this step:
    Tweezers
    $4.99
    Buy
    • Using tweezers, gently remove the connection hold the camera in place.

    Ask FixBot

    Add Comment

  12. HP Chromebook 14-x013dx Camera Replacement: step 12, image 1 of 2 HP Chromebook 14-x013dx Camera Replacement: step 12, image 2 of 2
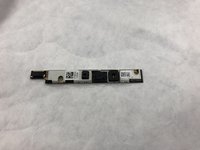
    • Gently pry the camera mount out of the lid.

    • Lift the camera mount out of the lid.

    Ask FixBot

    Add Comment

Conclusion

To reassemble your device, follow these instructions in reverse order.

Cancel: I did not complete this guide.

One other person completed this guide.

Eile Woeltje

Member since: 11/06/19

304 Reputation

2 Guides authored

Team

IUPUI, Team S1-G3, Stella Fall 2019 Member of IUPUI, Team S1-G3, Stella Fall 2019

IUPUI-STELLA-F19S1G3

3 Members

2 Guides authored

1 Guide Comment

Thank you, very helpful. You could also just start at Step 10 without removing the display

Douglas Walker - Reply Share

Add Comment

View Statistics:

Past 24 Hours: 0

Past 7 Days: 6

Past 30 Days: 29

All Time: 1,187