
HP Chromebook 14-SMB Fan Replacement

aurora and 4 other contributors
Last updated on Jan 15, 2026
Views: 306
View statistics:
- Past 24 Hours:
- 1
- Past 7 Days:
- 11
- Past 30 Days:
- 63
- All Time:
- 306
Comments: 0
No one has left comments on this guide. Will you be first?
Go to guide commentsCompleted: 0 1
No one has marked this guide "completed." Will you be the first?
1 person has marked this guide "completed." It's you — great job!
Favorites: 0 1
No one has favorited (and subscribed to) this guide. Will you be the first?
1 person has favorited (and subscribed to) this guide — and that's you!
Needs More Images
A few more images would make this guide's procedures crystal clear.
Needs Better Images
Better photos will improve this guide. Help out by taking, editing, or uploading new ones!
Introduction
Go to step 1 ↓Before replacing your HP Chromebook 14-SMB fan, consider other methods to improve cooling functions listed on HP's help center: https://h30434.www3.hp.com/t5/Notebook-B...
Use this guide to replace a faulty fan in a HP Chromebook 14-SMB to avoid overheating and ensure proper performance. In addition to overheating, symptoms of a broken fan in a HP Chromebook 14-SMB can include: unexpected shutdowns, poor performance, and or potential hardware failure.
What you need


-
-
-
Remove the eleven Phillips screws securing the lower case.
-
Remove the two rubber stoppers, then remove the two Phillips screws hidden underneath.
 Ask FixBot
-
-
-
Flip the laptop over and open the lid.
-
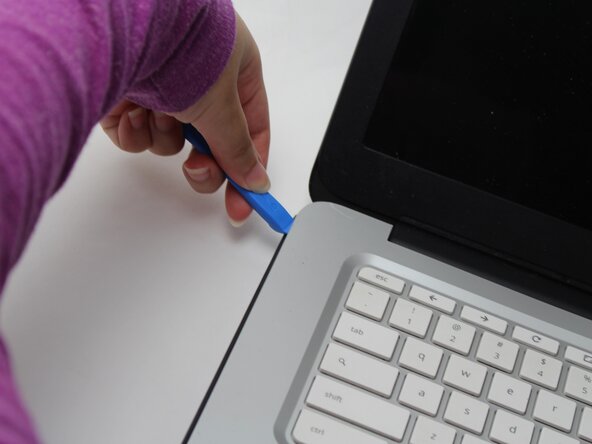
Insert an opening pick into the seam between the keyboard assembly and chassis.
-
Slide the pick along the edge to release the plastic clips, then use an opening tool to pry around the entire perimeter until the keyboard assembly fully releases.
-
-
-
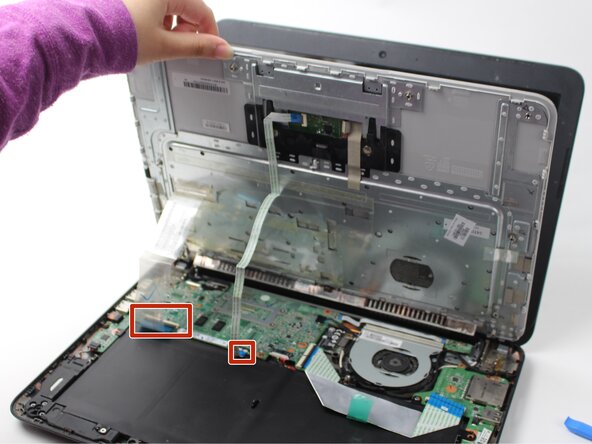
Lift the keyboard perpendicular to the laptop.
-
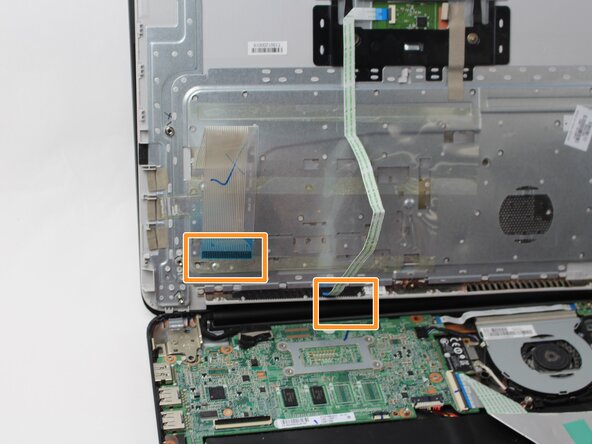
Flip up each of the two black ZIF locking flaps that secure the keyboard and trackpad ribbon cables to their motherboard sockets.
-
Disconnect the keyboard and trackpad ribbon cables.
-
Remove the keyboard.
-
-
-
-
-
-
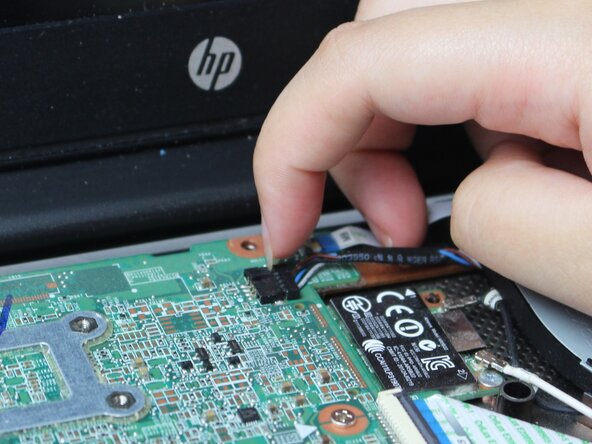
Use your fingernail or the flat end of a spudger to gently disconnect the battery connector from its motherboard connector.
-
-
-
Use a Phillips #0 screwdriver to remove the three screws that secure the battery.
-
-
-
-
-
Remove three Phillips screws that secure the fan.
-
Dislodge the cables around the fan from their retaining hooks.
-
-
-
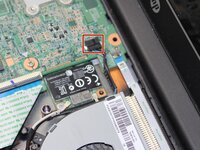
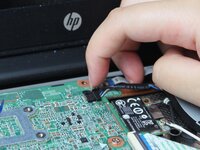
Use your fingernail or the flat end of a spudger to disconnect the fan connector from its motherboard socket.
-
-







To reassemble your device, follow the above steps in reverse order.
Take your e-waste to an R2 or e-Stewards certified recycler.
Repair didn’t go as planned? Try some basic troubleshooting or ask our Answers community for help.

Team

Sam Houston State, Team 17-3, Thornton Spring 2025 Member of Sam Houston State, Team 17-3, Thornton Spring 2025
SHSU-THORNTON-S25S17G3
3 Members
60 Guides authored
