
HP 225 G7 Memory (RAM) Replacement / Upgrade

Stratos Thivaios and one other contributor
Last updated on Jun 21, 2023
Views: 2K
View statistics:
- Past 24 Hours:
- 4
- Past 7 Days:
- 33
- Past 30 Days:
- 143
- All Time:
- 1,976
Comments: 0
No one has left comments on this guide. Will you be first?
Go to guide commentsCompleted: 4 5
4 people have marked this guide "completed." Will you be next?
5 people have marked this guide "completed." Including you — great job!
Favorites: 0 1
No one has favorited (and subscribed to) this guide. Will you be the first?
1 person has favorited (and subscribed to) this guide — and that's you!
Community-Contributed Guide
An awesome member of our community made this guide. It was not created by iFixit staff.
Introduction
Go to step 1 ↓Sometimes you might need to replace the RAM inside of your laptop, or you might want to upgrade your RAM. This guide will help you open your HP 255 G7, locate the RAM, and remove it and reinstall it.
What you need
Tools


-
-
-
Use the spatula to remove the long rubber leg from the bottom of the laptop.
-
Repeat the same for the second rubber on the bottom.
 Ask FixBot
-
-
-
Unscrew all the screws on the bottom of the laptop including the ones that were under the rubber legs.
-
-
-
Then, open the laptop like you normally would if you were working.
-
-
-
Carefully insert a guitar pick under the touchpad, and leave it on there.
-
-
-
Then, slowly insert all 6 picks all around the laptop.
-
-
-
Remove the picks.
-
Pull the cover and the main body of the laptop apart.
-
-
-
Locate the RAM dim on the upper right corner of the laptop. ("upper" when the screen hinge is facing upwards)
-
-
-
-
Use a spudger to push both of the clips outwards. Then the dim should pop upwards.
-
-
-
Then, you can simply pull the RAM dim outwards, and remove it.
-
-
-
Then, push downwards on the dim to lock it in place.
-
-


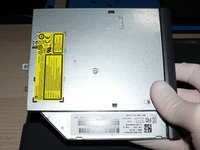


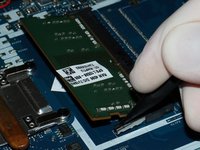

To reassemble your device, follow these instructions in reverse order.
Cancel: I did not complete this guide.
4 other people completed this guide.

