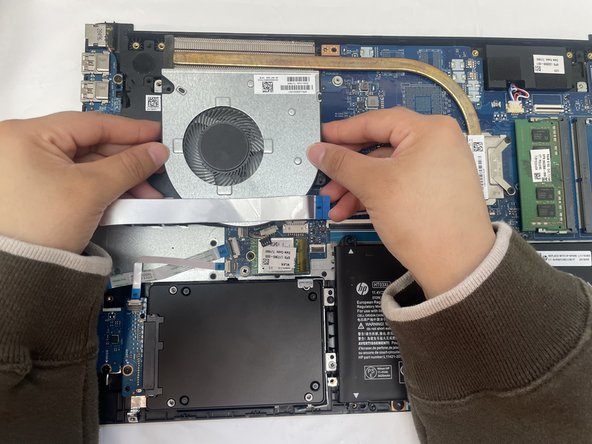
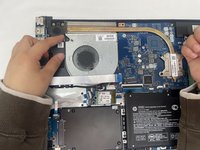
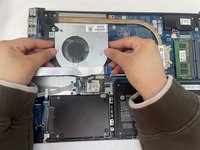
Free Shipping on Domestic Orders $75+

HP 15-dw0037wm Fan Replacement

What you need

  1. HP 15-dw0037wm Fan Replacement, Lower Case: step 1, image 1 of 2 HP 15-dw0037wm Fan Replacement, Lower Case: step 1, image 2 of 2
    • Before you begin, discharge your laptop battery below 25%. A charged lithium-ion battery can catch fire and/or explode if accidentally punctured.

    • Power off your laptop and disconnect the charger and any peripheries before beginning disassembly.

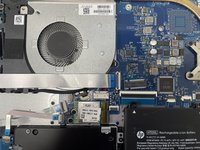
    • Set the laptop down with the lower case facing up.

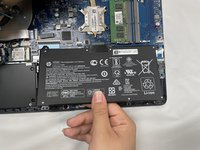
    • Lift a corner of the lower silicone foot and peel it completely off.

    • Repeat for the upper silicone foot.

  2. HP 15-dw0037wm Fan Replacement: step 2, image 1 of 2 HP 15-dw0037wm Fan Replacement: step 2, image 2 of 2
    • Use a Phillips screwdriver to remove the five 8 mm screws.

    • Remove the two 5 mm Phillips screws.

  3. HP 15-dw0037wm Fan Replacement: step 3, image 1 of 3 HP 15-dw0037wm Fan Replacement: step 3, image 2 of 3 HP 15-dw0037wm Fan Replacement: step 3, image 3 of 3
    • Insert an opening pick into the gap between the lower case and chassis.

    • Starting from a corner is recommended.

    • Slide the pick around the entire perimeter of the device until the lower case fully releases.

    • Remove the lower case.

  4. HP 15-dw0037wm Fan Replacement, Battery: step 4, image 1 of 2 HP 15-dw0037wm Fan Replacement, Battery: step 4, image 2 of 2
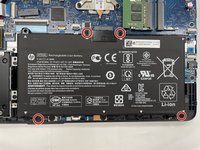
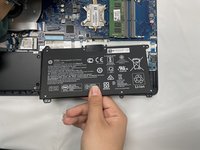
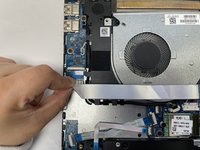
    • Use a Phillips screwdriver to remove the the four 4 mm screws that secure the battery.

  5. HP 15-dw0037wm Fan Replacement: step 5, image 1 of 3 HP 15-dw0037wm Fan Replacement: step 5, image 2 of 3 HP 15-dw0037wm Fan Replacement: step 5, image 3 of 3
    • Lift the battery out slowly to disconnect it from the socket that connects it to the motherboard.

    • Removing the battery quickly can damage the socket that the motherboard is connected to.

  6. HP 15-dw0037wm Fan Replacement, Fan: step 6, image 1 of 3 HP 15-dw0037wm Fan Replacement, Fan: step 6, image 2 of 3 HP 15-dw0037wm Fan Replacement, Fan: step 6, image 3 of 3
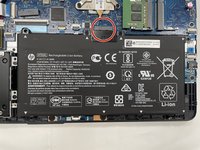
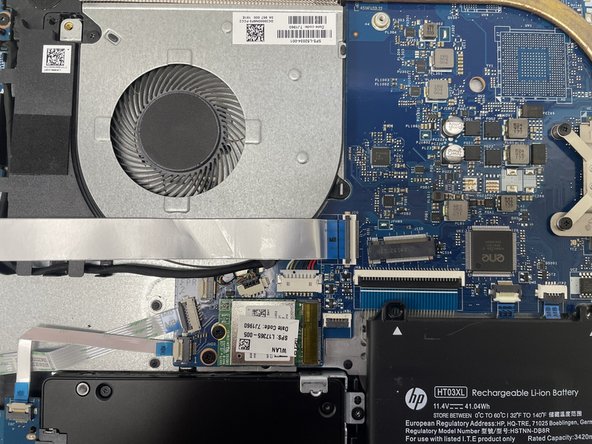
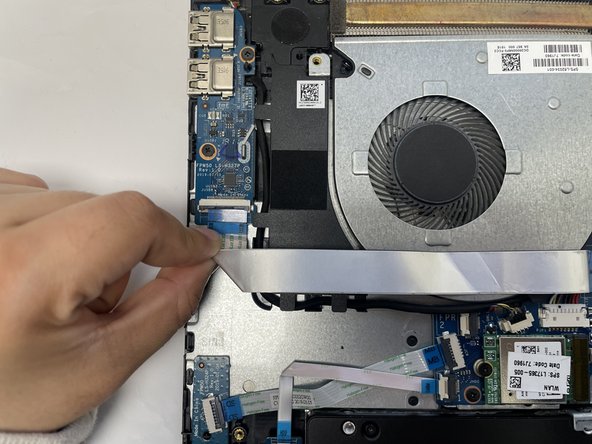
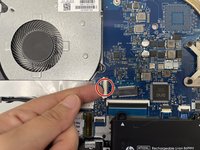
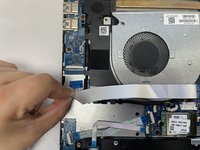
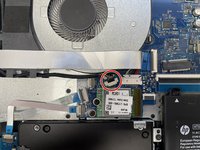
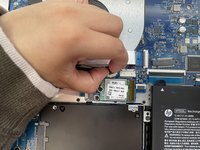
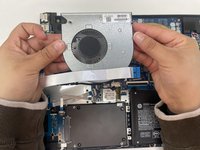
    • Use your fingernail or a spudger to gently lift the black ZIF locking flap that secures the ribbon cable.

    • Repeat the previous bullet on the other end of the ribbon cable.

  7. HP 15-dw0037wm Fan Replacement: step 7, image 1 of 2 HP 15-dw0037wm Fan Replacement: step 7, image 2 of 2
    • Slide the ribbon cable out from the socket gently.

    • Repeat on the other end of the ribbon cable.

  8. HP 15-dw0037wm Fan Replacement: step 8, image 1 of 3 HP 15-dw0037wm Fan Replacement: step 8, image 2 of 3 HP 15-dw0037wm Fan Replacement: step 8, image 3 of 3
    • Gently using your fingernails to push the fan connector out of its motherboard socket.

  9. HP 15-dw0037wm Fan Replacement: step 9, image 1 of 1
    • Remove the one 4 mm screw securing the fan with a Phillips #1 screwdriver.

  10. HP 15-dw0037wm Fan Replacement: step 10, image 1 of 3 HP 15-dw0037wm Fan Replacement: step 10, image 2 of 3 HP 15-dw0037wm Fan Replacement: step 10, image 3 of 3
    • Grip and lift the fan up and out of the chassis.

Conclusion

To reassemble your device, follow these instructions in reverse order.

2 other people completed this guide.

1 Guide Comment

thank youuuu

Бақжан Нұрдәулет - Reply Share

Add Comment

View Statistics:

Past 24 Hours: 4

Past 7 Days: 10

Past 30 Days: 37

All Time: 354