Free Shipping on Domestic Orders $75+

HP 14-dq5009nr Trackpad Replacement

What you need

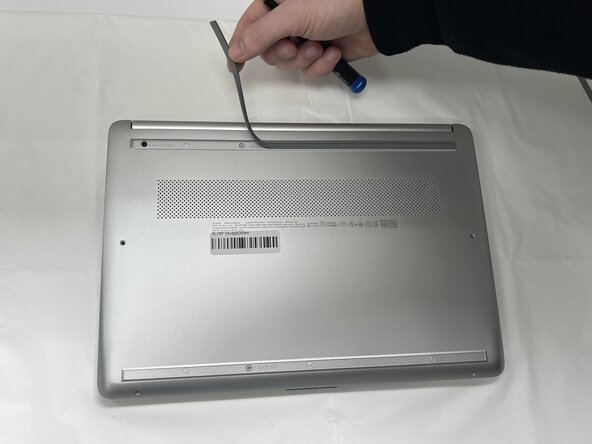
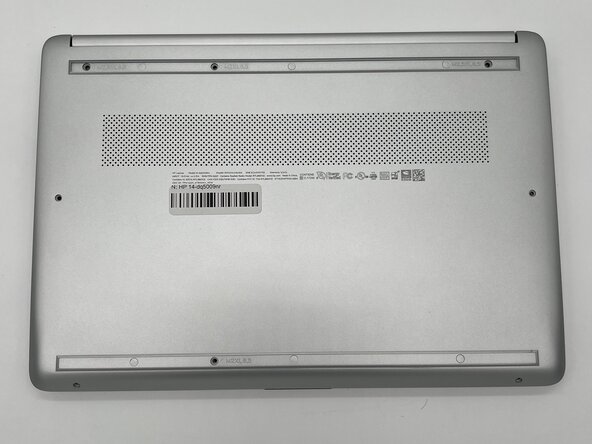
  1. HP 14-dq5009nr Trackpad Replacement, Battery: step 1, image 1 of 3 HP 14-dq5009nr Trackpad Replacement, Battery: step 1, image 2 of 3 HP 14-dq5009nr Trackpad Replacement, Battery: step 1, image 3 of 3
    • Peel the rubber feet off the bottom casing to reveal hidden screws.

    • Keep the rubber feet for reassembly.

    • Make sure the device is completely powered off before replacement.

    Ask FixBot

    Add Comment

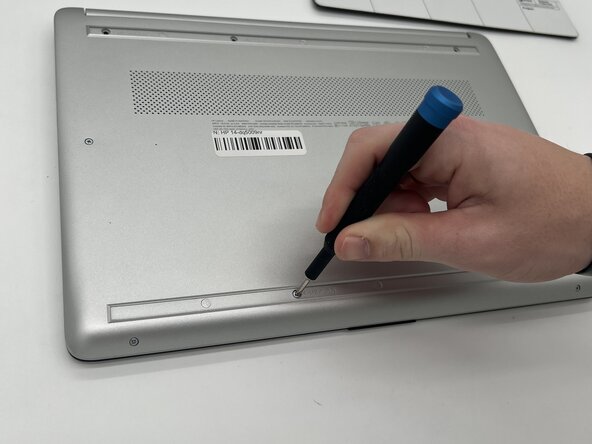
  2. HP 14-dq5009nr Trackpad Replacement: step 2, image 1 of 2 HP 14-dq5009nr Trackpad Replacement: step 2, image 2 of 2
    • Use a Philips #0 screwdriver to remove the eight screws from the back case.

    • Six 7 mm-long screws

    • Two 4.8 mm-long screws

    Ask FixBot

    Add Comment

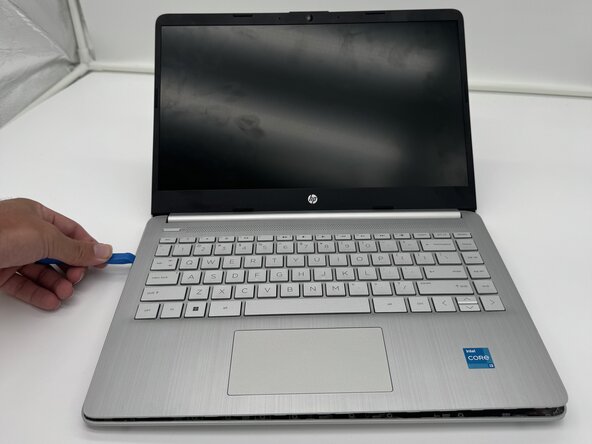
  3. HP 14-dq5009nr Trackpad Replacement: step 3, image 1 of 3 HP 14-dq5009nr Trackpad Replacement: step 3, image 2 of 3 HP 14-dq5009nr Trackpad Replacement: step 3, image 3 of 3
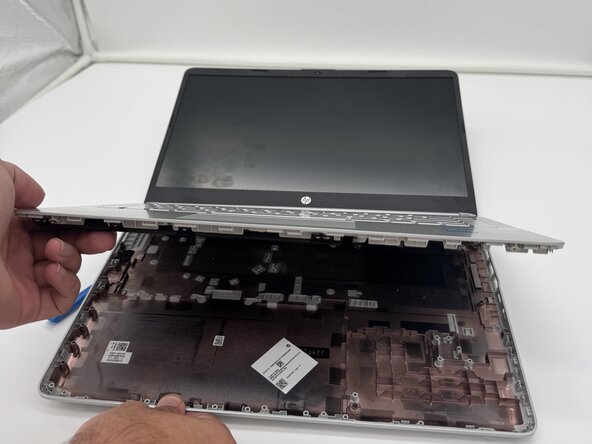
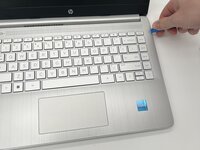
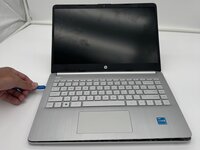
    • Use a plastic opening tool to separate the back case from the palmrest keyboard assembly. Gently pry the back cover from the device.

    • Start from a corner of the device and run the opening tool along the edge of the cover to release the clips before you separate them.

    • Be careful to not bend or crack the back cover.

    Ask FixBot

    Add Comment

  4. HP 14-dq5009nr Trackpad Replacement: step 4, image 1 of 2 HP 14-dq5009nr Trackpad Replacement: step 4, image 2 of 2
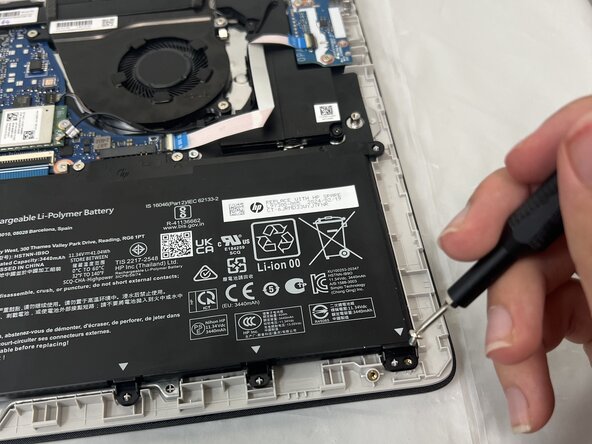
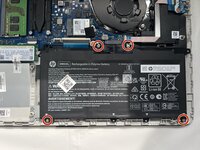
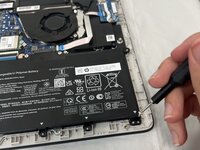
    • Use a Phillips #0 screwdriver to remove the four 3 mm screws that secure the battery to the chassis.

    Ask FixBot

    Add Comment

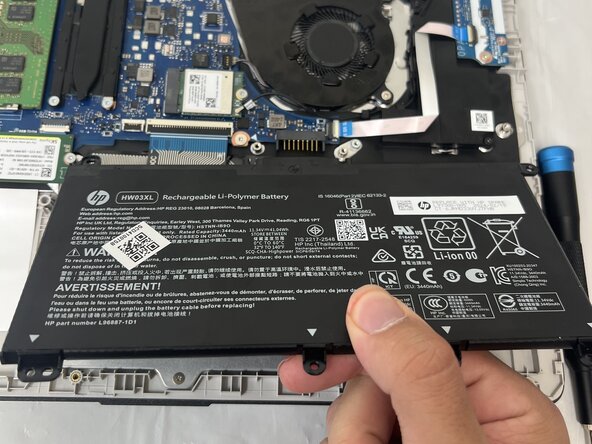
  5. HP 14-dq5009nr Trackpad Replacement: step 5, image 1 of 3 HP 14-dq5009nr Trackpad Replacement: step 5, image 2 of 3 HP 14-dq5009nr Trackpad Replacement: step 5, image 3 of 3
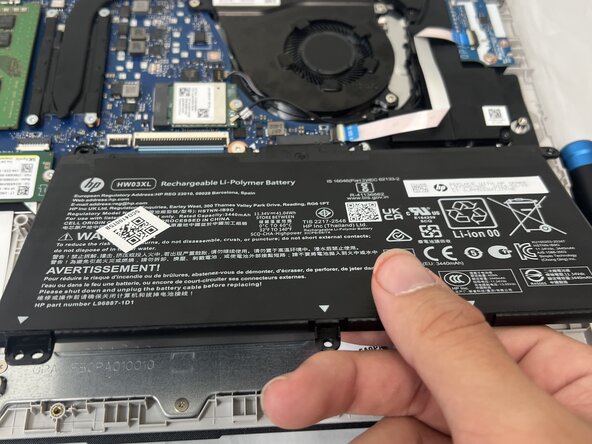
    • Angle the battery up slightly and gently pull it from the socket on the motherboard.

    Ask FixBot

    Add Comment

  6. HP 14-dq5009nr Trackpad Replacement, Fan Assembly: step 6, image 1 of 3 HP 14-dq5009nr Trackpad Replacement, Fan Assembly: step 6, image 2 of 3 HP 14-dq5009nr Trackpad Replacement, Fan Assembly: step 6, image 3 of 3
    • Use a Phillips #1 screwdriver to remove the four 2 mm screws that secure the heat sink.

    • Lift the heat sink by the neck to remove it.

    Ask FixBot

    Add Comment

  7. HP 14-dq5009nr Trackpad Replacement: step 7, image 1 of 1
    Ask FixBot

    Add Comment

  8. HP 14-dq5009nr Trackpad Replacement: step 8, image 1 of 2 HP 14-dq5009nr Trackpad Replacement: step 8, image 2 of 2
    • Use a Phillips #0 screwdriver to remove the three 3 mm screws from the fan.

    Ask FixBot

    Add Comment

  9. HP 14-dq5009nr Trackpad Replacement: step 9, image 1 of 2 HP 14-dq5009nr Trackpad Replacement: step 9, image 2 of 2
    • Use an angled tweezer to lift the fan connector from the socket on the motherboard.

    • Pull upward and outward at the same time.

    Ask FixBot

    Add Comment

  10. HP 14-dq5009nr Trackpad Replacement: step 10, image 1 of 2 HP 14-dq5009nr Trackpad Replacement: step 10, image 2 of 2
    • Lift the fan from the laptop to remove it.

    Ask FixBot

    Add Comment

  11. HP 14-dq5009nr Trackpad Replacement, Motherboard: step 11, image 1 of 3 HP 14-dq5009nr Trackpad Replacement, Motherboard: step 11, image 2 of 3 HP 14-dq5009nr Trackpad Replacement, Motherboard: step 11, image 3 of 3
    • Remove the single 3 mm Phillips #1 screw.

    • Hold the SSD by the edges and gently slide it out of its socket on the motherboard.

    Ask FixBot

    Add Comment

  12. HP 14-dq5009nr Trackpad Replacement: step 12, image 1 of 3 HP 14-dq5009nr Trackpad Replacement: step 12, image 2 of 3 HP 14-dq5009nr Trackpad Replacement: step 12, image 3 of 3
    • Use a Phillips #1 screwdriver to remove:

    • Three 2 mm-long screws

    • One 4 mm-long screw

    Ask FixBot

    Add Comment

  13. HP 14-dq5009nr Trackpad Replacement: step 13, image 1 of 3 HP 14-dq5009nr Trackpad Replacement: step 13, image 2 of 3 HP 14-dq5009nr Trackpad Replacement: step 13, image 3 of 3
    • Use a spudger or a clean fingernail to flip up the locking flap of the daughterboard cable connector socket.

    • Use tweezers or your fingers to gently pull the cable out of its socket on the motherboard.

    Ask FixBot

    Add Comment

  14. HP 14-dq5009nr Trackpad Replacement: step 14, image 1 of 3 HP 14-dq5009nr Trackpad Replacement: step 14, image 2 of 3 HP 14-dq5009nr Trackpad Replacement: step 14, image 3 of 3
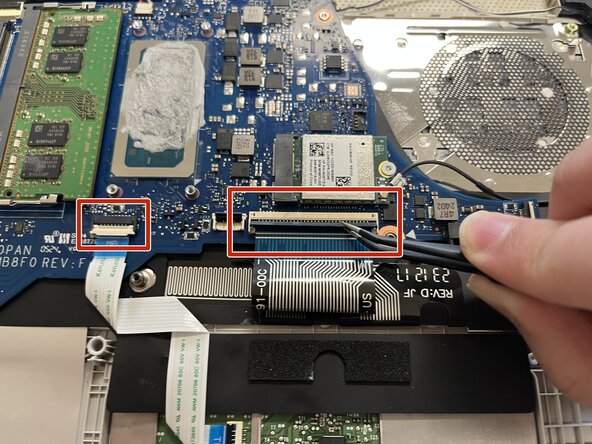
    • Flip up the locking flap on the ZIF connectors that connect to the trackpad and keyboard.

    • Use tweezers or your fingers to gently pull each ribbon cable out of its socket.

    • If the cable has a pull tab, use it to grip the cable. You may damage the cable by gripping it directly.

    Ask FixBot

    Add Comment

  15. HP 14-dq5009nr Trackpad Replacement: step 15, image 1 of 3 HP 14-dq5009nr Trackpad Replacement: step 15, image 2 of 3 HP 14-dq5009nr Trackpad Replacement: step 15, image 3 of 3
    • Use the wide end of a spudger to disconnect the 4-pin connector on the motherboard.

    • Avoid pulling on the cables, as they can easily disconnect from the connector.

    • Use the wide end of a spudger to push on the connector tab to slide it out of its socket.

    • Use a spudger to flip up the locking flap on the ZIF connector.

    • Use tweezers or your fingers to gently pull the cable out of its socket.

    Ask FixBot

    Add Comment

  16. HP 14-dq5009nr Trackpad Replacement: step 16, image 1 of 2 HP 14-dq5009nr Trackpad Replacement: step 16, image 2 of 2
    • Slide a thin, ESD-safe pry tool or angled tweezers under the metal neck of the coaxial cable connectors (as close to the head as possible) and lift straight up from the Wi-Fi card.

    • Pull the motherboard out and set it somewhere safe.

    • Be careful and ensure that all screws and cables are removed and disconnected before removing the motherboard.

    Ask FixBot

    Add Comment

  17. HP 14-dq5009nr Trackpad Replacement, Trackpad: step 17, image 1 of 3 HP 14-dq5009nr Trackpad Replacement, Trackpad: step 17, image 2 of 3 HP 14-dq5009nr Trackpad Replacement, Trackpad: step 17, image 3 of 3
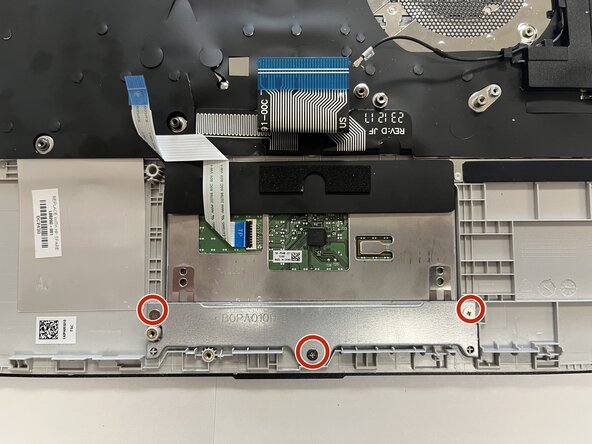
    • Use a Phillips #0 screwdriver to remove the three screws securing the metal bracket at the bottom edge of the trackpad.

    • Remove the bracket at the base of the trackpad.

    Ask FixBot

    Add Comment

  18. HP 14-dq5009nr Trackpad Replacement: step 18, image 1 of 3 HP 14-dq5009nr Trackpad Replacement: step 18, image 2 of 3 HP 14-dq5009nr Trackpad Replacement: step 18, image 3 of 3
    • Use a spudger or clean fingernail to flip the black locking up to the unlocked position.

    • With tweezers, pull the ribbon cable out of the socket by the blue tab.

    • Pull back the black plastic flap at the top of the trackpad to expose the three screws beneath.

    • Leave the flap connected and fold it to the side.

    Ask FixBot

    Add Comment

  19. HP 14-dq5009nr Trackpad Replacement: step 19, image 1 of 2 HP 14-dq5009nr Trackpad Replacement: step 19, image 2 of 2
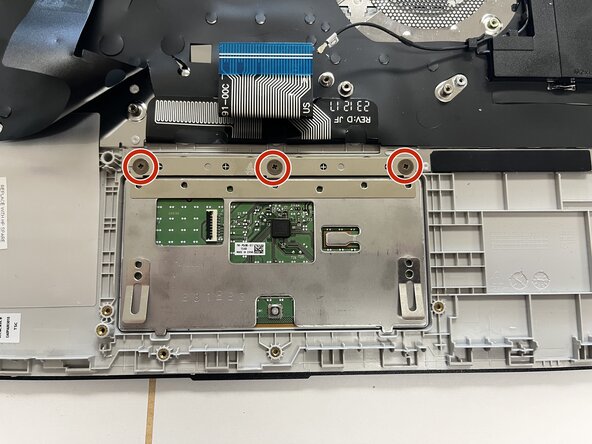
    • Use a Phillips #0 screwdriver to remove the three screws beneath the plastic flap.

    Ask FixBot

    Add Comment

  20. HP 14-dq5009nr Trackpad Replacement: step 20, image 1 of 2 HP 14-dq5009nr Trackpad Replacement: step 20, image 2 of 2
    • Lift the trackpad from the laptop to remove it.

    Ask FixBot

    Add Comment

Conclusion

To reassemble your device, follow these instructions in reverse order. Take your e-waste to an R2 or e-Stewards certified recycler.

Cancel: I did not complete this guide.

Valerie Rodriguez Cardiel

Member since: 09/23/25

109 Reputation

1 Guide authored

0 Guide Comments

Add Comment

View Statistics:

Past 24 Hours: 0

Past 7 Days: 2

Past 30 Days: 12

All Time: 86