
GravityLight Internal Gears Replacement

Michallynn Hoffman and one other contributor
Last updated on Jan 12, 2015
Views: 3.7K
View statistics:
- Past 24 Hours:
- 1
- Past 7 Days:
- 22
- Past 30 Days:
- 103
- All Time:
- 3,682
Comments: 1
1 guide comment.
Go to guide commentsCompleted: 0 1
No one has marked this guide "completed." Will you be the first?
1 person has marked this guide "completed." It's you — great job!
Favorites: 2 3
2 people have favorited (and subscribed to) this guide. Will you be next?
3 people have favorited (and subscribed to) this guide — including you!
Featured Student Guide
This guide has been the hard work of our awesome students and is found to be exceptionally cool by the iFixit staff.
Introduction
Go to step 1 ↓If the bag of rocks is not moving due to an internal issue, it might be because the gears are stripped! You will learn how to replace them.
What you need
Tools

-
-
-
Flip the GravityLight on its back and place it on a sturdy surface.
-
Unscrew the three 2cm Phillips #00 screws on the back of the GravityLight’s body.
 Ask FixBot
-
-
-
Firmly grasp both parts of the GravityLight body and pull them apart.
-
-
-
-
-
Take the thicker of the two parts, the back piece, and place it face down on a sturdy surface.
-
-
-
Place the back panel, the larger of the two pieces, on a sturdy surface with its back down.
-
Unscrew the two 2cm Phillips 00 screws on the inside of the back panel.
-
-
-
Gently lift off the LED housing (the white disk).
-
Set the LED housing on the table next to the body of the device.
-
-
-
-
Lift off the white piece with four arms.
-
Lift off the black-rimmed gear.
-
Set both pieces aside in a safe place.
-
-
-
Lift off the three 3.5cm diameter gears.
-
Replace any stripped gears.
-
-


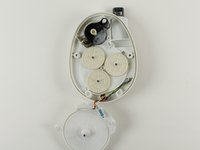
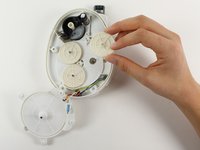
To reassemble your device, follow these instructions in reverse order.

Team

Cal Poly, Team 12-2, Forte Fall 2014 Member of Cal Poly, Team 12-2, Forte Fall 2014
CPSU-FORTE-F14S12G2
5 Members
84 Guides authored
