
Google Home LED Board Replacement

Gabe Hyun and 3 other contributors
Last updated on Jun 18, 2018
Views: 1.3K
View statistics:
- Past 24 Hours:
- 2
- Past 7 Days:
- 12
- Past 30 Days:
- 72
- All Time:
- 1,262
Comments: 0
No one has left comments on this guide. Will you be first?
Go to guide commentsCompleted: 1 2
1 person has marked this guide "completed." Will you be next?
2 people have marked this guide "completed." Including you — great job!
Favorites: 0 1
No one has favorited (and subscribed to) this guide. Will you be the first?
1 person has favorited (and subscribed to) this guide — and that's you!
Introduction
Go to step 1 ↓Fix the lights on the top of your Google Home with a new LED Board.
This guide will teach you how to take apart your Google Home to remove a faulty LED Board and replace it with a new one.
What you need
Tools


-
-
-
Pull off the Google Home’s magnetically attached base and set it aside.
-
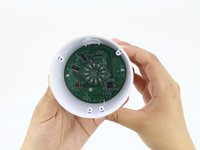
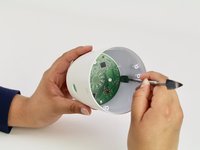
Using a Torx T6 screwdriver head, unscrew the four 1.7mm Torx screws deep in the speaker recess so that you can remove the lid.
-
After all four screws are out, pop the lid off the device to open the capsule.
 Ask FixBot
-
-
Tool used on this step:Tweezers$4.99
-
Carefully remove the interconnect cable using a pair of tweezers.
-
-
-
-
-
-
Use a metal spudger to pry the LED board away from the lid.
-
Remove the LED board.
-
-


To reassemble your device, follow these instructions in reverse order.
Cancel: I did not complete this guide.
One other person completed this guide.

Team

Cal Poly, Team S24-G11, Maness Spring 2018 Member of Cal Poly, Team S24-G11, Maness Spring 2018
CPSU-MANESS-S18S24G11
4 Members
60 Guides authored
