
Gigabyte GS32Q-SA Monitor Button Replacement

Christopher Romero and one other contributor
Last updated on Aug 12, 2026
Views: 304
View statistics:
- Past 24 Hours:
- 2
- Past 7 Days:
- 22
- Past 30 Days:
- 117
- All Time:
- 304
Comments: 0
No one has left comments on this guide. Will you be first?
Go to guide commentsCompleted: 1 2
1 person has marked this guide "completed." Will you be next?
2 people have marked this guide "completed." Including you — great job!
Favorites: 0 1
No one has favorited (and subscribed to) this guide. Will you be the first?
1 person has favorited (and subscribed to) this guide — and that's you!
Introduction
Go to step 1 ↓If the control button on your Gigabyte GS32Q-SA monitor has become unresponsive, difficult to press, or no longer allows you to navigate the on-screen display (OSD), use this guide to replace the monitor’s joystick-style control button assembly.
The GS32Q-SA uses a single joystick-style button to control functions such as brightness, volume, input selection, and display settings. A damaged or worn button can make it difficult or impossible to access these features even when the monitor itself is functioning normally.
Before replacing the button, confirm that the issue is not caused by a software setting or temporary firmware problem. Gigabyte provides GIGABYTE Control Center, which can adjust many monitor settings through a graphical interface and may serve as a temporary workaround if the physical button is unusable.
This repair requires opening the monitor and removing a few internal components. Before you begin, disconnect the monitor from power and any connected cables.
Replacing the control button assembly can restore full access to the monitor’s settings and allow the display to operate as intended.
Here is a link to the GIGABYTE Control Center: Link
What you need
Tools
-
Prying and Opening Tools Bundle (Plastic)$9.954.9
Refrain from anything metal as that would damage the plastic of the monitors housing.


-
-
-
Disconnect all display and power cables from the monitor.
-
Remove the monitor from its arm or stand so that the monitor is isolated.
 Ask FixBot
-
-
-
Place the monitor screen-side down on a soft, flat surface to prevent damage to the display.
-
-
-
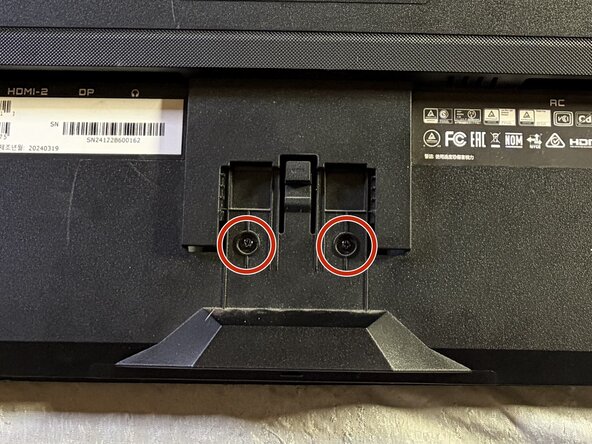
Use a Philips #1 screwdriver to remove the two 2.0 mm screws near the bottom center of the monitor.
-
-
-
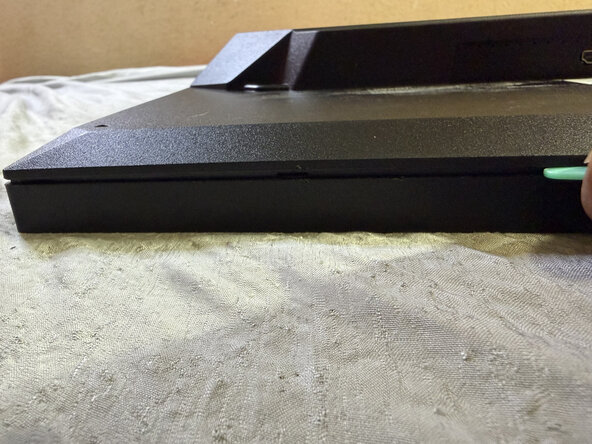
Gently insert a plastic opening tool or spudger tool into the seam between the monitor's rear housing and front assembly to create a space.
-
Slide an opening pick around the entire perimeter of the monitor to release the clips holding it together.
-
-
-
After the initial pass, increase the separation between the rear housing and the monitor assembly with your prying tool.
-
-
-
Slowly lift the monitor's rear housing from the right-hand side to approximately 45 degrees.
-
-
-
-
Remove the pair of 2 mm Phillips #1 screws securing the button housing at the bottom center of the rear housing.
-
Remove the button assembly from the rear housing.
-
-
-
Take the isolated button housing and disconnect the JST connector from the button assembly.
-
-






Take your e-waste to an R2 or e-Stewards certified recycler.
Cancel: I did not complete this guide.
One other person completed this guide.
Team

Austin Community College, Team 34-15, Kapoor Summer 2026 Member of Austin Community College, Team 34-15, Kapoor Summer 2026
AUSTINCC-KAPOOR-SU26S34G15
1 Member
12 Guides authored
