
Free Shipping on Domestic Orders $75+

George Foreman GRS040BC Disassembly

What you need

  1. George Foreman GRS040BC Disassembly, George Foreman GRS040BC: step 1, image 1 of 2 George Foreman GRS040BC Disassembly, George Foreman GRS040BC: step 1, image 2 of 2
    • Open the lid of the grill.

  2. George Foreman GRS040BC Disassembly: step 2, image 1 of 2 George Foreman GRS040BC Disassembly: step 2, image 2 of 2
    • Remove the two 10 mm screws that secure the left hinge to the top panel of the grill using a Phillips #2 screwdriver.

    • The left hinge will completely detach from the device.

  3. George Foreman GRS040BC Disassembly: step 3, image 1 of 2 George Foreman GRS040BC Disassembly: step 3, image 2 of 2
    • Remove the two 10 mm screws that secure the right hinge to the top panel of the grill using a Phillips #2 screwdriver.

    • The right hinge will not fully detach from the device.

    • Do not attempt to pull the two panels apart as the right hinge houses power cables that run between the top and bottom grill panels.

  4. George Foreman GRS040BC Disassembly: step 4, image 1 of 1
    • Remove the four 10mm screws that secure the top grill tray to the black backing using a Phillips #2 screwdriver.

  5. George Foreman GRS040BC Disassembly: step 5, image 1 of 2 George Foreman GRS040BC Disassembly: step 5, image 2 of 2
    • Gently remove the top grill panel from the back casing to reveal the wiring and heating system.

  6. George Foreman GRS040BC Disassembly: step 6, image 1 of 3 George Foreman GRS040BC Disassembly: step 6, image 2 of 3 George Foreman GRS040BC Disassembly: step 6, image 3 of 3
    • Please note this step is OPTIONAL! Reassembling the thermistor is difficult, so do not unscrew this unless it's completely necessary

    • Remove the two 5mm screws from the thermistor using a Phillips #2 screwdriver.

    • Remove the thermistor.

  7. George Foreman GRS040BC Disassembly: step 7, image 1 of 3 George Foreman GRS040BC Disassembly: step 7, image 2 of 3 George Foreman GRS040BC Disassembly: step 7, image 3 of 3
    • Please note that this step is OPTIONAL. The lights can be difficult to reassemble, so only do this if you have issues with the lights that you need to fix.

    • Remove the three 7.5 mm screws found on the black covering.

    • Take the cover off to show the lights.

    • When reassembling, squeeze the bulbs back into place, ensuring that you put the red and green covers in the correct configuration. Press the split wires down on each side of the red/green lights and screw the black cover back on.

  8. George Foreman GRS040BC Disassembly: step 8, image 1 of 2 George Foreman GRS040BC Disassembly: step 8, image 2 of 2
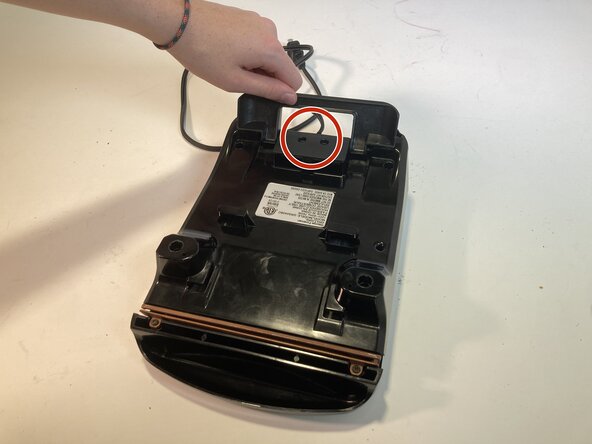
    • Close your partially disassembled George Foreman and turn it upside down.

    • Pry out the two rubber supports.

    • Lift the back stand on the bottom of the device.

  9. George Foreman GRS040BC Disassembly: step 9, image 1 of 3 George Foreman GRS040BC Disassembly: step 9, image 2 of 3 George Foreman GRS040BC Disassembly: step 9, image 3 of 3
    • Remove the four 10mm screws found deep beneath the rubber supports and in the opposite corners.

  10. George Foreman GRS040BC Disassembly: step 10, image 1 of 3 George Foreman GRS040BC Disassembly: step 10, image 2 of 3 George Foreman GRS040BC Disassembly: step 10, image 3 of 3
    • Gently open the bottom case, taking caution not to mix up or break any wires.

  11. George Foreman GRS040BC Disassembly: step 11, image 1 of 3 George Foreman GRS040BC Disassembly: step 11, image 2 of 3 George Foreman GRS040BC Disassembly: step 11, image 3 of 3
    • This step is also entirely optional.

    • Remove the 5mm screw connecting the white cable to the grill.

  12. George Foreman GRS040BC Disassembly: step 12, image 1 of 2 George Foreman GRS040BC Disassembly: step 12, image 2 of 2
    • Remove the two 12mm screws found on the casing under the black stand using a TR6 Torx screwdriver.

  13. George Foreman GRS040BC Disassembly: step 13, image 1 of 2 George Foreman GRS040BC Disassembly: step 13, image 2 of 2
    • Remove the casing and the stand, which will clip off, to reveal the wiring.

Conclusion

To reassemble your device, follow these instructions in reverse order.

0 Guide Comments

Add Comment

View Statistics:

Past 24 Hours: 1

Past 7 Days: 6

Past 30 Days: 24

All Time: 131