
Gateway KAV60 LT2016U Upper Cover Replacement

Lydia Benjock and 10 other contributors
Last updated on Jan 16, 2025
Views: 1.2K
View statistics:
- Past 24 Hours:
- 1
- Past 7 Days:
- 23
- Past 30 Days:
- 97
- All Time:
- 1,239
Comments: 0
No one has left comments on this guide. Will you be first?
Go to guide commentsCompleted: 2 3
2 people have marked this guide "completed." Will you be next?
3 people have marked this guide "completed." Including you — great job!
Favorites: 1 2
1 person has favorited (and subscribed to) this guide. Will you be next?
2 people have favorited (and subscribed to) this guide — including you!
Needs Better Images
Better photos will improve this guide. Help out by taking, editing, or uploading new ones!
Needs More Images
A few more images would make this guide's procedures crystal clear.
Better Introduction
Improve this guide by completing or revising its introduction.
Missing Details
Some of this guide's details are missing. Help users by adding tools, difficulty, or time.
Introduction
Go to step 1 ↓Use this guide to replace the upper cover, which also gives access to many other internal parts of the netbook.
What you need
Tools
-
Spudger4.9


-
-
-
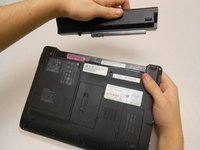
Unlock the tab located in the top left corner of the netbook.
-
The red tab indicated that the battery has been properly unlocked.
-
Remove the battery.
 Ask FixBot
-
-
-
-
-
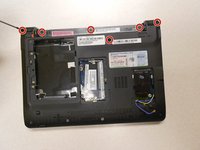
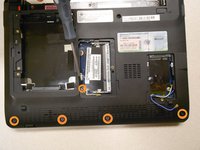
Remove six (6) 5mm screws, two (2) 17.5mm screws, and three (3) 2.5mm screws from the back, using the Phillips #0 screwdriver, as marked here.
-
-
-
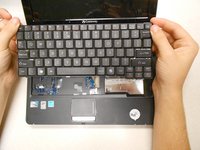
Pry up the keyboard using a spudger or plastic opening tool in the exact location shown in the photograph.
-
Carefully disconnect the keyboard ribbon cable from the motherboard, and remove the keyboard.
-
-
-
-
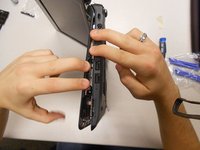
Separate the upper cover from the back cover. It is possible to do this without a tool, but you may also use a plastic opening tool for added leverage.
-
Be careful to keep even pressure all the way around the cover so that it is not bent beyond repair.
-
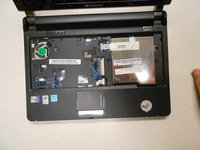
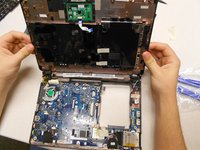
Carefully disconnect two ribbon cables to complete the separation of the upper cover.
-









To reassemble your device, follow these instructions in reverse order.
Cancel: I did not complete this guide.
2 other people completed this guide.

Team

Clemson, Team 14-3, Benson Fall 2013 Member of Clemson, Team 14-3, Benson Fall 2013
CLEM-BENSON-F13S14G3
3 Members
132 Guides authored
