Free Shipping on Domestic Orders $75+

Gateway ID49C07U DVD Drive Replacement

What you need

    1. Gateway ID49C07U DVD Drive Replacement, Battery: step 1, image 1 of 1
      • Turn the laptop over so the bottom of the device is facing upwards with the hinge facing away from you.

      Ask FixBot

      Add Comment

    2. Gateway ID49C07U DVD Drive Replacement: step 2, image 1 of 2 Gateway ID49C07U DVD Drive Replacement: step 2, image 2 of 2
      • Locate the switch on the top left of the laptop labeled with a padlock symbol.

      • Flip the switch in the direction of the unlocked padlock symbol.

      Ask FixBot

      Add Comment

    3. Gateway ID49C07U DVD Drive Replacement: step 3, image 1 of 1
      • Locate the switch that releases the battery and slide it to the right.

      Ask FixBot

      Add Comment

    4. Gateway ID49C07U DVD Drive Replacement: step 4, image 1 of 1
      • While holding the release switch to the right, pull the battery away from you.

      Ask FixBot

      Add Comment

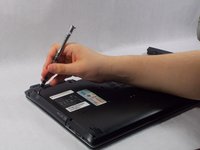
    1. Gateway ID49C07U DVD Drive Replacement, DVD Drive: step 5, image 1 of 1
      • Locate screw towards the center of the device and unscrew it

      Ask FixBot

      Add Comment

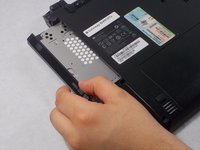
    2. Gateway ID49C07U DVD Drive Replacement: step 6, image 1 of 3 Gateway ID49C07U DVD Drive Replacement: step 6, image 2 of 3 Gateway ID49C07U DVD Drive Replacement: step 6, image 3 of 3
      • Use a metal spudger to pry off the DVD drive.

      • Once loosened, use your hand to pull the DVD drive out.

      Ask FixBot

      Add Comment

Conclusion

To reassemble your device, follow these instructions in reverse order.

Cancel: I did not complete this guide.

2 other people completed this guide.

Patrick McGrail

Member since: 03/19/17

466 Reputation

3 Guides authored

Team

0 Guide Comments

Add Comment

View Statistics:

Past 24 Hours: 1

Past 7 Days: 19

Past 30 Days: 93

All Time: 632