Free Shipping on Domestic Orders $75+

Garmin Nuvi 200 Rear Casing Replacement

What you need

    1. Garmin Nuvi 200 Rear Casing Replacement, Rear Casing: step 1, image 1 of 2 Garmin Nuvi 200 Rear Casing Replacement, Rear Casing: step 1, image 2 of 2
      • Peel off the sticker from the bottom of the device to reveal two screws.

      Ask FixBot

      Add Comment

    2. Garmin Nuvi 200 Rear Casing Replacement: step 2, image 1 of 1
      • Remove two T5 Torx screws.

      Ask FixBot

      Add Comment

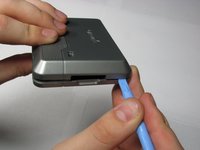
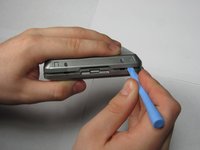
    3. Garmin Nuvi 200 Rear Casing Replacement: step 3, image 1 of 2 Garmin Nuvi 200 Rear Casing Replacement: step 3, image 2 of 2
      • Insert a plastic opening tool in the gap between the front and rear casing.

      • Carefully work the tool around the gap, separating the two halves of the case.

      • Keep the power switch in place while removing the rear case.

      Ask FixBot

      Add Comment

Finish Line

Cancel: I did not complete this guide.

2 other people completed this guide.

Stuart Heater

Member since: 04/11/10

155 Reputation

1 Guide authored

Team

Cal Poly, Team 25-90, Amido Spring 2010 Member of Cal Poly, Team 25-90, Amido Spring 2010

CPSU-AMIDO-S10S25G90

4 Members

60 Guides authored

0 Guide Comments

Add Comment

View Statistics:

Past 24 Hours: 2

Past 7 Days: 14

Past 30 Days: 37

All Time: 5,122