Free Shipping on Domestic Orders $75+

Garmin Nuvi 1490T Battery Replacement

What you need

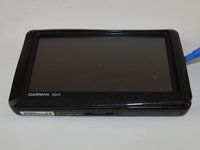
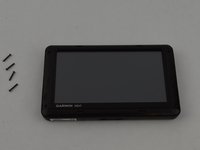
    1. Garmin Nuvi 1490T Battery Replacement, Front Frame Panel: step 1, image 1 of 1
      • Power off your GPS before moving on.

      • Locate the crevice that separates the frame from the body.

      Ask FixBot
      Add Comment

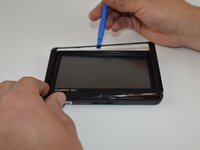
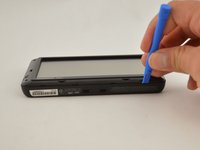
    2. Garmin Nuvi 1490T Battery Replacement: step 2, image 1 of 1
      • Carefully insert the plastic prying tool into the crevice to separate the frame from the body.

      • Applying excessive force can lead to a damaged or scratched display screen.

      Ask FixBot

      Add Comment

    3. Garmin Nuvi 1490T Battery Replacement: step 3, image 1 of 2 Garmin Nuvi 1490T Battery Replacement: step 3, image 2 of 2
      • Slide the plastic prying tool around the perimeter to completely remove the frame.

      Ask FixBot

      Add Comment

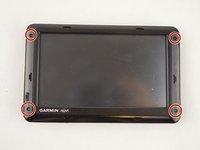
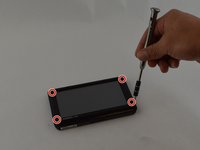
    1. Garmin Nuvi 1490T Battery Replacement, Second Frame Panel: step 4, image 1 of 3 Garmin Nuvi 1490T Battery Replacement, Second Frame Panel: step 4, image 2 of 3 Garmin Nuvi 1490T Battery Replacement, Second Frame Panel: step 4, image 3 of 3
      • Remove the four 11.0 mm screws using the Torx T5 screwdriver.

      Ask FixBot
      Add Comment

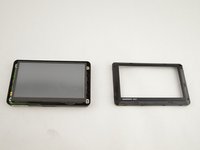
    2. Garmin Nuvi 1490T Battery Replacement: step 5, image 1 of 3 Garmin Nuvi 1490T Battery Replacement: step 5, image 2 of 3 Garmin Nuvi 1490T Battery Replacement: step 5, image 3 of 3
      • Using the plastic prying tool, dislodge the frame from the body of the device.

      • Using your hands, completely disconnect the frame from the body.

      • Set the pieces of the frame aside.

      Ask FixBot
      Add Comment

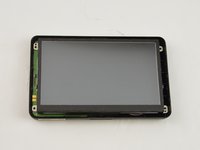
    1. Garmin Nuvi 1490T Battery Replacement, Display Screen: step 6, image 1 of 3 Garmin Nuvi 1490T Battery Replacement, Display Screen: step 6, image 2 of 3 Garmin Nuvi 1490T Battery Replacement, Display Screen: step 6, image 3 of 3
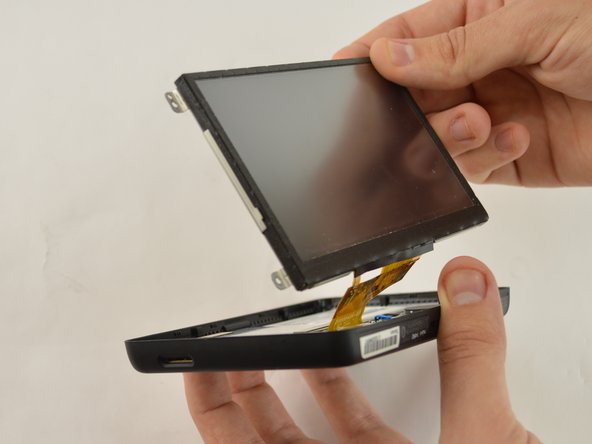
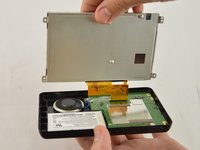
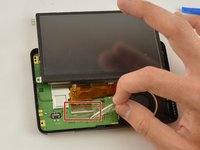
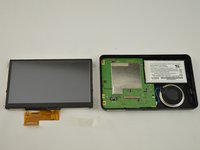
      • Gently lift up the display screen using your fingers to make sure the only thing connecting it to the body is the ribbon cable.

      Ask FixBot
      Add Comment

    2. Garmin Nuvi 1490T Battery Replacement: step 7, image 1 of 2 Garmin Nuvi 1490T Battery Replacement: step 7, image 2 of 2
      • Remove the piece of tape that is covering the connecting point of the motherboard and display.

      Ask FixBot

      Add Comment

    3. Garmin Nuvi 1490T Battery Replacement: step 8, image 1 of 3 Garmin Nuvi 1490T Battery Replacement: step 8, image 2 of 3 Garmin Nuvi 1490T Battery Replacement: step 8, image 3 of 3
      Tool used on this step:
      Tweezers
      $4.99
      Buy
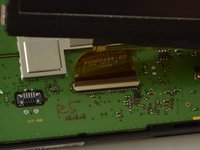
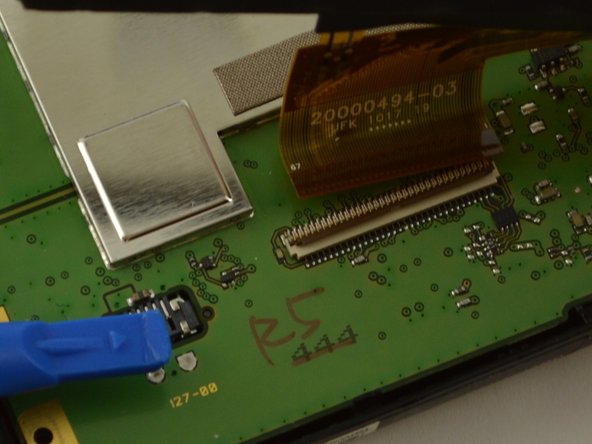
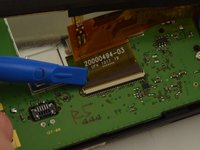
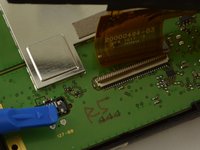
      • Using the plastic opening tool or your fingers, lift up the ZIF connector holding the ribbon cable in place.

      • Carefully pull the ribbon cable out of the connector with tweezers or two fingers.

      • Gently disconnect the display by pulling upward. Set display aside.

      • If the display screen does not disconnect easily, make sure the ZIF connector is no longer holding it in place.

      Ask FixBot

      Add Comment

    1. Garmin Nuvi 1490T Battery Replacement, Battery: step 9, image 1 of 3 Garmin Nuvi 1490T Battery Replacement, Battery: step 9, image 2 of 3 Garmin Nuvi 1490T Battery Replacement, Battery: step 9, image 3 of 3
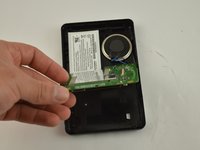
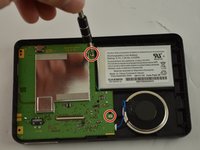
      • Using the T5 Torx screw driver, remove the two 5.0 mm screws.

      • Using your hands, lift up the motherboard and fold it over.

      Ask FixBot

      Add Comment

    2. Garmin Nuvi 1490T Battery Replacement: step 10, image 1 of 3 Garmin Nuvi 1490T Battery Replacement: step 10, image 2 of 3 Garmin Nuvi 1490T Battery Replacement: step 10, image 3 of 3
      Tool used on this step:
      Tweezers
      $4.99
      Buy
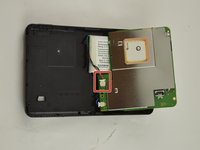
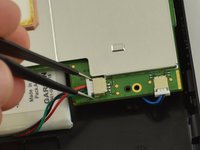
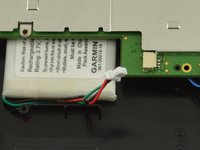
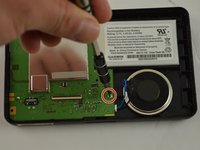
      • Fold motherboard out of the way to reveal the white plastic end of the battery plug.

      • Using the tweezers, pull the white plastic connector to disconnect the battery from the motherboard.

      • Let the cord hang unattached.

      Ask FixBot
      Add Comment
    3. Garmin Nuvi 1490T Battery Replacement: step 11, image 1 of 2 Garmin Nuvi 1490T Battery Replacement: step 11, image 2 of 2
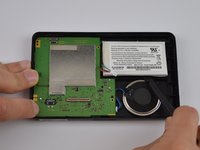
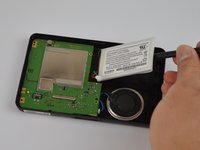
      • Return motherboard back to original position by flipping it back over.

      • Using the nylon spudger, dislodge the battery out of its socket.

      • Use a tool that is ESD-safe such as a nylon spudger or a plastic prying tool. Never use a metal spudger to take out the battery.

      Ask FixBot

      Add Comment

Conclusion

To reassemble your device, follow these instructions in reverse order.

Cancel: I did not complete this guide.

8 other people completed this guide.

Ricardo Solis

Member since: 01/20/16

1,058 Reputation

6 Guides authored

Team

USF Tampa, Team 15-2, Remmell Spring 2016 Member of USF Tampa, Team 15-2, Remmell Spring 2016

USFT-REMMELL-S16S15G2

4 Members

22 Guides authored

2 Guide Comments

Great guide and very informative. Here is a replacement battery that is reasonably priced and it comes with all of the tools needed for installation. It even has a 1 year replacement warranty!

Nuvi 1490T Battery 361-00019-16

Mike - Reply Share

Thanks for the great instructions! Had I not given up on Garmin's video instruction I'm sure I would have destroyed my GPS. You saved the day for me. Again, THANKS!

Mike Billmaier - Reply Share

Add Comment

View Statistics:

Past 24 Hours: 2

Past 7 Days: 13

Past 30 Days: 75

All Time: 7,326