Introduction
This is a quick guide to take you through the steps required to replace the screen of a Fenix 5X Sapphire Edition. This is a relatively straightforward repair, just be careful not to damage your o-ring during the process.
What you need
-
-
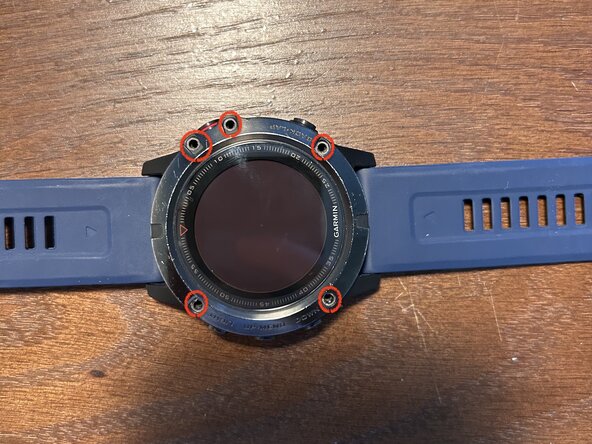
Remove the five screws surrounding the display using a Torx T7 bit.
-
Please take note of how tight they are so you can achieve the same torque during final reassembly.
-
Carefully lift up the display. Be careful not to pull too hard on the ribbon cable so you do not damage the cable or the main board connector.
 Ask FixBot
-
-
-
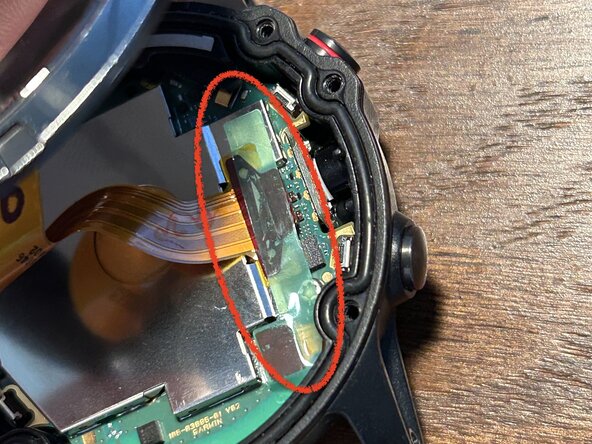
Remove the green sticker covering the two press-fit connectors.
-
Save this for later; you might be able to reinstall it at the end of the repair. If not, no worries, the watch works fine without it.
-
-
-
-
Remove the display ribbon cable press-fit connector of the old display.
-
Connect the new display. Ensure that you press the connector down fully.
-
(optional) If you are able to replace the small green sticker covering the press connectors for the ribbon cables, do this now.
-
-
-
Power on your watch to confirm functionality of the new screen (and all buttons) before final reassembly.
-
-
-
Ensure that the o-ring is clean and properly in place in its groove. This is what keeps everything waterproof, so if you use your watch in water, this is very important to check.
-
If during the repair you get dust inside the groove or around the o-ring, carefully clean the o-ring, and the sealing areas on both the underside of the display and the body of the watch.
-
-
-
Insert all 5 screws around the bezel of the watch.
-
First, gently tighten all screws, and then proceed to fully tighten opposite pairs at a time to ensure a proper and complete seal.
-


Thank you for completing my guide! If you have any questions, leave a comment and I will try to respond and help out.
Cancel: I did not complete this guide.
One other person completed this guide.
