Introduction
Replacing the battery is the next step in the logical breakdown of the Gamesir X4 Aileron controller. You need to take it out before you can access anything else. One of the main reasons that you may need to remove the battery of the controller is if it will not turn on. Before going through this process, try troubleshooting your device to ensure that the battery is the problem. Make sure not to puncture the battery as that could damage the device and create hazards. There is no way to turn off the device, so make sure not to damage the battery.
What you need
-
-
Use a hairdryer to heat the rubber grips to soften the adhesive securing them to the back cover.
-
Using a Jimmy and your hands to pry and remove rubber covering from the back plate.
 Ask FixBot
-
-
-
Use a Jimmy to pry up and remove the small back cover off to gain access to the screws.
-
Slowly work your way around with the Jimmy to work the panel off.
-
-
-
Use your hand/Jimmy to take the sticker off of the front of each controller to access the screws behind it.
-
-
-
-
Use a Phillips screwdriver to remove all six 7.2 mm screws. securing the back cover.
-
-
-
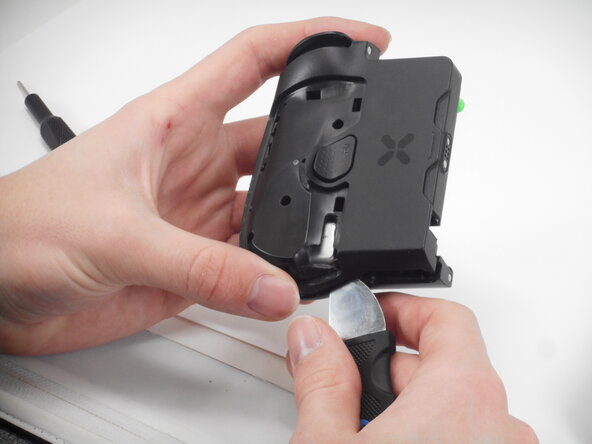
Use a Jimmy to pry the entire controller in half to separate the 2 components. Slowly work your way around the controller, working the Jimmy through the separate the halves.
-
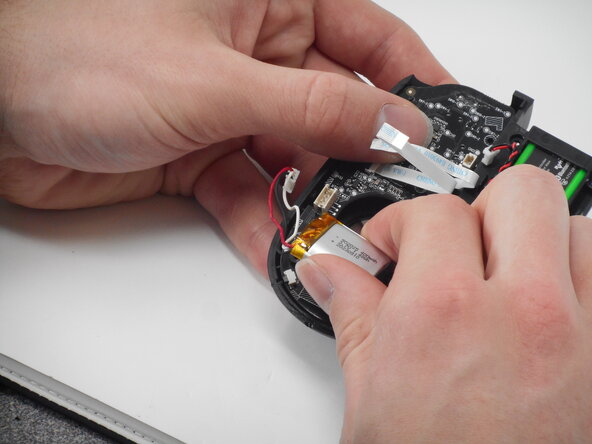
Flip up the black locking flap securing the ribbon cable.
-
Disconnect the ribbon cable.
-
-
-
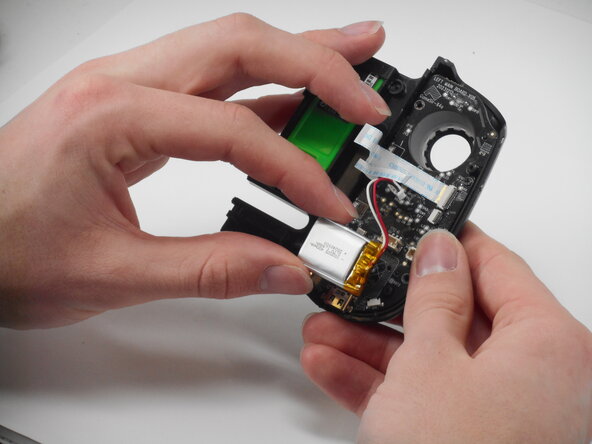
Disconnect the battery connector by lifting it straight up and out of its socket.
-







To reassemble your device, follow the above steps in reverse order.
For optimal performance, after completing this guide, calibrate your newly installed battery.
Take your e-waste to an R2 or e-Stewards certified recycler.
Repair didn’t go as planned? Try some basic troubleshooting or ask our Answers community for help.

Team

University of Memphis, Team 1-1, Sneed Spring 2026 Member of University of Memphis, Team 1-1, Sneed Spring 2026
UM-SNEED-S26S1G1
4 Members
6 Guides authored
