Free Shipping on Domestic Orders $75+

Gamesir X4 Aileron Action Buttons Replacement

What you need

  1. Gamesir X4 Aileron Action Buttons Replacement, Back Cover: step 1, image 1 of 1
    • Use a hairdryer to heat the rubber grips to soften the adhesive securing them to the back cover.

    • Using a Jimmy and your hands to pry and remove rubber covering from the back plate.

    • The rubber may become deformed and challenging to reinstall.

    Ask FixBot

    Add Comment

  2. Gamesir X4 Aileron Action Buttons Replacement: step 2, image 1 of 1
    • Use a Jimmy to pry up and remove the small back cover off to gain access to the screws.

    • There is a small hole at the bottom side of the panel that can be used as leverage for prying it open.

    • Slowly work your way around with the Jimmy to work the panel off.

    Ask FixBot

    Add Comment

  3. Gamesir X4 Aileron Action Buttons Replacement: step 3, image 1 of 1
    • Use your hand/Jimmy to take the sticker off of the front of each controller to access the screws behind it.

    Ask FixBot

    Add Comment

  4. Gamesir X4 Aileron Action Buttons Replacement: step 4, image 1 of 2 Gamesir X4 Aileron Action Buttons Replacement: step 4, image 2 of 2
    • Use a Phillips screwdriver to remove all six 7.2 mm screws. securing the back cover.

    • There are two screws under the small back cover and four screws under the sticker on to the front.

    Ask FixBot

    Add Comment

  5. Gamesir X4 Aileron Action Buttons Replacement: step 5, image 1 of 3 Gamesir X4 Aileron Action Buttons Replacement: step 5, image 2 of 3 Gamesir X4 Aileron Action Buttons Replacement: step 5, image 3 of 3
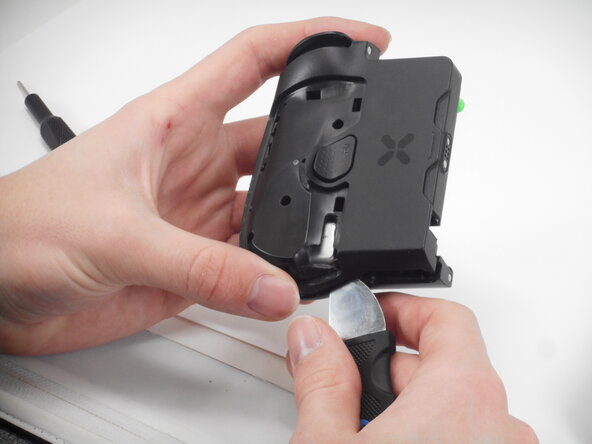
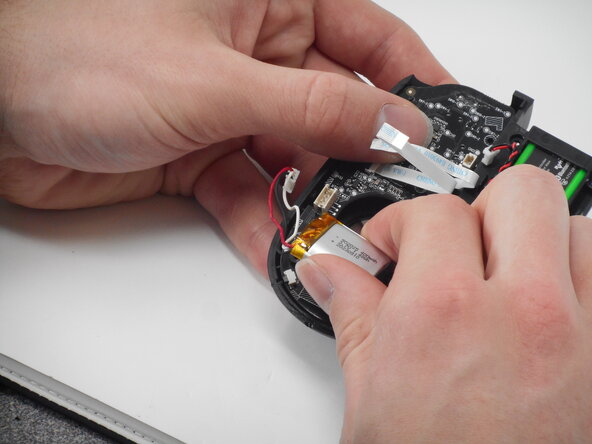
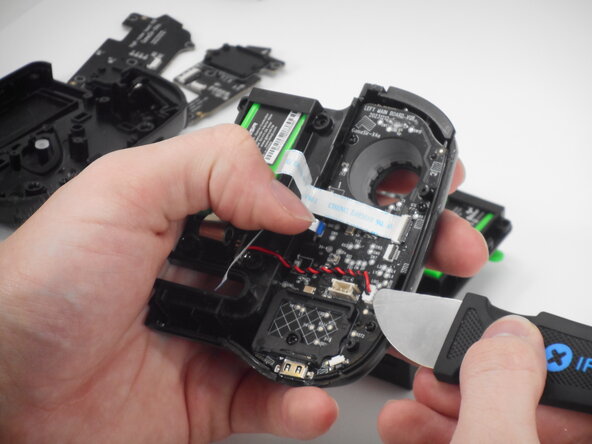
    • Use a Jimmy to pry the entire controller in half to separate the 2 components. Slowly work your way around the controller, working the Jimmy through the separate the halves.

    • Take care not to strain or damage the connected ribbon cable.

    • Flip up the black locking flap securing the ribbon cable.

    • Disconnect the ribbon cable.

    Ask FixBot

    Add Comment

  6. Gamesir X4 Aileron Action Buttons Replacement: step 6, image 1 of 1
    • Repeat all above steps for other side of the controller if needed.

    Ask FixBot

    Add Comment

  7. Gamesir X4 Aileron Action Buttons Replacement, Battery: step 7, image 1 of 1
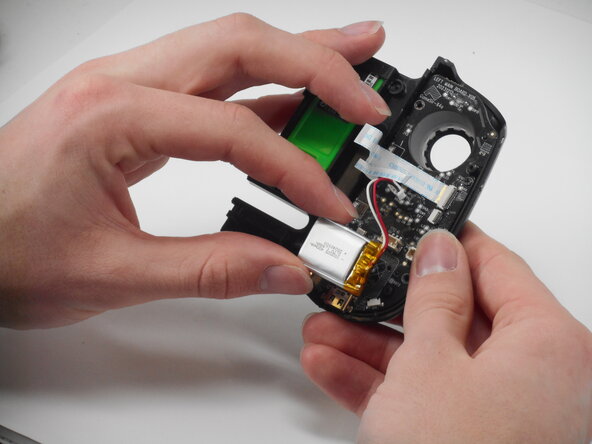
    • Disconnect the battery connector by lifting it straight up and out of its socket.

    Ask FixBot

    Add Comment

  8. Gamesir X4 Aileron Action Buttons Replacement: step 8, image 1 of 1
    • Pull out the battery by hand.

    • The battery is secured with a mild adhesive.

    Ask FixBot

    Add Comment

  9. Gamesir X4 Aileron Action Buttons Replacement: step 9, image 1 of 2 Gamesir X4 Aileron Action Buttons Replacement: step 9, image 2 of 2
    • Repeat the procedure for the other side if necessary.

    Ask FixBot

    Add Comment

  10. Gamesir X4 Aileron Action Buttons Replacement, Joysticks: step 10, image 1 of 1
    • Use a Phillips screwdriver to remove the five 7.2 mm screws securing the right rocker board.

    Ask FixBot

    Add Comment

  11. Gamesir X4 Aileron Action Buttons Replacement: step 11, image 1 of 1
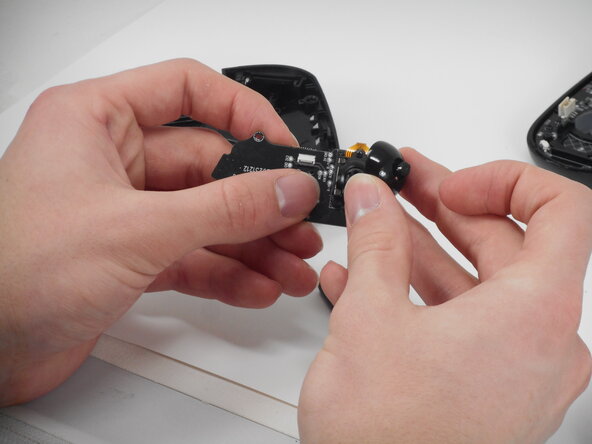
    • Remove the black plastic joystick cap by hand.

    Ask FixBot

    Add Comment

  12. Gamesir X4 Aileron Action Buttons Replacement: step 12, image 1 of 2 Gamesir X4 Aileron Action Buttons Replacement: step 12, image 2 of 2
    • Flip up the black locking flap securing the orange ribbon cable.

    • Disconnect the orange ribbon cable.

    • Use a Phillips screwdriver to remove the two 4.1 mm screws securing the joystick module.

    Ask FixBot

    Add Comment

  13. Gamesir X4 Aileron Action Buttons Replacement: step 13, image 1 of 1
    • On the left side, remove the black plastic joystick cover.

    Ask FixBot

    Add Comment

  14. Gamesir X4 Aileron Action Buttons Replacement: step 14, image 1 of 1
    • Use a Phillips screwdriver to remove the four 7.2 mm screws securing the left rocker board.

    Ask FixBot

    Add Comment

  15. Gamesir X4 Aileron Action Buttons Replacement: step 15, image 1 of 1
    • Flip up the black locking flap securing the orange ribbon cable.

    • Disconnect the orange ribbon cable.

    Ask FixBot

    Add Comment

  16. Gamesir X4 Aileron Action Buttons Replacement: step 16, image 1 of 1
    • Use a Phillips screwdriver to remove the two 4.1 mm screws securing the joystick module.

    • Remove the joystick module.

    Ask FixBot

    Add Comment

  17. Gamesir X4 Aileron Action Buttons Replacement, Action Buttons: step 17, image 1 of 1
    • Flip up both of the black locking flaps securing the two ribbon cables.

    • Disconnect the ribbon cables.

    Ask FixBot

    Add Comment

  18. Gamesir X4 Aileron Action Buttons Replacement: step 18, image 1 of 1
    • Disconnect the black and red twisted cable from the right main board.

    Ask FixBot

    Add Comment

  19. Gamesir X4 Aileron Action Buttons Replacement: step 19, image 1 of 1
    • Use a Phillips #000 screwdriver to remove the four 7.2 mm screws securing the right main board.

    Ask FixBot

    Add Comment

  20. Gamesir X4 Aileron Action Buttons Replacement: step 20, image 1 of 1
    • Remove the right main board from the controller by hand.

    Ask FixBot

    Add Comment

  21. Gamesir X4 Aileron Action Buttons Replacement: step 21, image 1 of 1
    • By hand, pull the buttons out one by one.

    • They are connected via magnets and simply pull out.

    Ask FixBot

    Add Comment

Conclusion

To reassemble your device, follow these instructions in reverse order.

Cancel: I did not complete this guide.

0 Guide Comments

Add Comment

View Statistics:

Past 24 Hours: 2

Past 7 Days: 14

Past 30 Days: 56

All Time: 126