Introduction
If any of your GameSir X5 Lite's joysticks are unresponsive, experiencing stick drift, or are in need of an upgrade, then follow this guide to replace a joystick.
A joystick is a necessary component of a controller and is commonly used to move around in games. If broken, a joystick might experience stick drift or be unresponsive. A joystick might also be upgraded to improve gaming performance.
Before using this guide, ensure that the joystick has been checked for any obstruction that might cause potential unresponsiveness or stick drift. A dust blower or a microfiber cloth can be used to clean any obstruction. Ensure that the controller has been calibrated to eliminate any minor stick drift before replacing a joystick. The calibration guide can be found here.
Step 7 covers replacing a ZIF Connector. Info on ZIF Connectors can be found in Step 7 and here.
Before beginning, ensure that the GameSir X5 Lite is not connected to any device and is not being charged during the joystick replacement.
What you need
-
-
-
Use a Phillips #00 screwdriver to remove the four 8 mm screws located on the back cover.
 Ask FixBot
-
-
-
Fully extend the controller and remove the six 5 mm screws from the back of the extender with a Phillips #00 screwdriver.
-
-
-
Use an opening pick to loosen the back cover to reach the end of the extender.
-
-
-
-
Fully extend the extender to reach the last two 5 mm screws.
-
Remove the last two 5 mm screws with a Phillips #00.
-
Remove the springs to separate the two sides of the controller by unscrewing two 5 mm Phillips #00 screws.
-
-
-
Loosen the three 7 mm screws where the triggers are located using a Phillips 000 screwdriver, and remove one 7 ml screw that sits below the joystick.
-
-
-
Remove two 7 mm screws at the front of the joystick using a Phillips 00 screwdriver.
-
Use a spudger to lift and remove the joystick cap.
-
-
-
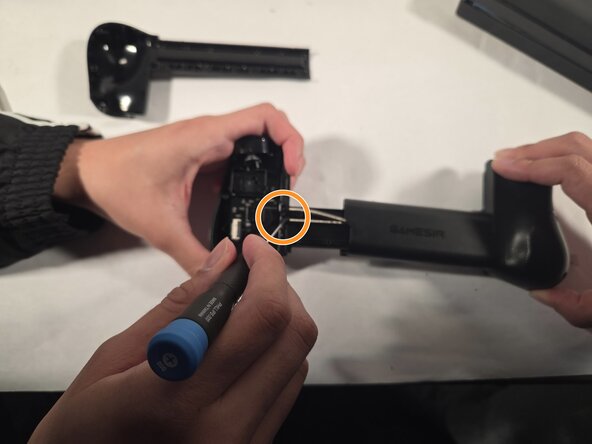
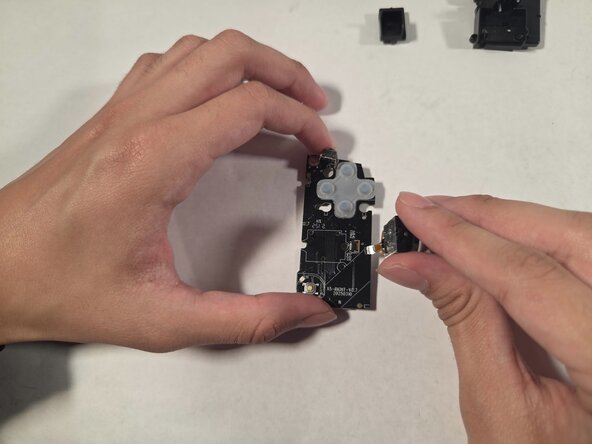
Disconnect the old joystick by carefully using a metal spudger/opening tool to lift the locking flap that connects the ZIF Connector, then disconnect the ZIF Connector and connect the new ZIF Connector by using a metal spudger/opening tool to lock the flap downward.
-
-






To reassemble your device, follow the above steps in reverse order.
Take your e-waste to an R2 or e-Stewards certified recycler.
Repair didn’t go as planned? Try some basic troubleshooting or ask our Answers community for help.

Team

University of Texas at Arlington, Team 1-3, Aguilar Spring 2026 Member of University of Texas at Arlington, Team 1-3, Aguilar Spring 2026
UTA-AGUILAR-S26S1G3
4 Members
47 Guides authored
1 Guide Comment
How are you supposed to reach the last two screws on the extender without taking off the right side? The extender locks out before them, even if you have the left side separated.
